- Intro to CSS: Link Selectors
- Example Navigation Menu
- Hover Selector
- Example Menu
- CSS
- AND
- HTML
- Link Selector
- CSS
- HTML
- Visited Selector
- CSS
- HTML
- Active Selector
- CSS
- HTML
- Text-decoration
- Here is example code:
- Classes with Selectors
- Project - Part II: Adding Navigation
- Adding style to links, on active
- 3 Answers 3
- CSS Active Link
- Example 1
- Example 2
- Example 3
- Example 4
- Conclusion
- About the author
- Aqsa Yasin
Intro to CSS: Link Selectors
CSS can be used to custimize links and navigation menus. A navigation menu is basically a list of links.
At the bottom of this page there is a code editor pre-loaded with the lesson’s code.
Example Navigation Menu
If you are not familar with lists visit HTML Lists and CSS Lists. If you are not familar with elements visit HTML Navigation.
Hover Selector
When the user hovers over a link, changes often occur. Look at the menu below. What happens when you hoover over the links?
Example Menu
Notice the background turns white and the text turns black? That is done with the hover selector. Let’s look at the code.
CSS
/* Text & background color on hover*/ a:hover < color: black; background-color: white > AND
HTML
Link Selector
In the example menu, you may also have noticed the link text was white before you visited the associated page. Unvisited links are styled by the link selector.
CSS
HTML
Visited Selector
The visited selector is used to style link that have already been visited. In the example menu, visited links have pink text.
CSS
HTML
Active Selector
Once you click on a link, it becomes active
CSS
a:active < background-color: hotpink; > HTML
Text-decoration
Sometimes links have decoration such as an underline. I generally do not like decoration on my links, but there are situations that may call for it. By default elements have an underline. Here are possible options:
✶ none
✶ underline
✶ overline
✶ line-through
Here is example code:
However, text decoration is not limited to links. You can add decoration on other elements, such as headings.
Classes with Selectors
You may not want all links styles the same. To give you this ability, we will use CSS classes.
Let’s choose a class name.
Class Name: myMenu
Now let’s see how the above selectors are rewritten for your myMenu class.
/* a selectors for myMenu class*/ /* Hover selector*/ .myMenu a:hover < background-color: white; color: black; >/* Unvisited Selector*/ .myMenu a:link < color: white; >/* Visited selector*/ .myMenu a:visited < color:pink; >/* Visited Hover*/ .myMenu a:visited:hover < background-color: white; color: black; >/* Active Selector*/ .myMenu a:active < background-color: hotpink; Note: The hoover selector can be applied to other elements, not just a links. It is common to use hover with buttons, links and list items.
To continue making the example menu, and learn how to make horizontal menus, continue to the next lesson: CSS Menus.
Project - Part II: Adding Navigation
Project - Part I: Is explained on the bottom of CSS Color Lesson.
Continue working on the ad you started in Part I.
Project -Part II Assignment: Create a Navigation Menu for your ad.
The menu should have links to:
1) www.codingcommanders.com
2) The ad you are making (from Project: Part I)
3) A new page you create (you choose the content!)
Happy Coding!
Play with the code in the code editor below.
Adding style to links, on active
I'm trying to style the menu when the links are active. I've got this code to use, but not sure which ID's etc to use, or how to write the css. The CSS should maybe be something like this?
If you are writing in CSS, you use your id or class and add a colon then write out what you want. So #XX a.anchorLink:active < color:red; >
3 Answers 3
Close. You want the :active pseudo-selector:
Don't i need to add it to the div? or can i just style it in the css? I need to figure out the div, the name to put in the javascript. Maybe it's just me not following the news in CSS. I will try just using :active like :hover etc. 😀
@SabineQuardon, if you're just styling active links, this is all you need. If you need something else, then I have not understood.
That's what i need, just thought I needed to use the javacsriptpart, cause the :active didn't work before. (Been a long time since i've done it, but thx!)
What I need is, when I'm on the "buy" page, the "buy" would be fx red or so, so you KNOW you're on that page.
just use :active for style when you click onto the link item or :hover when the style should appear on mouseover directly in your css-code.
I believe you are referring to the current page link being 'active'? The pseudo state :active will not work for this. With the menu you are using the class 'current-menu-item' is applied to the li of the active link so to style that link you would use something like
Think it's just the words 'link' and 'active' tend to make people think of pseudo classes first, glad I could help.
CSS Active Link
![]()
A link is active whenever you click on it. When you click on the given link, it will open the linked page. We can create any link in HTML and give style to that link using CSS. CSS contains different properties, such as the “: active” selector for selecting and styling the active links, the “: link” selector for styling the links which are not visited, and the “visited” selector for the styling of the visited page. In this guide, we will describe how to create links in HTML and apply styling to the created links using CSS. We can change the color, background color, font size, or font style of the link using CSS. We will explain all these concepts in this guide.
Example 1
Open your HTML file to create links. For styling these links, we will create our CSS file. We are using the visual code studio to perform these examples. So, we create the HTML file, and the HTML code is also given here. After completing the code, save it with the “.html” extension.
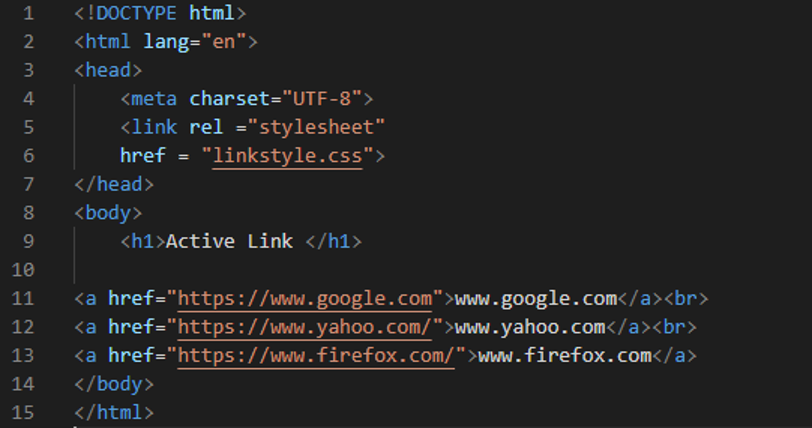
In the previous HTML code, we create three different links. The first link we have created is the “google” link, the second link is the “yahoo” link, and the last link is the “firefox” link. We will also style these links in CSS. This HTML file is here for just creating these links. Now, move to the following CSS file, and see how to style these links.
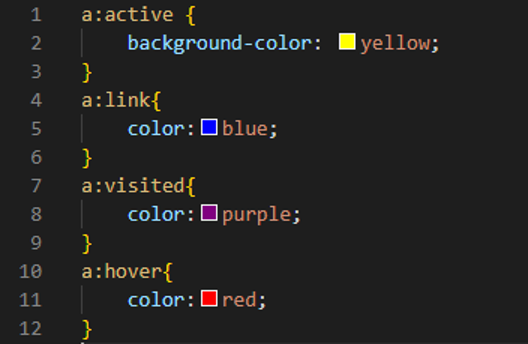
In the previous image, we use the “: active” selector, which we use to give style to that link. When the user presses this link, the link’s background color turns “yellow”. Then we have the “: link” selector, which styles the link that is not visited and changes the color of the unvisited link to “blue”. It will appear “blue” on the screen. After this, we use the “: visited” selector, and this visited selector changes the color of the visited link to “purple”. Finally, we have the “: hover” selector in which we change the color of the link to a “red” color when the cursor moves over the link. When you move your mouse on these links, the color of these links changes to “red”. In this example, we changed the color of the link when you hover on it and visit the link or the color of the unvisited link.

You can see three links in the previous image. The first two links are color “purple”, so it means these two links are visited. The third link’s color is “blue”, meaning this third link is not visited as we set these colors in the CSS code for the visited and unvisited links. When we hover on any link, its color turns to a “red” color. When we click on any link, the color of the link’s background will appear “yellow”. When we click on the first google link, the google page will appear on the screen, as shown in the following image:

Example 2
This is another example where we create a link between the paragraph and give styles to this link in CSS. Let’s see how the link is active in between the paragraphs.
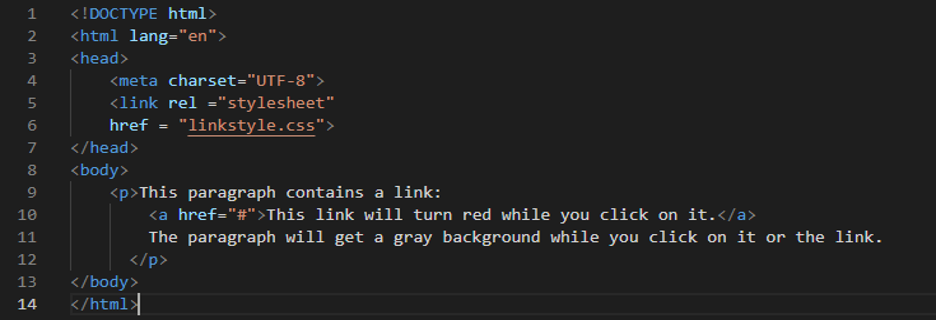
In the previous image, you can see that we have created a paragraph using HTML and added a link in between the paragraph. We will use CSS in this example to change the link’s and paragraph’s color.
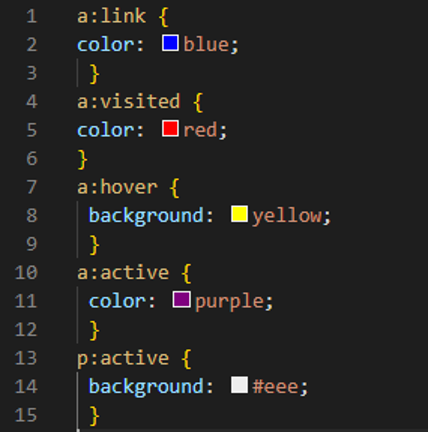
In the previous CSS file, you can see that we changed the color of the link to “blue” inside the curly braces of “: link”, so this link will appear blue between paragraphs. Then, we use a “red” color for the visited link. For “hover”, we select the background color as “yellow”. The “active” color of the link is set as “purple”, and the active paragraph color is designated as “#eee” color. So, when the link is active, it changes the link’s color as well as the background color of the paragraph.
In this first output, you can see that the link’s color in the paragraph appears “blue” as we set it as “blue” in our CSS file.

In the second output, the color of the link turns to “red”, which means we have visited the link here, so its color is changed from “blue” to “red”.

Example 3
In this third example, we will change the link’s font size, font style, and colors using CSS. For this, we have to create different links in HTML.
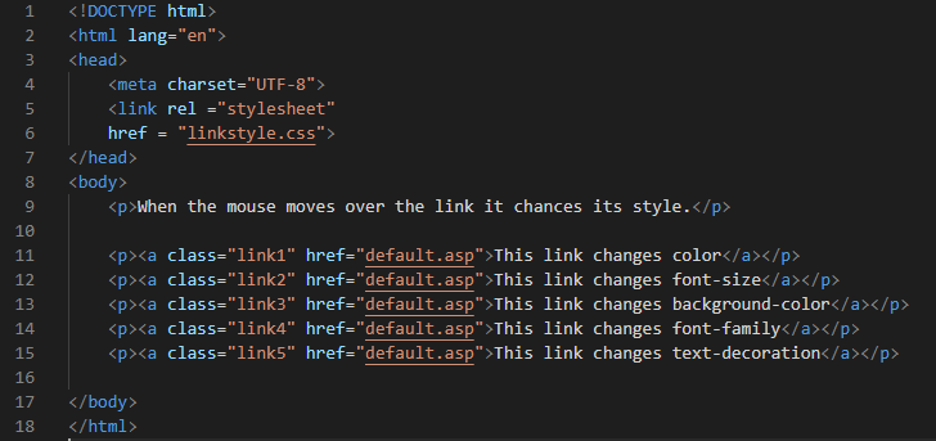
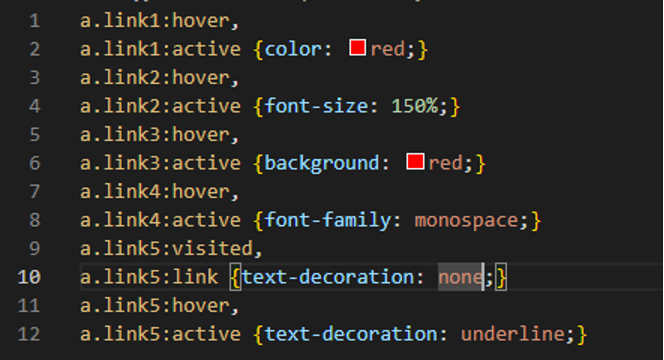
We use the “link1” name of the class and apply the style on this first link. The first link appears “red” when it is “active”. Then, we change the “font-size” of the second link. When we hover over this link, the size of this link increases to “150%”. We set the “background-color” of the third link to “red”, so the background color becomes “red” when we hover over the third link. We change the font style of the fourth link by utilizing the “font-family” property. We use the “text-decoration” in the fifth link and set it to “underline”. The output is shown.
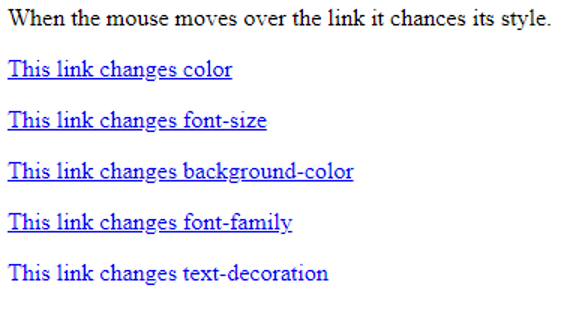
This output changes its color when we hover over the first link. When we hover over the second link, its font size changes. When it comes to the third link, its background color changes. The font style changes to “monospace” when you hover over the fourth link.
Example 4
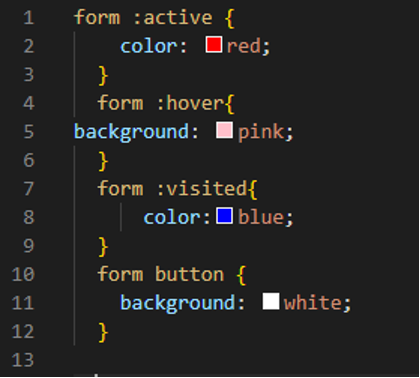
In this example, we will create two link buttons with links inside the buttons. In the first button, we place the link of “Gmail”. Inside the second button, we put the link of “Facebook”. So, when you click on button one, it will open the Gmail page. When you click the second button, it will open the Facebook page. Now, we also want to apply the style of these links.
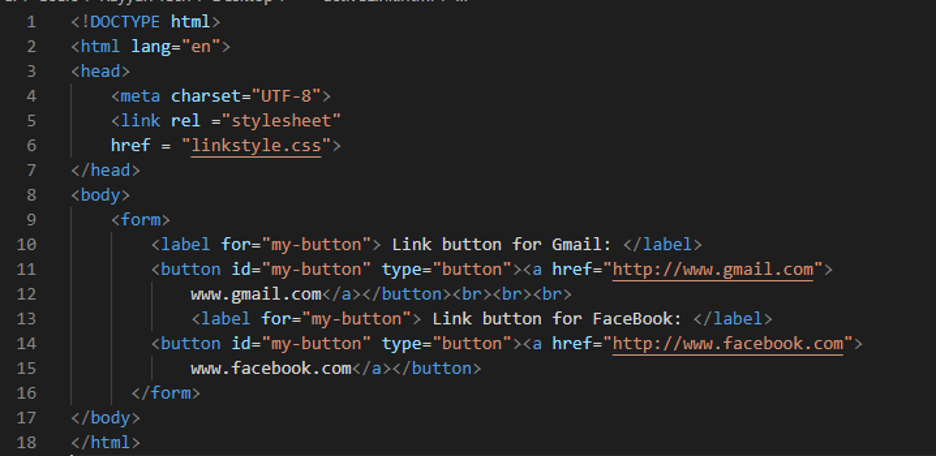
When this link is active, the color of this link appears “red” as we place the “color: red” inside the curly braces of the “: active” selector. When we hover over this link, which is inside the button, the color of the button turns “pink” as we set this color in the CSS file. After visiting these links, the color will be “blue”, and the color of the button’s background will be “white”.
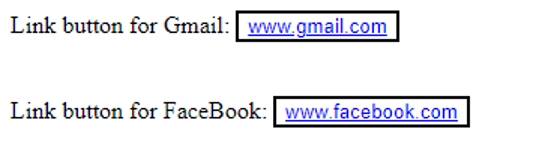
The previous output shows two link buttons in which we have two different links, and you can see that the color of both links is “blue”, meaning both links are visited.
Conclusion
We have learned about the “Active link” in this guide. We have applied different styling on different links using the CSS properties. We have performed four various examples here as we know that the link is active when pressed. Here, we have changed the style of the active link, the font size of the link when we hover over it, and the color after visiting the link. We used different colors for the visited and unvisited links in this guide. We have learned to style these active links in CSS in detail.
About the author
Aqsa Yasin
I am a self-motivated information technology professional with a passion for writing. I am a technical writer and love to write for all Linux flavors and Windows.