- Introduction
- Setup Our Project
- Let’s Start Our Project
- Introduction of HTML
- This is what it looks like when opened in a browser 👇
- Introduction of CSS
- The rules for declaring CSS
- For Adding Class
- Hello HTML Class Attribute Here class attribute is appended to the starting tag of with equal sign (=) and after = we add class name under quotation mark. For Adding Id Hello HTML Id Attribute Here class attribute is appended to the starting tag of with equal sign (=) and after = we add id name under quotation mark. After selecting a selector we open the curly brace, then we add the properties we want to style such as color, font, border, etc. Then we add the colon right after the property and then we add the value for that property, then end with a semicolon and the close curly brace. CSS can be added to HTML in 3 ways — 1. Inline CSS , 2. Internal CSS, 3. External CSS. 1. Inline Css Hello World ! To use inline css in html we need to use attribute. HTML attributes are special words used inside the opening tag to control the element’s behaviour. 2. Internal CSS Usually we use internal CSS when we make a one page website. It is defined with a style element under the tag. 3. External CSS For external css we create a new file with extension .css and link that page to html using link attribute. It is generally good practice to use external CSS and generate clean code as well. After creating the css file we can simply add the style with css. Now we have to add the css file to our portfolio website, after adding the css file our website looks like this👇 Previously we finished the HTML part, now we have to add the CSS, To add the css file we create a css external file named style.css then we have to link that page with html. For links we have to use attribute in tag. After creating style.css file we start our styling. body < background-color: rgb(255, 232, 155); text-align: center; margin-top: 6%; >p < font-family: "Courier New", Courier, monospace; font-size: 20px; >a < text-decoration: none; color: #fff; >ul < list-style-type: none; >table, th, td < background-color: #fff; margin-left: 28%; border: 1px solid black; padding: 10px; >button < padding: 10px; >#fb < background-color: #3b5998; >#link < background-color: #0077b5; >#git Lets understand the above css code, first we style our body with some background color for that we use CSS background-color property with value rgb(255, 232, 155) or you can write your favorite color code or name. After styling the background color, we now style our text position, for this we use the CSS text-align property with a value of center or you can choose different values (left, right, etc). Now we style the margins with CSS margin-top property with a value of 6%, the margin-top property creates margins only from the top, if we only use the margin property they create margins from all sides. Now we style the paragraph from selecting a tag with CSS font-family property with a value of «Courier New», Courier, monospace, the font-family property changes the font style of paragraph, after styling the font style now we also style the size of font with CSS font-size property with value 20px. Источник How TO — Build a Website Learn how to create a fast and awesome responsive website that will work on all devices, PC, laptop, tablet, and phone. Create a Website with a CSS Framework Ever heard about W3Schools Spaces? Here you can create your website from scratch or use a template. A «Layout Draft» It is always wise to draw a layout draft of the page design before building a website. Having a «Layout Draft» will make it a lot easier to create a web site: Navigation bar The Band Article Article Article Footer Doctype, Meta Tags, and CSS The doctype should define the page as an HTML5 document: A meta tag should define the character set to be UTF-8: A viewport meta tag should make the web site work on all devices and screen resolutions: W3.CSS should take care of all our styling needs and all device and browser differences: To learn more about styling with W3.CSS, please visit our W3.CSS Tutorial. Our first empty web page will look much like this: Note: If you want to create a website from scratch, without the help of a CSS framework, read our How To Make a Website Tutorial. Creating Page Content Inside the element of our web site we will use our «Layout Picture» and create: A navigation bar A slide show A header Some sections and articles A footer Semantic Elements HTML5 introduced several new semantic elements. Semantic elements are important to use because they define the structure of web pages and helps screen readers and search engines to read the page correctly. These are some of the most common semantic HTML elements: The element can be used to define a part of a website with related content. The element can be used to define an individual piece of content. The element can be used to define a header (in a document, a section, or an article). The element can be used to define a footer (in a document, a section, or an article). The element can be used to define a container of navigation links. In this tutorial we will use semantic elements. However, it is up to you if you want to use elements instead. The Navigation Bar On our «Layout Draft» we have a «Navigation bar». We can use a or element as a container for the navigation links. The w3-bar class is a container for navigation links. The w3-black class defines the color of the navigation bar. The w3-bar-item and w3-button class styles the navigation links inside the bar. Slide Show On the «Layout Draft» we have a «Slide show». For the slide show we can use a or element as a picture container: We need to add a little JavaScript to change the images every 3 seconds: // Automatic Slideshow — change image every 3 seconds var myIndex = 0; carousel(); function carousel() var i; var x = document.getElementsByClassName(«mySlides»); for (i = 0; i < x.length; i++) x[i].style.display = "none"; > myIndex++; if (myIndex > x.length) x[myIndex-1].style.display = «block»; setTimeout(carousel, 3000); > Sections and Articles Looking at the «Layout Draft» we can see that the next step is to create articles. First we will create a or element containing band information: The w3-container class takes care of standard padding. The w3-center class centers the content. The w3-wide class provides a wider heading. The w3-opacity class provides text transparency. The max-width style sets a maximum with of the band description section. Then we will add a paragraph describing the band: We have created a fictional band website. Lorem ipsum dolor sit amet, consectetur adipiscing elit, sed do eiusmod tempor incididunt ut labore et dolore magna aliqua. The w3-justify class justifies the text’s right and left margins. Then create a or with an or about each band-member: John Paul Ringo Footer Finally we will use a or to create a footer: The fa fa classes are Font Awesome Icon classes. To use these classes you must link to a Font Awesome library: To learn more about using icons, please visit our Icons Tutorial. Источник
- with equal sign (=) and after = we add class name under quotation mark. For Adding Id Hello HTML Id Attribute
- For Adding Id
- Hello HTML Id Attribute
- with equal sign (=) and after = we add id name under quotation mark. After selecting a selector we open the curly brace, then we add the properties we want to style such as color, font, border, etc. Then we add the colon right after the property and then we add the value for that property, then end with a semicolon and the close curly brace. CSS can be added to HTML in 3 ways — 1. Inline CSS , 2. Internal CSS, 3. External CSS. 1. Inline Css Hello World !
- 1. Inline Css
- Hello World !
- 2. Internal CSS
- 3. External CSS
- How TO — Build a Website
- Create a Website with a CSS Framework
- A «Layout Draft»
- Navigation bar
- The Band
- Article
- Article
- Article
- Footer
- Doctype, Meta Tags, and CSS
- Creating Page Content
- Semantic Elements
- The Navigation Bar
- Slide Show
- Sections and Articles
- Footer
Introduction

Web development is the work involved in developing a Web site for the Internet (World Wide Web). From building a personal website to building a social media web app, everything is a web development work and HTML and CSS are the beginning of everything you need to know to make your first web page. At the end of this blog, your first personal portfolio website will be ready.
Setup Our Project
First we need to set our project folder in our PC and after creating the folder we open that folder in any IDE (in my case I use VS Code), you can choose whatever you want. After opening the folder in IDE, we need to create files with .html extension for HTML file and .css for CSS file. VS-Code


Let’s Start Our Project

Introduction of HTML

HTML is the hypertext markup language used to create the website structure and its content. Headlines, paragraphs, tables, links, images in a website are all done with HTML.
Let’s understand from code, open your project on IDE and in HTML file, write this code and open in your browser( right click and click Open in browser ).
This is what it looks like when opened in a browser 👇
 Start with This declaration defines that this document is an HTML5 document. HTML & HTML 5 both are same. HTML 5 are just updated version of HTML.
This declaration defines to declare the language of the Web page.
The element contains meta information about the HTML page.
Meta data may be used by browsers (content or methods of page reloading), search engines (keywords), or other web services, including keywords for page information, the author of the document, last modified, and metadata.
title element specifies a title for the HTML page (which is shown in the browser’s title bar or in the page’s tab). Using JavaScript you can change the title dynamically.
body tag is the main part or element of HTML document. It contain text content, paragraphs, headings, images, tables, links, videos, etc.
Now, in body tag we struct all the parts of website.  Now, let’s start building our website structure. we start from heading, in HTML heading define with to tag.
define most important heading or largest font size heading and is for least important heading or smallest font size heading. After creating heading with to tag, now we move to paragraph where we use
tag to create paragraph in HTML. Above code you see that we put a heading in tag.
The tag is also known as the division tag, it makes it easy to create different divisions for websites like navbar, header, sidebar and footer etc.  I used tag for main title and tag for sub-heading, After title you see there is
tag which is used for paragraph.
Now after heading and paragraph let us see how we create table in HTML, as you see in the code i have again used tag for education title and after that i have used tag which is used to create a table in HTML. In tag we use tag which defines table row where we write our data, In the first tag we use tag which defines the table title, we add three titles in the first tag (degree, college, year), after that we put a content according to its title in the next tag and In the second tag we use the tag which defines the data cell in the HTML table. There are two types of cells in HTML table, first- header cell ( ) and second is data cell ( ). According to our table header we put our data in the data cell.  Now after completing our table we move on to learn about unordered list and ordered list.
To create a list we have to use
- tag or
tag which defines the order of the list.
- defines an unordered list (bullet) for a list (collection of items) with no numeric or alphabetical order and
defines an ordered list which means that the collection of data (list) is numerically or alphabetically. Now we come to our last part of our website where we create our contact section where people can click on buttons to find you in different social media. Yes it is possible using HTML where people click on a button and that button send that user to your social media page. To create a button we use the tag which defines a clickable button. In button we can put different HTML tags or texts. In this project we put anchor tag tag that defines a hyperlink that links one page to another. In this anchor tag we will put social media link then when people click on button then that tag will take them directly to that page.
 Now we are finally done with our HTML code 👇 , as earlier we have learned that HTML only forms the structure of our website but currently our website is not looking good so to beautify our website we need to use CSS What needs to be done is to make our website look good by giving it some color, margin and padding etc.
Introduction of CSS

CSS stands for Cascading Style Sheet , it is a style sheet language used to stylize our website by selecting HTML elements by adding colors, layouts and fonts. It also helps in adapting the presentation to different devices like large screen, small screen.
The rules for declaring CSS

We have to choose which HTML elements we want to style, that element is called selector. we can select that element directly but when we need to select some specific section to style then we create a class or id for the element then we select that class or id and then style them. To create a class or id we need to add class attribute or id attribute to the html element.
For Adding Class
Hello HTML Class Attribute
Here class attribute is appended to the starting tag of
with equal sign (=) and after = we add class name under quotation mark. For Adding Id
Hello HTML Id Attribute
Here class attribute is appended to the starting tag of
with equal sign (=) and after = we add id name under quotation mark.


After selecting a selector we open the curly brace, then we add the properties we want to style such as color, font, border, etc. Then we add the colon right after the property and then we add the value for that property, then end with a semicolon and the close curly brace. CSS can be added to HTML in 3 ways — 1. Inline CSS , 2. Internal CSS, 3. External CSS.
1. Inline Css
Hello World !
To use inline css in html we need to use attribute. HTML attributes are special words used inside the opening tag to control the element’s behaviour.
2. Internal CSS
Usually we use internal CSS when we make a one page website. It is defined with a style element under the
tag.3. External CSS
For external css we create a new file with extension .css and link that page to html using link attribute. It is generally good practice to use external CSS and generate clean code as well.
After creating the css file we can simply add the style with css.
Now we have to add the css file to our portfolio website, after adding the css file our website looks like this👇

Previously we finished the HTML part, now we have to add the CSS, To add the css file we create a css external file named style.css then we have to link that page with html. For links we have to use attribute in tag. After creating style.css file we start our styling.
body < background-color: rgb(255, 232, 155); text-align: center; margin-top: 6%; >p < font-family: "Courier New", Courier, monospace; font-size: 20px; >a < text-decoration: none; color: #fff; >ul < list-style-type: none; >table, th, td < background-color: #fff; margin-left: 28%; border: 1px solid black; padding: 10px; >button < padding: 10px; >#fb < background-color: #3b5998; >#link < background-color: #0077b5; >#git
Lets understand the above css code, first we style our body with some background color for that we use CSS background-color property with value rgb(255, 232, 155) or you can write your favorite color code or name.
After styling the background color, we now style our text position, for this we use the CSS text-align property with a value of center or you can choose different values (left, right, etc).
Now we style the margins with CSS margin-top property with a value of 6%, the margin-top property creates margins only from the top, if we only use the margin property they create margins from all sides.
Now we style the paragraph from selecting a
tag with CSS font-family property with a value of «Courier New», Courier, monospace, the font-family property changes the font style of paragraph, after styling the font style now we also style the size of font with CSS font-size property with value 20px.
How TO — Build a Website
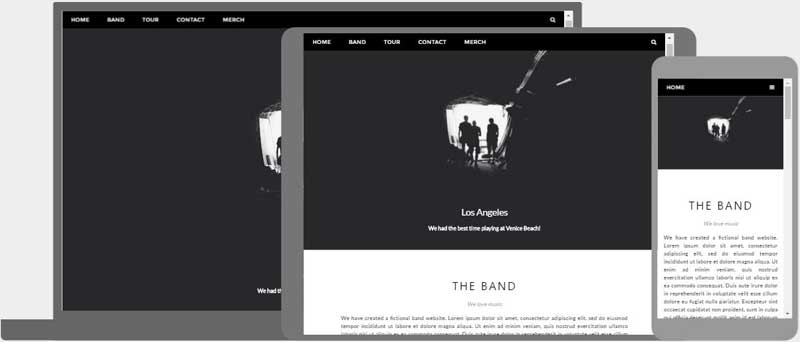
Learn how to create a fast and awesome responsive website that will work on all devices, PC, laptop, tablet, and phone.
Create a Website with a CSS Framework
Ever heard about W3Schools Spaces? Here you can create your website from scratch or use a template.
A «Layout Draft»
It is always wise to draw a layout draft of the page design before building a website.
Having a «Layout Draft» will make it a lot easier to create a web site:
Navigation bar
The Band
Article
Article
Article
Footer
Doctype, Meta Tags, and CSS
The doctype should define the page as an HTML5 document:
A meta tag should define the character set to be UTF-8:
A viewport meta tag should make the web site work on all devices and screen resolutions:
W3.CSS should take care of all our styling needs and all device and browser differences:
To learn more about styling with W3.CSS, please visit our W3.CSS Tutorial.
Our first empty web page will look much like this:
Note: If you want to create a website from scratch, without the help of a CSS framework, read our How To Make a Website Tutorial.
Creating Page Content
Inside the element of our web site we will use our «Layout Picture» and create:
- A navigation bar
- A slide show
- A header
- Some sections and articles
- A footer
Semantic Elements
HTML5 introduced several new semantic elements. Semantic elements are important to use because they define the structure of web pages and helps screen readers and search engines to read the page correctly.
These are some of the most common semantic HTML elements:
The element can be used to define a part of a website with related content.
The element can be used to define an individual piece of content.
The element can be used to define a header (in a document, a section, or an article).
The element can be used to define a footer (in a document, a section, or an article).
The element can be used to define a container of navigation links.
In this tutorial we will use semantic elements.
However, it is up to you if you want to use elements instead.
The Navigation Bar
On our «Layout Draft» we have a «Navigation bar».
We can use a or element as a container for the navigation links.
The w3-bar class is a container for navigation links.
The w3-black class defines the color of the navigation bar.
The w3-bar-item and w3-button class styles the navigation links inside the bar.
Slide Show
On the «Layout Draft» we have a «Slide show».
For the slide show we can use a or element as a picture container:


We need to add a little JavaScript to change the images every 3 seconds:
// Automatic Slideshow — change image every 3 seconds
var myIndex = 0;
carousel();
function carousel() var i;
var x = document.getElementsByClassName(«mySlides»);
for (i = 0; i < x.length; i++) x[i].style.display = "none";
>
myIndex++;
if (myIndex > x.length)
x[myIndex-1].style.display = «block»;
setTimeout(carousel, 3000);
>
Sections and Articles
Looking at the «Layout Draft» we can see that the next step is to create articles.
First we will create a or element containing band information:
The w3-container class takes care of standard padding.
The w3-center class centers the content.
The w3-wide class provides a wider heading.
The w3-opacity class provides text transparency.
The max-width style sets a maximum with of the band description section.
Then we will add a paragraph describing the band:
We have created a fictional band website. Lorem ipsum dolor sit amet, consectetur adipiscing elit, sed do eiusmod tempor incididunt ut labore et dolore magna aliqua.
The w3-justify class justifies the text’s right and left margins.
Then create a or with an or about each band-member:
John

Paul
Ringo
Footer
Finally we will use a or to create a footer:
The fa fa classes are Font Awesome Icon classes.
To use these classes you must link to a Font Awesome library:
To learn more about using icons, please visit our Icons Tutorial.