- How to create an online resume
- What is a resume
- Why create an online resume
- What do I need to know to create my resume as a website?
- How to create a resume step-by-step
- Preparations
- Step One: Add a Website Layout
- Step Two: Plan your content
- Step Three: Add content
- CV example
- Creating a Resume in HTML and CSS
- Getting Started
- Wireframe
- Setting up a «Canvas»
- Layout and Content
- Exporting
- Print Styles
- Generating a PDF
- Conclusion
- How To Make a Resume Using HTML & CSS Only
How to create an online resume
It is an overview of your experience, skills, education, and achievements.
It can be used to apply for a job, freelancer gig, consultancy engagement, or apply to a school.
The value of having it online as a website is that people from all over the world can access it easily.
What is a resume
The resume is an overview of your experience, competence, and skills.
It is most known for being a document, used to apply for jobs.
Companies and hiring managers use the resume to get an understanding of who you are as a professional and what you are capable of doing.
Your online resume can be shared by its link to companies, hiring managers, and recruiters, so that they can notice you.
Why create an online resume
A resume is relevant for every professional.
Your resume as a website makes it easy for others to access and view your resume.
It can be used to E.G. get a job, freelancing gig, consultancy engagement, or apply to a school.
Having it online makes it possible for people from all over the world to find you.
The design of the resume gives the reader an impression of who you are. Make sure that it appears in a good and presentable way!
What do I need to know to create my resume as a website?
HTML, CSS and JavaScript are the basic languages to create a website.
You can come a long way just using these three!
- Create the structure with HTML. The first thing you have to learn, is HTML, which is the standard markup language for creating web pages. Learn HTML ❯
- Style with CSS. The next step is to learn CSS, to set the layout of your web page with beautiful colors, fonts, and much more. Learn CSS ❯
- Make it interactive with JavaScript. After studying HTML and CSS, you should learn JavaScript to create dynamic and interactive web pages for your users. Learn JavaScript ❯
How to create a resume step-by-step
Follow the steps to create your online resume from the ground up.
Preparations
Decide which code editor to use and set up your environment.
W3Schools has created an easy to use code editor called W3Schools Spaces. Sign up and get started in a few clicks.
Create your index.html file. So that you are ready to enter the code.
All set up. Lets go!
Step One: Add a Website Layout
Create a responsive website from scratch.
Read here for how to create a website layout: How to create a Website Layout
A resume can be created in different ways.
There is not a one-size fits all.
Keep in mind why, how, and what, you are building it for.
Build the resume that is right for you.
Step Two: Plan your content
Think about how you want to design your resume.
- What information do you want to include?
- What impression do you want to give the reader?
- How do you as a professional want to be presented?
Step Three: Add content
Include the essential sections:
Check out our How To library for more code snippets: How To Library
1. Contact Information section.
Add your name and contact information.
The contact information section lets the reader know how to get in touch with you.
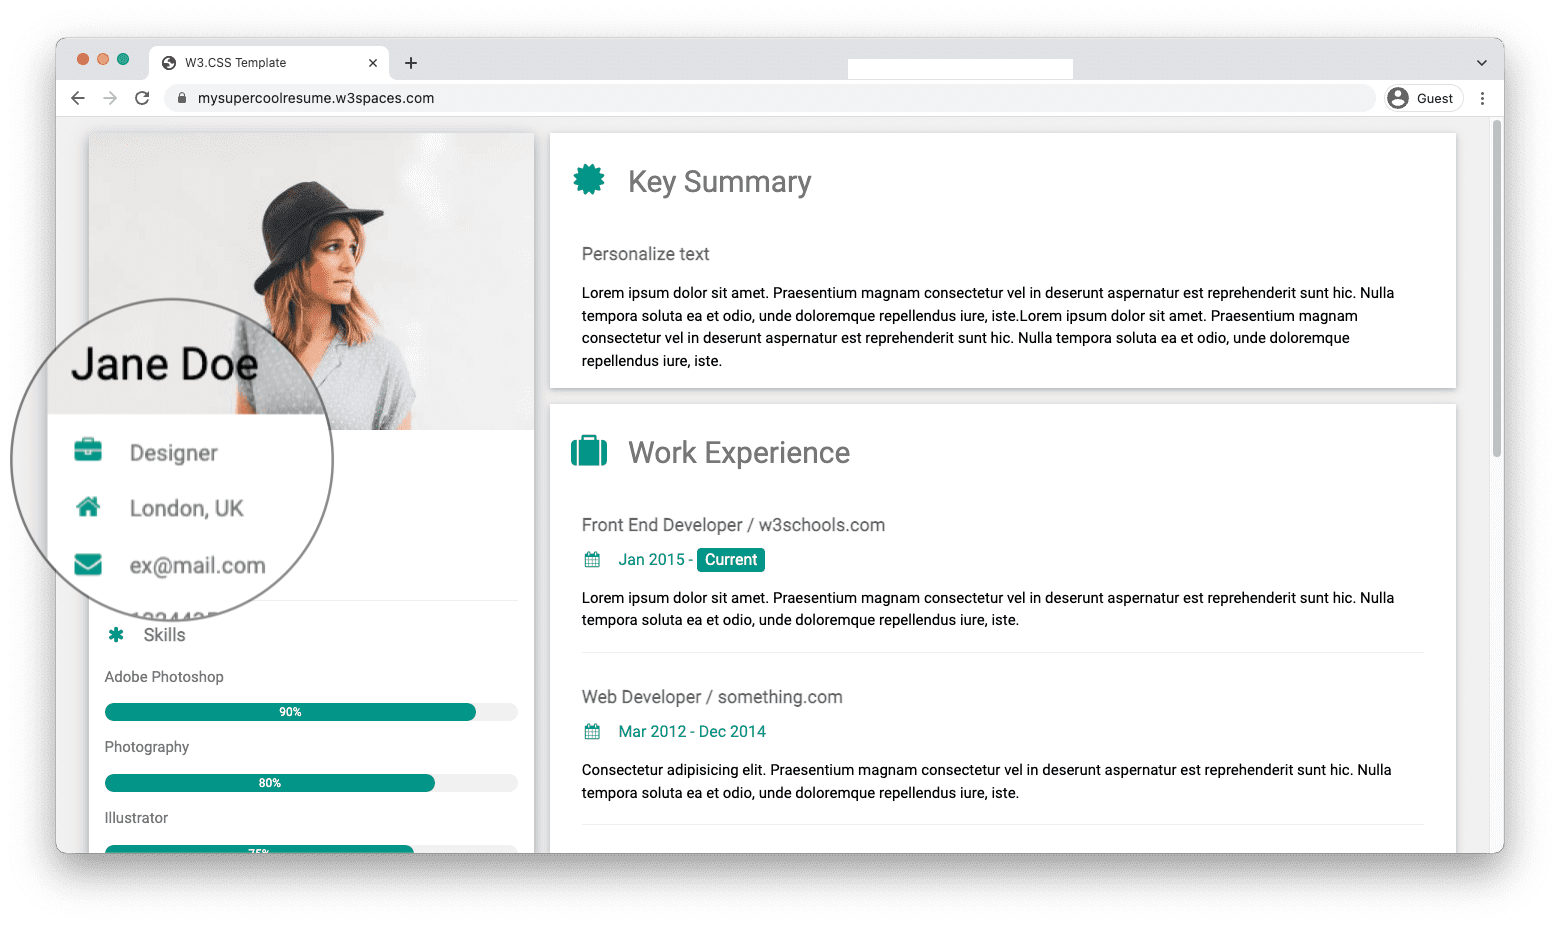
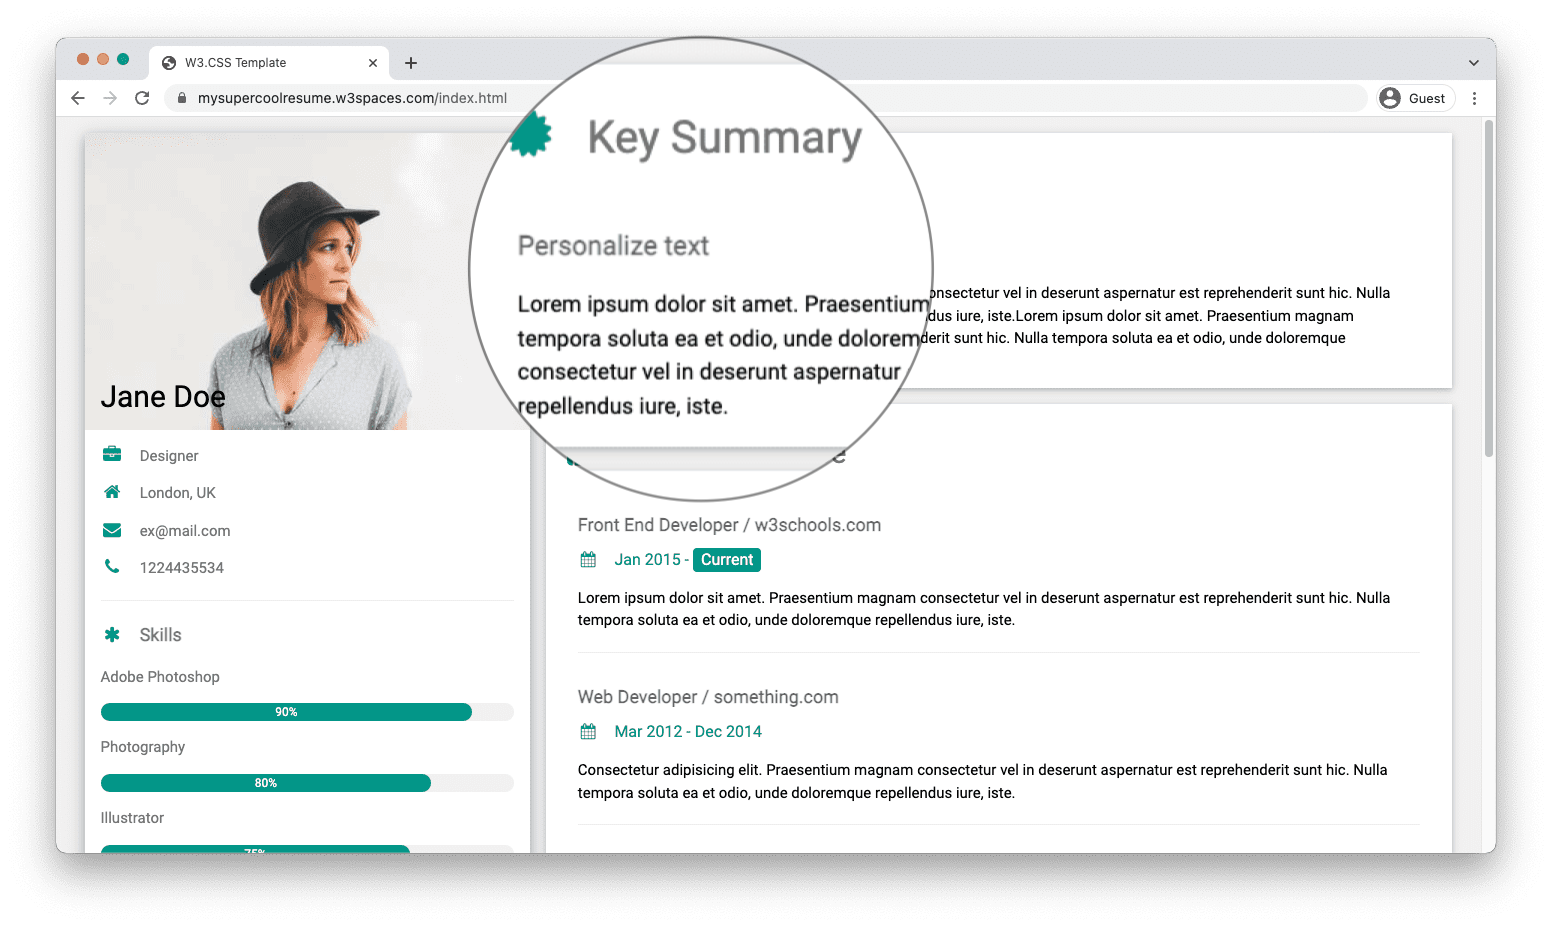
2. Key Summary section.
Write a short summary that highlights your experience, competence, and skills.
Personalizing the text can make you stand out.
The key summary helps the reader to get an understanding of who you are as a professional.
Keep it short and simple.
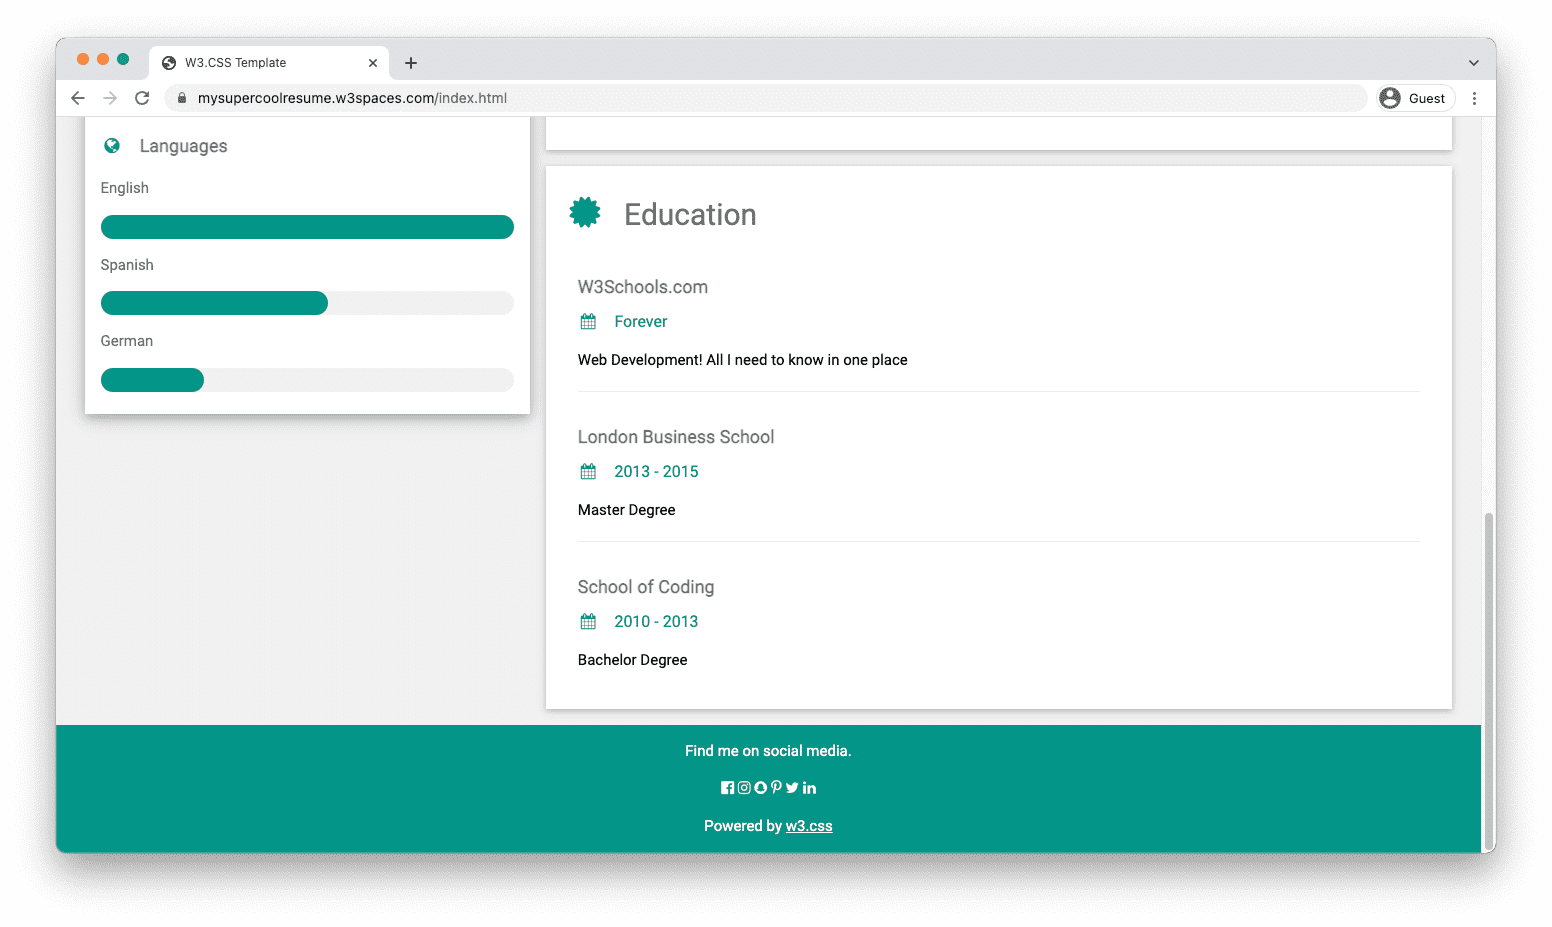
3. Education section.
Give an overview of your educational background.
Include details such as the institution, degree, and year.
Professional courses and certifications can also be listed as education.
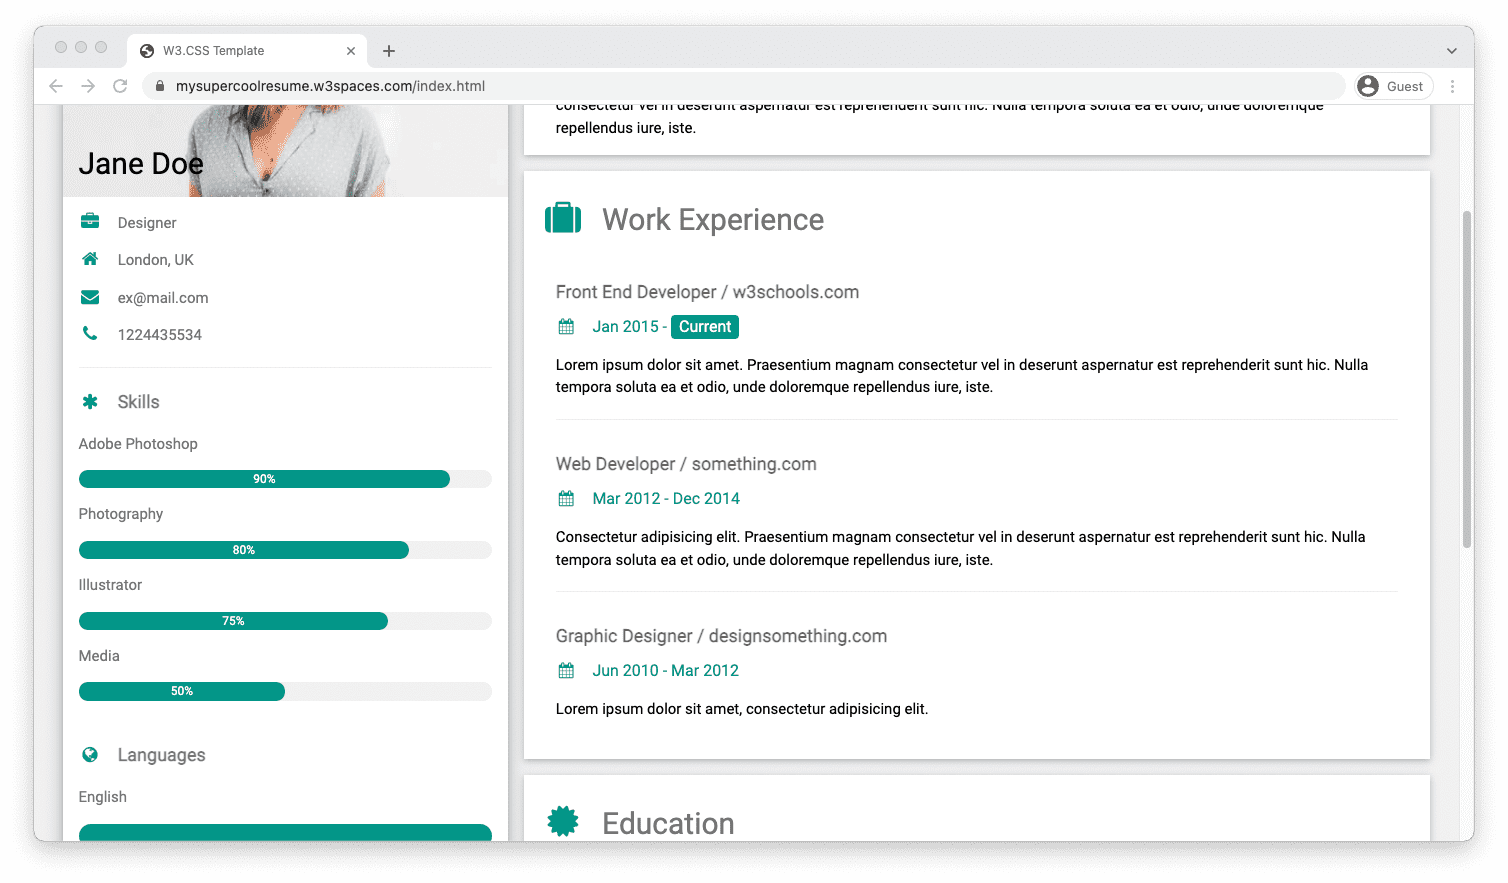
4. Work Experience section.
List the jobs that you have had.
Add details to each job, which includes what year, your role, and your responsibilities.
Other experiences such as projects and freelancing gigs can also be a part of this list.
CV example
We have made you a template that you can use and build with.
You can load the CV template in W3Schools Spaces. Get started with publishing your online resume in a few clicks.
Creating a Resume in HTML and CSS
Standard word processors don’t hold a candle to HTML and CSS when it comes to controlling the finer details of styling and layout. I’ve had difficulty fine-tuning my resume in a word processor, so I started using HTML and CSS to create and maintain my resume instead. I’ve found it to work a lot better overall, but there are a few helpful things to know before beginning the transition.
Getting Started
First, a disclaimer: this guide is not meant to provide resume templates or styling advice. Rather, I’m detailing a process for handling a resume print layout in HTML/CSS. This includes setup, print styling, and a final PDF export.
Wireframe

It’s much easier to write HTML and CSS when working from a mockup or wireframe. I used an old resume from Word as my baseline, but you could just as easily mock something up in a free tool like Adobe XD or Figma (Figma even supports print sizes by default). If you already have content from a past resume ready to go (like I did), you can break out your design into sections and add the details later: We don’t have to adhere to the exact styling of a template or mockup, but it can be useful for organizing the overall layout.
Setting up a «Canvas»

To better visualize your resume as you code, I’d recommend creating a «canvas» – an HTML container with the same proportions as your resume. By placing this container on an empty page, you’ll get a view very similar to a typical word processor: We can actually use physical measurement units in CSS (even though they end up mapping to pixels anyway), so it was quite easy to set this canvas up:
.canvas-container margin: 0 auto; /* for centering, feel free to use flexbox or some other method*/ box-sizing: border-box; padding: 0.5in; /* controls margins */ width: 8.5in; height: 11in; background-color: white; box-shadow: 0 3px 8px -3px rgba(0, 0, 0, 0.7); > Here’s what that might look like on a barebones page (use 0.5x or 0.25x zoom for the best effect): Use your canvas container to set default styles on your entire page, similar to defaults in a word processor. Other good properties to consider adding here are line-height and font properties like font-size and font-family .
Layout and Content
Using your wireframe for reference, map out how you will divide your canvas space into sections of content. This is where tools like Flexbox and Grid will come in handy if your layout is more complex. My setup was fairly straightforward: each area of my resume was broken into a section element. Whenever I had content spanning two columns, I used a grid to split them up:
.multicolumn display: grid; grid-template-columns: 1fr 1fr; gap: 1rem; > Here’s what that looks like in practice: In my resume, I only needed a multicolumn layout for two sections, Experience and Certifications / Skills. I hid the content, but here’s how those grids are situated on my current layout:  One added bonus of using something like grid is maintainability; I could very easily add another instance of work experience and have the grid automatically adjust without destroying the rest of my layout:
  Apart from using grid in those two instances, everything else fit nicely into sections using normal flow. Feel free to use whatever works best for you.
Exporting
Most companies and recruiters won’t accept an HTML page as a valid resume. Therefore, you’ll want to export your page as a PDF. Browsers can do this readily via the Print command, but we’ll need to do some adjustments to our CSS beforehand.
Print Styles
We’ll be taking advantage of the print media query to style our exported page. It allows us to apply styles specifically when a browser attempts to print. If you followed my advice of building everything inside a container, this should be a straightforward process. For simplicity, I made the entire html element’s width and height match the print size of my container. You may also need to remove any margins (and box-shadows!) for elements between the body and your container, otherwise the added space might cause an extra page to render:
@media print html height: 11in; width: 8.5in; overflow: hidden; > body margin: 0; > .canvas-container width: 100%; box-shadow: none; > > Generating a PDF

With browser styles in place, we can use the browser’s Print dialog to save our page as a PDF. While I love Firefox, Blink’s Print functionality tends to do a much better job of accurately exporting a page. I used Chrome for my final export – as detailed in the following instructions. After opening the print dialog, set your Destination to «Save as PDF». Additionally, you’ll want to adjust a few settings before saving the final result. Expand the «More settings» option and check the following:
- Color is enabled if you are using anything other than shades of gray
- Paper size is set to your preferred size (I used Letter throughout this guide)
- Margins should be set to None
- Scale should be set to 100
- Background Graphics are enabled
Go ahead and save the page. With that, you should have both an easily maintainable HTML resume and a PDF export to use for actual applications.
Conclusion
I hope this guide was a helpful starting point in how to create a resume in HTML and CSS.
If you’re curious for what my final result was, the source code for my current implementation is available here.
If you’ve gone through this process or have any additional tips for handling a print layout in HTML/CSS, please let me know in the comments below.
This post originally appeared on my personal blog, with a few modifications here for brevity.
How To Make a Resume Using HTML & CSS Only

hello viewer, In this article I will you teach how to create a unique and designer resume using html and CSS. you can see lots of video and article related to create resume in internet. but this article is different for others article.
You can also check our all resume design
Resume is important part of our career growth. You can see lots of resume design on internet. Basically resume are present your skills your hard works and your industry experience and your education knowledge and where are you belong and what is your family background they lots of things inside your resume. Whenever you give any interview first thing in your interview mind is how your resume looks and how to mention your skills in your resume. So when you create a good resume then your selection chance is much high.
AdhikariAddress
c-2343Phone
+01234-444-7768
Info@dummy.comWebsite
www.dummy.comSkype
msoftechskype.com
demotwitter.comLinkdin
Linkdindemo.com
facebookdummy.com
CSS Code:root < --bgcolor:#beb8ac; --blue:#0b83c4; --black:#3D3F42; --white:#f4f7ff; --gray:#d8dce4; --lightgray:#8e9095; >* < margin: 0px; padding: 0px; box-sizing: border-box; font-family: monospace; >body < background: var(--bgcolor); >.clearfix .resume-box < width: 800px; height: 1000px; margin: 100px auto; background: var(--white); box-shadow: 5px 21px 20px 20px #3df4238; >.left-section < background: var(--blue); width: 250px; height: 1000px; float: left; >.profile < overflow: hidden;position: relative; >.blue-box < width: 257px; height: 407px; background: var(--blue); margin-left: -100px; transform: rotateZ(48deg); margin-top: -178px; >.profile-img < position: absolute; z-index: 9; width: 120px; height: 120px; transform: translate(-50%, -50%); left: 50%; top: 50%; border-radius: 50%; border: 3px solid var(--gray); >.name < color: var(--gray); text-align: center; margin-top: -34px; font-size: 30px; letter-spacing: 2px; font-weight: 400; text-transform: uppercase; >.name span .n-p < width: 180px; margin: 0 auto; text-align: center; padding: 7px; border-bottom: 1px solid var(--gray); border-top:1px solid var(--gray); color: var(--black); background: var(--white); margin-top: 11px; text-transform: uppercase; >.info < margin-top: 50px; >.heading < width: 230px; margin-left: 20px; padding: 5px; padding-left: 15px; border-bottom: 1px solid var(--gray); border-top:1px solid var(--gray); color:var(--blue); background: var(--white); margin-top: 11px; text-transform: uppercase; font-size: 18px; border-radius: 10px 0px 0px 10px; >.p1 < color: var(--gray); width: 184px; margin: 0 auto; margin-top: 25px; font-size: 15px; line-height: 14px; >.p1 span .span1 img < background: white; width: 30px; padding: 6px; border-radius: 16px; float: left; margin-right: 10px; >.right-section < padding: 40px 30px; background: var(--white); width: 68%; float: left; height: 1000px; >.right-heading img < background:var(--blue); width: 36px; padding: 7px; border-radius: 17px; float: left; display: inline-block; margin-top: -2px; >.p2 < margin: 0 auto; padding: 6px; border-bottom: 1px solid var(--lightgray); border-top: 1px solid var(--lightgray); color: var(--white); background: var(--blue); text-transform: uppercase; font-size: 17px; margin-left: 26px; font-weight: bold; line-height: 18px; padding-left: 20px; >.p3 < margin-top: 20px; color: var(--lightgray); text-align: justify; word-spacing: -4px; >.left .right .lr-box .p4 .p5 .s-box < width: 50%; float: left; padding: 20px 20px 20px 0px; >#progress < background: #333; border-radius: 13px; height: 8px; width: 100%; >#progress:after < content: ''; display: block; background: var(--blue); width: 50%; height: 100%; border-radius: 9px; >#progress1 < background: #333; border-radius: 13px; height: 8px; width: 100%; >#progress1:after < content: ''; display: block; background: var(--blue); width: 40%; height: 100%; border-radius: 9px; >#progress2 < background: #333; border-radius: 13px; height: 8px; width: 100%; >#progress2:after < content: ''; display: block; background: var(--blue); width: 80%; height: 100%; border-radius: 9px; >#progress3 < background: #333; border-radius: 13px; height: 8px; width: 100%; >#progress3:after < content: ''; display: block; background: var(--blue); width: 90%; height: 100%; border-radius: 9px; >.p6 .h-imgYou can also watch a video tutorial how to create a resume using html CSS