- How To Create New Java Class In Android Studio
- 1.How To Create New Java Class In Android Studio.
- 2. Java Class SMSBean Usage Example.
- 2.1 SMSBean.java
- 2.2 activity_smsmanager.xml
- 2.3 SMSManagerActivity.java
- Android tutorial — How to Create New Java Class in Android Studio — android studio tutorial
- Related Searches to How to Create New Java Class in Android Studio
- Create java class in android
- Introduction to Java Class Constructors: Android Studio Crash Course (Free Tutorial)
How To Create New Java Class In Android Studio
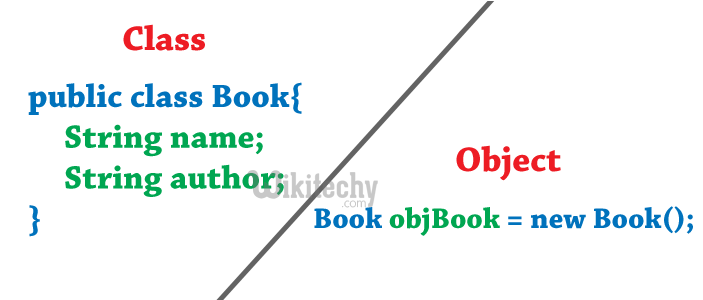
In android development, the java class is commonly used to implement business logic processes such as database access, send emails, send short messages etc. We always use one java class to encapsulate some related functions.
So we can think java class as the Model role in the MVC pattern. This example will show you how to create a new java class in android studio, and we will create a SMSBean java class that will implement short message send and receives functions.
1.How To Create New Java Class In Android Studio.
- Launch Android Studio, create a new project. You can read the article How To Create New Android Studio Project to learn more.
- After that right-click the default package in the android studio Project View’s Android subview, then click the New —> Java Class menu item.
- You can also click the New —> Package menu item to create a new package or sub-package under exist package. In this example, we create a sub-package model under the existing com.dev2qa.example package.
- Then there will popup a dialog that will let you input java class-related information. Input class name SMSBean in the Name input text box, select Class in the Kind drop-down list, do not input any superclass, do not implement any interface. Input package name value such as com.dev2qa.example.model. Click the OK button.
- After clicking the OK button, the java class SMSBean has been created successfully. We will add two methods in it, one is sendSMS(), the other is receiveSMS(), please see code comments for detail.
2. Java Class SMSBean Usage Example.
This example will use SMSBean as a short messages manager object, it has two methods sendSMS() and receiveSMS().
The user interface of this example is not complex, there will have two buttons on the screen one is used to send short messages, the other is used to receive short messages. When you click any of the two buttons, an AlertDialog will pop up showing some messages.
If you can not watch the above video, you can see it on the youtube URL https://youtu.be/VhM3qIQkuD8
So if you want to run this example, you should create a new activity and layout XML files to implement the user interface. You can read the below articles if you do not know how to create activity and use event listener.
This example includes below core files.
2.1 SMSBean.java
package com.dev2qa.example.model; import android.app.AlertDialog; import android.support.v7.app.AppCompatActivity; import com.dev2qa.example.SMSManagerActivity; public class SMSBean < // This variable will be injected by SMSBean caller, it will be used to show AlertDialog. private SMSManagerActivity sourceActivity; public SMSManagerActivity getSourceActivity() < return sourceActivity; >public void setSourceActivity(SMSManagerActivity sourceActivity) < this.sourceActivity = sourceActivity; >// Send short message. public void sendSMS(String msg) < if(this.getSourceActivity()!=null) < // Create a AlertDialog object. AlertDialog dialog = new AlertDialog.Builder(sourceActivity).create(); String showMsg = "Short message '" + msg + "' has been sent."; // Set AlertDialog show message. dialog.setMessage(showMsg); // Show AlertDialog. dialog.show(); System.out.println(showMsg); >else < System.out.println("Source activity is null."); >> // Receive short message. public void receiveSMS() < if(this.getSourceActivity()!=null) < // Create a AlertDialog object AlertDialog dialog = new AlertDialog.Builder(sourceActivity).create(); String showMsg = "Some short messages has been received."; // Set AlertDialog show message dialog.setMessage(showMsg); // Show AlertDialog. dialog.show(); System.out.println(showMsg); >else < System.out.println("Source activity is null."); >> > 2.2 activity_smsmanager.xml
2.3 SMSManagerActivity.java
package com.dev2qa.example; import android.support.v7.app.AppCompatActivity; import android.os.Bundle; import android.view.View; import android.widget.Button; import com.dev2qa.example.model.SMSBean; public class SMSManagerActivity extends AppCompatActivity < // Declare SMSBean as a final static variable. public static final SMSBean smsBean = new SMSBean(); @Override protected void onCreate(Bundle savedInstanceState) < super.onCreate(savedInstanceState); setContentView(R.layout.activity_smsmanager); // set this object in smsBean, it will be used to show send / receive message dialog. smsBean.setSourceActivity(this); // Get send short message button. Button sendSmsBtn = (Button)this.findViewById(R.id.btnSendSms); // Register an OnClickListener object what listen to sendSmsBtn on click event. sendSmsBtn.setOnClickListener(new View.OnClickListener() < @Override public void onClick(View view) < // If sendSmsBtn is clicked, then call smsBean sendSMS method to send short message. smsBean.sendSMS("Hello Android World :)"); >>); // Get receive short message button. Button receiveSmsBtn = (Button)this.findViewById(R.id.btnReceiveSms); // Register an OnClickListener object what listen to receiveSmsBtn on click event. receiveSmsBtn.setOnClickListener(new View.OnClickListener() < @Override public void onClick(View view) < // If receiveSmsBtn is clicked, then call smsBean receiveSMS method to receive coming in short messages. smsBean.receiveSMS(); >>); > > Android tutorial — How to Create New Java Class in Android Studio — android studio tutorial
Related Searches to How to Create New Java Class in Android Studio
drawable in android drawable in android studio how to convert drawable to bitmap in android android shape drawable android drawable selector android drawable xml drawable android studio android r drawable android bitmap drawable android res drawable android custom drawable android vectordrawable android drawable images android resources drawable drawable android xml android drawable scale xml drawable android studio drawable xml bitmap drawable android android drawable to bitmap android drawable size bitmap from drawable draw drawable on canvas android drawable example drawable folder in android studio drawable folder in android android drawable download java for android development java code in android studio java studio android java app android studio java tutorial java programming app for android how to make an android app with java java in android studio android java programming for beginners java android app java application android download java for android studio java app android install java apps on android android java applet java to android mainactivity java android studio how to import java class in android studio how to create a class in android android studio .class files android classes and methods how to import a class in android studio classes in android programming android studio add existing java file android classes for beginners android phones best android phone android apps android developer android update android android sdk android versions android emulator kodi app poweramp android app development apps for android android software android development android apps download android app store android api developer android android programming eclipse android android studio tutorial android development tutorial android tutorial android service google android android download android device android video what is android android system
- INTERVIEW TIPS
- Final Year Projects
- HR Interview Q&A
- GD Interview
- Resume Samples
- Engineering
- Aptitude
- Reasoning
- Company Questions
- Country wise visa
- Interview Dress Code CAREER GUIDANCE
- Entrance Exam
- Colleges
- Admission Alerts
- ScholarShip
- Education Loans
- Letters
- Learn Languages
World’s No 1 Animated self learning Website with Informative tutorials explaining the code and the choices behind it all.
Create java class in android

Introduction to Java Class Constructors: Android Studio Crash Course (Free Tutorial)
Picture this: you have a user that wants to specify the details of a product. Today we’re going to be looking at a user who inputs the make, model, and manufacturing year of their car, and we want Java to display the inputs as a message.
If you want to learn more coding for FREE, check out our 30-minute beginners course here: training.mammothinteractive.com/p/learn-to-code-in-30-minutes
When an object is created, Java first executes the code in the constructor. The constructor will then invoke that object. In this example, we’ll look at both default and customized constructors in a Java class. So let’s create a class! To follow along in Android Studio, go into Project view. Then go to app > java. Right-click on the topmost com.example.zebra.demo. Select New > Java Class.
The tab “Create New Class” will pop up. Let’s name our class “Car”. You should see the following on your screen:
As you can see, we have created our new class. It will also appear in Project view inside the same folder that contains the MainActivity class.
Before we create constructors, we have to instantiate a couple of fields. In the public class Car , let’s declare some fields. Note that, unlike in this example, these fields are usually private, meaning that they can only be accessed in this class. In your public class, create two public strings named make and model . Also create a public integer variable for the year in which the car was manufactured. Name it yearManufactured . Note that each of these lines must end in a semi-colon.
public class Car public String make; public String model; public int yearManufactured; >Now that we have created some properties for the car object, we have to create a constructor. First let’s trying using a default constructor. Note that a constructor takes the same name as its class. Still within the public class, type the following:
//default constructorpublic Car ()>
Instantiate the fields by adding onto the constructor so it looks like this:
//default constructorpublic Car ()this.make = "";this.model = "";this.yearManufactured = 2000;>
For string variables, we usually put "" , signifying empty strings. For integer variables, we usually use 0 . In this example, we used 2000 because it’s a much more appropriate default value for the year in which a car was manufactured.
Next go to app > java > (topmost) com.example.zebra.demo > MainActivity. Beneath setContentView(R.layout.activity_main); , create a new object called myCar . Use the default constructor Car :
We also want to display a message on the screen. To set the message, on the next line, create the string message , and set it equal to the properties that we created in the Car class.
String message = "Make: " + myCar.make +"\nModel: " + myCar.model +"\nYear manufactured: " + myCar.yearManufactured;
Note that because we added \n to the last two lines, our message will be displayed on three separate lines.
To display our message, we can use the Toast utility in Android Studio. On the next line, type in “Toast”, select “Create a new Toast”, and hit Enter. Android Studio will auto-complete the following code:
Toast.makeText(MainActivity.this, "", Toast.LENGTH_SHORT).show();To specify the message we want to display, edit that code so it looks like this:
Toast.makeText(MainActivity.this, "Brand of my car: " + myVehicle.getBrand() + " Conversion rate between KM and MILES: " + Vehicle.KILOMETERS_TO_MILES, Toast.LENGTH_SHORT).show();Run the emulator, and zoom in. Because we used the default constructor, you will see that the defaults we created will be shown on the screen:
Make:
Model:
Year manufactured: 2000
There are no values for the make or model of the car since we didn’t specify their values when we created the Car class. So let’s specify their values, shall we? To do so, we must create a customized constructor back in the Car.java tab.
Below the default constructor, add a customized one:
//customized constructorpublic Car()>
The only difference between the default constructor and the customized constructor is that we can pass some parameters in the parentheses of the customized constructor. Let’s add these parameters into the parentheses: String make, String model, int yearManufactured .
These are the parameters that the users of our application will input. For instance, a user will specify the make of a car, such as Honda, then the model, such as Civic, and the year manufactured, such as 2013. Since these are specific values, we have to make sure that our fields store these values. In the customized constructor, type the following lines:
this.make = make;this.model = model;this.yearManufactured = yearManufactured;
This code means that your field that stores, for example, the make is equal to the make that the user inputs in the initialization of the object that we just specified in the parentheses.
Let’s see how this customized constructor works. Instead of having the Car instantiate the constructor without any parameters, we’ll specify for the make, model, and manufacturing year of a car. In the parentheses after Car myCar = new Car , type: "Honda", "Civic", 2013 .
If you run the emulator, you will see the following:
Make: Honda
Model: Civic
Year manufactured: 2013
All done! Now we’re able to store specific values inside fields. If you want to learn even more coding for FREE, check out our 30-minute beginners course here: training.mammothinteractive.com/p/learn-to-code-in-30-minutes