- CSS Tooltip
- Basic Tooltip
- Example
- Example Explained
- Positioning Tooltips
- CSS Tooltip
- Basic Tooltip
- Example
- Example Explained
- Positioning Tooltips
- Тултипы на CSS3 и HTML5
- Дисклеймер
- Простой способ
- Способ для более сложных тултипов
- Пошаговое руководство по созданию подсказок на чистом CSS
- Проблема
- Улучшение решения
- Шаг 1
- Шаг 2
- Шаг 3
CSS Tooltip
A tooltip is often used to specify extra information about something when the user moves the mouse pointer over an element:
Basic Tooltip
Create a tooltip that appears when the user moves the mouse over an element:
Example
/* Tooltip text */
.tooltip .tooltiptext visibility: hidden;
width: 120px;
background-color: black;
color: #fff;
text-align: center;
padding: 5px 0;
border-radius: 6px;
/* Position the tooltip text — see examples below! */
position: absolute;
z-index: 1;
>
/* Show the tooltip text when you mouse over the tooltip container */
.tooltip:hover .tooltiptext visibility: visible;
>
Example Explained
HTML: Use a container element (like ) and add the «tooltip» class to it. When the user mouse over this , it will show the tooltip text.
The tooltip text is placed inside an inline element (like ) with class=»tooltiptext» .
CSS: The tooltip class use position:relative , which is needed to position the tooltip text ( position:absolute ). Note: See examples below on how to position the tooltip.
The tooltiptext class holds the actual tooltip text. It is hidden by default, and will be visible on hover (see below). We have also added some basic styles to it: 120px width, black background color, white text color, centered text, and 5px top and bottom padding.
The CSS border-radius property is used to add rounded corners to the tooltip text.
The :hover selector is used to show the tooltip text when the user moves the mouse over the with class=»tooltip» .
Positioning Tooltips
In this example, the tooltip is placed to the right ( left:105% ) of the «hoverable» text (). Also note that top:-5px is used to place it in the middle of its container element. We use the number 5 because the tooltip text has a top and bottom padding of 5px. If you increase its padding, also increase the value of the top property to ensure that it stays in the middle (if this is something you want). The same applies if you want the tooltip placed to the left.
Тултипы на CSS3 и HTML5
В связи с тем, что на Хабрахабре не нашёл я описания данного простого и в то же время удобного способа создания простых «тултипов» — всплывающих подсказок, я решил о нём написать.
В данном методе не будет использоваться JS, мы довольствуемся лишь CSS3 и HTML5.
Дисклеймер
На самом деле, css attr() для свойства псевдоэлемента content появился в CSS2 и в данном способе, в общем-то, нет ничего нового.
Простой способ

Этот способ сгодится там, где нужны небольшие «тултипчики» — всплывающие подсказки.
.tooltip < border-bottom: 1px dotted #0077AA; cursor: help; >.tooltip::after < background: rgba(0, 0, 0, 0.8); border-radius: 8px 8px 8px 0px; box-shadow: 1px 1px 10px rgba(0, 0, 0, 0.5); color: #FFF; content: attr(data-tooltip); /* Главная часть кода, определяющая содержимое всплывающей подсказки */ margin-top: -24px; opacity: 0; /* Наш элемент прозрачен. */ padding: 3px 7px; position: absolute; visibility: hidden; /* . и скрыт. */ transition: all 0.4s ease-in-out; /* Добавить плавности по вкусу */ >.tooltip:hover::after < opacity: 1; /* Показываем его */ visibility: visible; >Мы берём некий элемент (В нашем случае span), добавляем к нему атрибут с текстом, который будет показан и берём псевдоэлемент ::after. В content этого псевдоэлемента мы, пользуясь замечательнейшим свойством attr(), присваиваем нашей всплывающей подсказке текст и потом по :hover показываем его.
Думаю, остальные свойства понятны по комментариям в коде.
Отдельно хочу отметить, как ведёт себя анимация в Chrome и Opera (Возможно и в IE, за его отсутствием проверить я не имею никакой возможности).
Её нет. Связано это с тем, что WebKit и Opera не применяют transitions и animation к псевдоэлементам ::before и ::after.
По этому поводу в багтрекере WebKit зарегистрирован баг.
Способ для более сложных тултипов
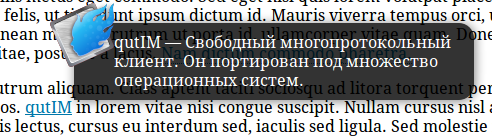
Иногда в тултипе должен быть не просто текст, но и некое форматирование или изображение, которое в предыдущий способ не вставишь.
Далее я рассмотрю лишь пример того, что можно сделать этим способом.
.htooltip span < /* Внешний вид нашего тултипа */ background-color: rgba(0,0,0, 0.8); border-radius: 15px 15px 15px 0px; box-shadow: 1px 1px 10px rgba(0, 0, 0, 0.5); color: #fff; margin-left: 2px; margin-top: -75px; opacity: 0; /* Делаем его прозрачным */ padding: 10px 10px 10px 40px; position: absolute; text-decoration: none; visibility: hidden; /* И прячем */ width: 350px; z-index: 10; >.htooltip:hover span < /* По hover отображаем тултип */ opacity: 1; visibility: visible; >.htooltip span img < /* Изображение для примера */ border: 0 none; float: left; margin: -71px 0 0 -234px; opacity: 0; position: absolute; visibility: hidden; z-index: -1; >.htooltip:hover span img < /* Показываем изображение */ opacity: 1; visibility: visible; >Всё просто. Данные примеры можно лицезреть на этой страничке.
P.S. Некоторые спросят: А где же HTML5? В статье упомянуты data-* атрибуты, являющиеся частью спецификации HTML5.
Пошаговое руководство по созданию подсказок на чистом CSS

Недавно я разбирал одно короткое руководство по созданию простых подсказок на чистом CSS (то есть без дополнительных HTML-элементов и кода на JavaScript). Позже я использовал эту технику в своём проекте и придумал пару приёмов её для улучшения. Здесь я хочу поделиться своим опытом.
Эта статья — пошаговое руководство, которое поможет понять приёмы создания подсказок, чтобы вы могли сделать это самостоятельно. Вы узнаете, как добавить подсказку к любому элементу, используя простой атрибут.
Проблема
Мне нужно было создать пользовательские подсказки для проекта.
Начал я с того, что загуглил «генератор подсказок CSS». Генераторов нашлось немало. Они добавляли span с абсолютной позицией внутри элемента, для которого нужна подсказка.
Мой проект уже был реализован, поэтому я не хотел возвращаться к коду и добавлять везде span . Это заняло бы много времени и усложнило бы HTML-код. Должен был быть путь проще.
Наконец, я нашёл на YouTube отличное руководство по подсказкам. Приём заключался в создании подсказок с помощью псевдоэлементов ::before и ::after :

Приём хорош, но не универсален.
Улучшение решения
В этой части я расскажу про более общий подход. Заодно мы изучим некоторые свойства CSS. Итак, мы хотим получить:
Мы также сможем определять позицию подсказки:
Прежде всего, как было сказано в видео, мы добавим к кнопке псевдоэлементы ::before и ::after . Они позволяют вставлять контент до или после содержимого элемента.
Шаг 1
Добавим атрибут подсказки:
Нам нужны псевдоэлементы ::after и ::before . Это будут прямоугольники с текстом подсказки. Чтобы создать прямоугольник с помощью CSS, добавим границы вокруг пустого элемента, созданного с помощью свойства content .
Псевдоэлемент ::before используется для отображения содержимого подсказки. Мы добавляем его со свойством content и извлекаем значение атрибута подсказки. Значение для содержимого может быть строкой, значением атрибута элемента (как в нашем примере) или даже изображением url(path/image.png) .
Чтобы это работало, расположение элемента кнопки должно быть относительным. То есть позиция всех элементов внутри кнопки зависит от позиции самой кнопки.
Мы также используем несколько приёмов с позиционированием, чтобы разместить подсказку в центре при помощи свойства transform .
button < margin:auto; background: #3498db; font-family: Arial; color: #ffffff; font-size: 14px; >%saved0% < margin:20px; position:relative; >%saved1%::before < content: ""; position: absolute; top:-6px; left:50%; transform: translateX(-50%); border-width: 4px 6px 0 6px; border-style: solid; border-color: rgba(0,0,0,0.7) transparent transparent transparent; z-index: 100; opacity: 0; >%saved2%::after
Шаг 2
Переберём комбинации псевдоэлементов ::before и ::after , чтобы выбрать позицию подсказки. HTML нашей кнопки будет выглядеть так:
Подсказка может быть расположена cлева, справа, сверху или снизу:
[tooltip-position='left']::before < left:0%; top:50%; margin-left:-12px; transform:translatey(-50%) rotate(-90deg) >[tooltip-position='top']::before < left:50%; >[tooltip-position='bottom']::before < top:100%; margin-top:8px; transform: translateX(-50%) translatey(-100%) rotate(-180deg) >[tooltip-position='right']::before < left:100%; top:50%; margin-left:1px; transform:translatey(-50%) rotate(90deg) >[tooltip-position='left']::after < left:0%; top:50%; margin-left:-8px; transform: translateX(-100%) translateY(-50%); >[tooltip-position='top']::after < left:50%; >[tooltip-position='bottom']::after < top:100%; margin-top:8px; transform: translateX(-50%) translateY(0%); >[tooltip-position='right']::after
Шаг 3
Осталось добавить анимацию для подсказки:
%saved3%:hover::after, %saved4%:hover::before
See the Pen CSS Tooltip by Eduardo Machado de Oliveira (@dudaskank) on CodePen.