- как изменить текст кнопки js
- Button javascript add text
- # Table of Contents
- # Change button text on Click using JavaScript
- # Changing the button’s innerHTML on click
- # Toggle button text on Click using JavaScript
- # Toggle a button’s innerHTML on click
- # Additional Resources
- Create a Button in JavaScript
- 1. Create a button using document createElement
- 2. Add an event listener on your button
- 3. Add your JS button to your HTML
- Full code to create a button in JS 👇
- How to change the Button element text using JavaScript
- Button javascript add text
как изменить текст кнопки js
Для изменения текста кнопки в JavaScript необходимо получить доступ к элементу кнопки с помощью метода document.getElementById() , затем установить текстовое значение. Например, через свойство textContent :
const button = document.getElementById('myButton'); button.textContent = 'Новый текст кнопки'; В этом примере мы получили элемент кнопки по его id , затем установили новое значение свойства textContent на «Новый текст кнопки». Кнопка теперь будет отображать этот текст.
Чтобы изменить текст на кнопке с помощью JavaScript, можно использовать свойство innerHTML элемента кнопки. Вот пример:
Нажми меня В этом примере, сначала находим кнопку с помощью метода getElementById() , а затем используем свойство innerHTML для изменения текста кнопки на «Кликни меня». Это заменит текст «Нажми меня» на кнопке на новый текст «Кликни меня».
Также можно использовать метод innerText вместо innerHTML , если нужно изменить только текстовое содержимое элемента кнопки без изменения любых HTML-тегов внутри этого элемента. Вот пример:
Нажми меня Оба примера изменят текст на кнопке на новый текст. Выбор между использованием innerHTML или innerText зависит от того, нужно ли изменять только текстовое содержимое элемента или изменять HTML-теги внутри элемента кнопки.
Button javascript add text
Last updated: Jan 12, 2023
Reading time · 3 min
# Table of Contents
# Change button text on Click using JavaScript
To change the text of a button on click:
- Add a click event listener to the button.
- Use the textContent property to change the button’s text.
- For example, btn.textContent = ‘Button clicked’ .
Here is the HTML for the examples.
Copied!DOCTYPE html> html lang="en"> head> title>bobbyhadz.comtitle> meta charset="UTF-8" /> head> body> button id="btn">Click mebutton> script src="index.js"> script> body> html>
And here is the related JavaScript code.
Copied!const btn = document.getElementById('btn'); // ✅ Change button text on click btn.addEventListener('click', function handleClick() btn.textContent = 'Button clicked'; >); /** * ✅ If you need to change the button's inner HTML use: * - `innerHTML` instead of `textContent` */
We added a click event listener to the button.
Every time the button is clicked, the handleClick function is invoked.
The textContent property can be used to change the button’s text every time it’s clicked.
# Changing the button’s innerHTML on click
If you need to change the button’s inner HTML, use the innerHTML property instead of textContent .
Copied!const btn = document.getElementById('btn'); // ✅ Change button text on click btn.addEventListener('click', function handleClick() const initialText = 'Click me'; btn.innerHTML = `span style="background-color: salmon">Button clickedspan>`; >);
This approach could be used to add a loading spinner when the user clicks a button.
Note that you shouldn’t set the button’s innerHTML based on user-provided input without escaping it. This would make your site vulnerable to cross-site scripting attacks.
# Toggle button text on Click using JavaScript
To toggle a button’s text on click:
- Add a click event listener to the button.
- Each time the button is clicked, check if the button’s text is the initial text.
- If it is, change the text to the clicked text.
- Otherwise, change the text back to the initial text.
Copied!const btn = document.getElementById('btn'); // ✅ Toggle button text on click btn.addEventListener('click', function handleClick() const initialText = 'Click me'; if (btn.textContent.toLowerCase().includes(initialText.toLowerCase())) btn.textContent = 'Button clicked'; > else btn.textContent = initialText; > >); /** * ✅ If you need to change the button's inner HTML use: * - `innerHTML` instead of `textContent` */
Each time the button is clicked, the handleClick function is invoked.
In the function, we check if the button’s textContent contains the initial text value.
We converted both the initialText and the button’s text content to lowercase to make a case-insensitive comparison.
If the button’s text is the initial text, we set the text to a new value of Button clicked .
Otherwise, we set the button’s text to the initial text.
# Toggle a button’s innerHTML on click
If you need to use HTML when setting the button’s content, use the innerHTML property instead of textContent .
Copied!const btn = document.getElementById('btn'); // ✅ Toggle button text on click btn.addEventListener('click', function handleClick() const initialText = 'Click me'; if (btn.textContent.toLowerCase().includes(initialText.toLowerCase())) btn.innerHTML = 'Button clicked'; > else btn.textContent = initialText; > >);
We used the innerHTML property to set the content of a button to a span with a background color.
In a more real-world scenario, you would probably set the content to some text and a loading spinner.
# Additional Resources
You can learn more about the related topics by checking out the following tutorials:
I wrote a book in which I share everything I know about how to become a better, more efficient programmer.
Create a Button in JavaScript
As a web developer, you should probably create buttons and add them to your HTML page programmatically.
A typical workflow is to validate some data in your JavaScript code before displaying a button in HTML to your users.
Before starting, let me show you what you will achieve!
When you click on the button, your JavaScript code will trigger an alert.

Let’s dive into that tutorial!
1. Create a button using document createElement
To create a button in JavaScript, you must use the createElement function available by default in the Document interface of your web page.
Then, you will configure the button with a “Can you click me?” text.
// Create a button element const button = document.createElement('button') // Set the button text to 'Can you click me?' button.innerText = 'Can you click me?'As a side note, you can add a lot of properties to a button when creating it. This tutorial only sets the innerText because we don’t need the other properties.
2. Add an event listener on your button
The next step is to create an event listener on your button. It will allow you to detect when a user clicks on it.
Whenever the “click” event is detected, the arrow function (second parameter) is launched.
// Attach the "click" event to your button button.addEventListener('click', () => < // When there is a "click" // it shows an alert in the browser alert('Oh, you clicked me!') >)3. Add your JS button to your HTML
The last step is to add your button to the HTML body.
After that, you will have the same result as the beginning example!
// Add the button to your HTML tag document.body.appendChild(button)Full code to create a button in JS 👇
HTML (the JavaScript code in Congrats! 🎉 Now you know how to programmatically create buttons using JavaScript. You can go a bit further by learning how to enable and disable a button in JavaScript.
Join me on Twitter for daily doses of educational content to help you Unlock your Web Development skills! 🚀 From tips to tutorials, let’s learn & grow together! 📚 DMs are open, let’s connect! 🤝📬
How to change the Button element text using JavaScript
In this tutorial, we are going to learn about how to change the text value of an button element using JavaScript.
Consider, we have a following input button element:
input type="button" value="Red" id="btn" /> Now, we want to change the above button text value to blue by using JavaScript.
To change the button text, first we need to access the button element inside the JavaScript by using the document.getElementById() method and add a click event handler to the button, then set it’s value property to blue .
const btn = document.getElementById("btn"); btn.addEventListener("click", ()=> if(btn.value === "Red") btn.value = "Blue"; >else btn.value= "Red"; > >)Now, when we click on our button , it changes the value from Red to Blue or vice versa.
If you want to change the text value for a HTML element, then you need to update the button element innerText property instead of value property.
const btn = document.getElementById("btn"); btn.addEventListener("click", ()=> if(btn.innerText === "Red") btn.innerText = "Blue"; >else btn.innerText= "Red"; > >);Button javascript add text

Для отправки введенных данных на форме используются кнопки. Для создания кнопки используется либо элемент button :
С точки зрения функциональности в html эти элементы не совсем равноценны, но в данном случае они нас интересуют с точки зрения взаимодействия с кодом javascript.
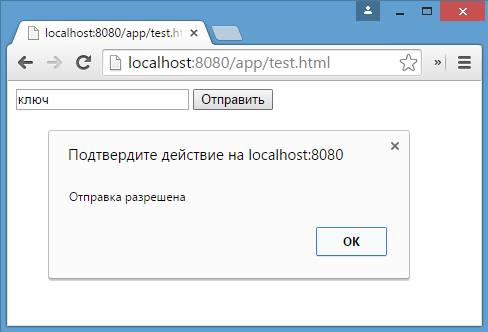
При нажатии на любой из этих двух вариантов кнопки происходит отправка формы по адресу, который указан у формы в атрибуте action , либо по адресу веб-страницы, если атрибут action не указан. Однако в коде javascript мы можем перехватить отправку, обрабатывая событие click
При нажатии на кнопку происходит событие click , и для его обработки к кнопке прикрепляем обработчик sendForm . В этом обработчике проверяем введенный в текстовое поле текст. Если его длина больше 5 символов, то выводим сообщение о недостимой длине и прерываем обычный ход события с помощью вызова e.preventDefault() . В итоге форма не отправляется.
Если же длина текста меньше шести символов, то также выводится сообщение, и затем форма отправляется.
Также мы можем при необходимости при отправке изменить адрес, на который отправляются данные:
function sendForm(e)< // получаем значение поля key var keyBox = document.search.key; var val = keyBox.value; if(val.length>5) < alert("Недопустимая длина строки"); document.search.action="PostForm"; >else alert("Отправка разрешена"); > В данном случае, если длина текста больше пяти символов, то текст отправляется, только теперь он отправляется по адресу PostForm , поскольку задано свойство action:
document.search.action="PostForm";
Для очистки формы предназначены следующие равноценные по функциональности кнопки:
При нажатию на кнопки произойдет очистка форм. Но также функциональность по очистке полей формы можно реализовать с помощью метода reset() :
function sendForm(e)< // получаем значение поля key var keyBox = document.search.key; var val = keyBox.value; if(val.length>5) < alert("Недопустимая длина строки"); document.search.reset(); e.preventDefault(); >else alert("Отправка разрешена"); > Кроме специальных кнопок отправки и очистки на форме также может использоваться обычная кнопка:
При нажатии на подобную кнопку отправки данных не происходит, хотя также генерируется событие click:
При нажатии на кнопку получаем введенный в текстовое поле текст, создаем новый элемент параграфа для этого текста и добавляем параграф в элемент printBlock.