- Using the JavaScript console in Visual Studio Code
- Create JavaScript / Node task in VSCode
- Console log javascript vs code
- # Table of Contents
- # Configure a shortcut for console.log() in VS Code
- # Configuring a Snippet for console.log() in VS Code
- # Configure a shortcut for console.log() using an extension
- # Using the VS Code Turbo console log extension
- Быстрый вызов сниппета console.log() в VS Code c помощью горячих клавиш
- Using console.log() debugging in Visual Studio Code
- My other work:
Using the JavaScript console in Visual Studio Code
Some time ago I published an article about the JavaScript console in Sublime Text. It’s turned out to be one of the most popular articles on this website. As I recently changed my code editor from Sublime Text to VSCode I found a solution to replicate this functionality.
Similar to Build Systems in Sublime Text, Visual Studio Code comes with Tasks that allows us to pass a file to an external program without manually switching between the code editor and the Terminal. This is essentially all that we need to do — pass a currently active file to a JavaScript interpreter (Node in this case — so make sure it is installed on your computer).
Create JavaScript / Node task in VSCode
A VSCode Task is a set of instructions in a JSON file that resides in our projects file. Unfortunately at this moment it isn’t possible to create globally available tasks — they need to be added per project. The good news is that the development of VSCode is rapid so we may see global tasks appear very soon as I’m not the only one who wants this feature. To create a Task hit cmd + shift + p on Mac, ctrl + shift + p on Windows / Linux or simply F1 on any platform to show the Command Palette, type “Tasks: Configure Task” then “Create tasks.json file from template” and choose “Others” from the list. Time to configure the task.
" " " OK, so what is going on here? When we run a task called “Show in console” this will run a shell command that takes our currently opened file as an argument preceded by the path to our node executable. To make things even easier the group.kind property lets us run this task via shift + cmd + b keyboard shortcut.
In most cases the “node” in command property does the job instead of passing a full path. I found this method more reliable though. The path can vary depending on operating system, version and installation method. Update command according to the output of which node . On Windows the equivalent command is where node .

Time for the fun bit! Create an amazing script and enjoy the instant output in your code editor by pressing shift + cmd + b or by running the “Show in console” task from the Command Palette. Hopefully this helped you out. Stay curious and build amazing things!
Did you like it? Please share it with your friends or get me a beer coffee. Thanks!
Console log javascript vs code
Last updated: Mar 3, 2023
Reading time · 4 min
# Table of Contents
# Configure a shortcut for console.log() in VS Code
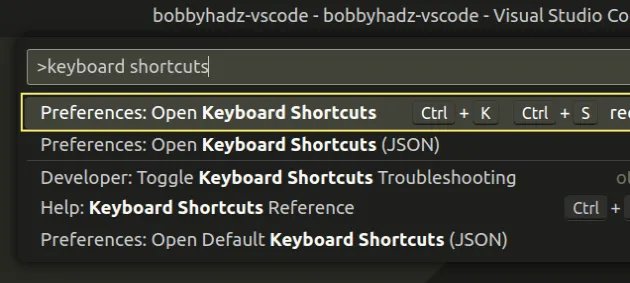
To set a keyboard shortcut for the action:
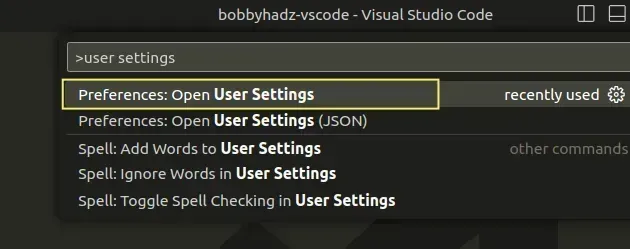
- Type Keyboard Shortcuts and select Preferences: Open Keyboard Shortcuts.
![]()
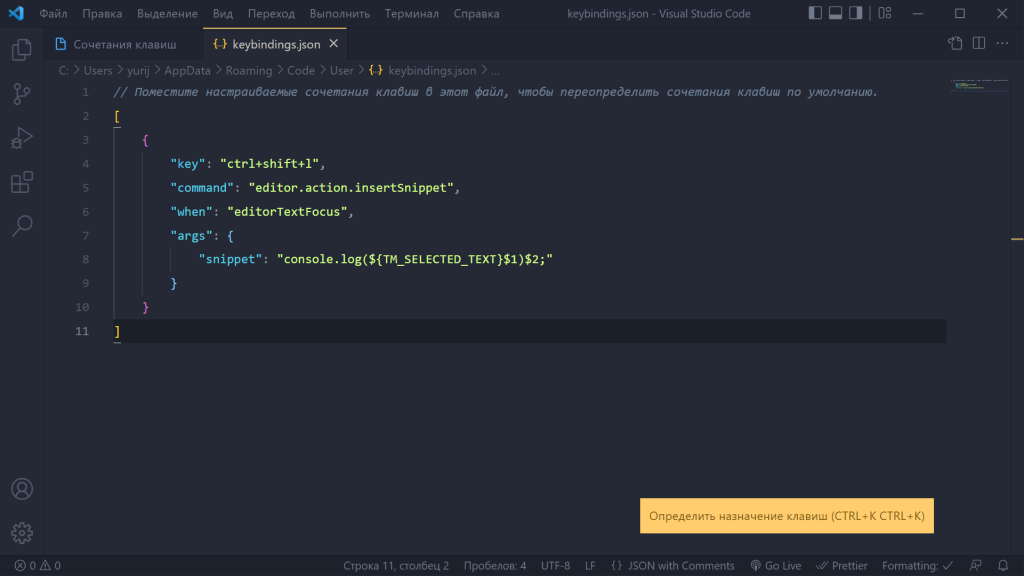
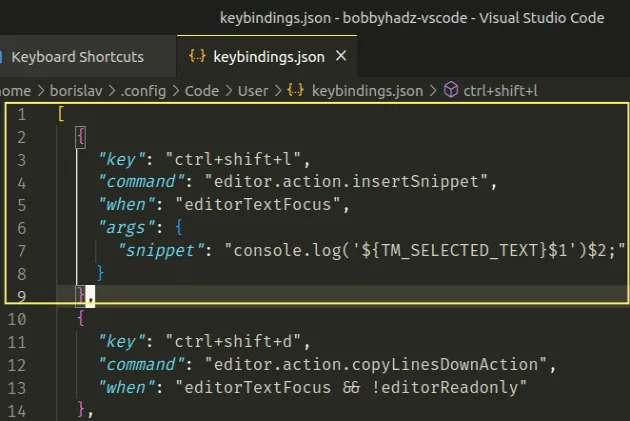
Copied![ "key": "ctrl+shift+l", "command": "editor.action.insertSnippet", "when": "editorTextFocus", "args": "snippet": "console.log('$$1')$2;" > >, ]
You can also set the keybinding to «cmd+shift+l» if you are on macOS.
Here is the equivalent example on macOS.
Copied![ "key": "cmd+shift+l", "command": "editor.action.insertSnippet", "when": "editorTextFocus", "args": "snippet": "console.log('$$1')$2;" > >, ]
The code sample sets the console.log() function to Ctrl + Shift + l .
Here is a short clip that demonstrates the process.
Now you can open a file and press Ctrl + Shift + l (or Cmd + Shift + l ) to use the shortcut.
The $1 statement is used to specify the location where your cursor should be placed first.
Similarly, $2 is used to specify the location where your cursor should be placed after you press Tab.
# Configuring a Snippet for console.log() in VS Code
If you’d rather configure a snippet (with auto-complete) for console.log() .
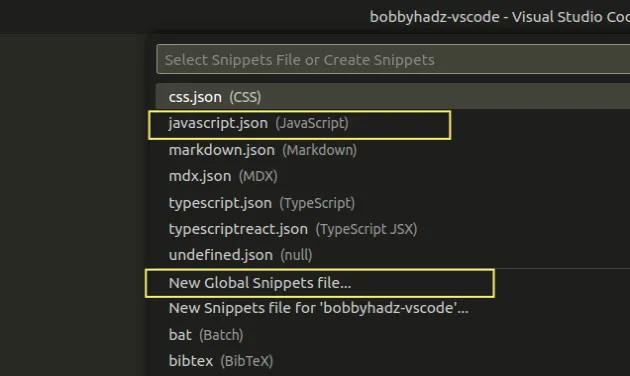
Note that the snippet will only be available when using the specified language.
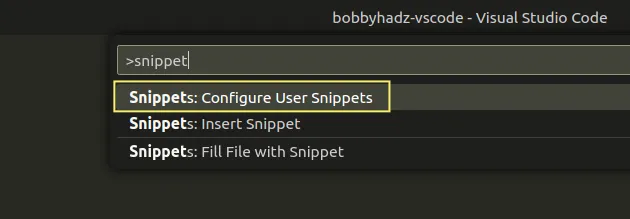
You can also select New Global Snippets file. if you want to create a snippet that can be used in all files.
Add the following code to your snippets file.
Copied!"Log to console": "prefix": "log", "body": ["console.log('$1');", "$2"], "description": "Log output to console" > >
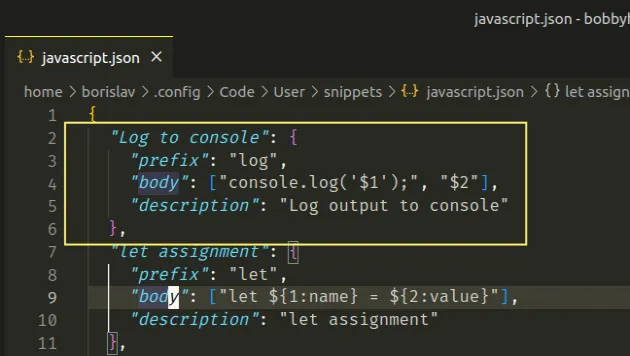
Now you can start typing log to use the snippet.
If you use a global file, set the scope property to specify multiply languages.
Copied!"Log to console": "scope": "javascript,typescript,javascriptreact", "prefix": "log", "body": [ "console.log('$1');", "$2" ], "description": "Log output to console" > >
The global setting enables the log snippet for JavaScript, TypeScript and React.js files.
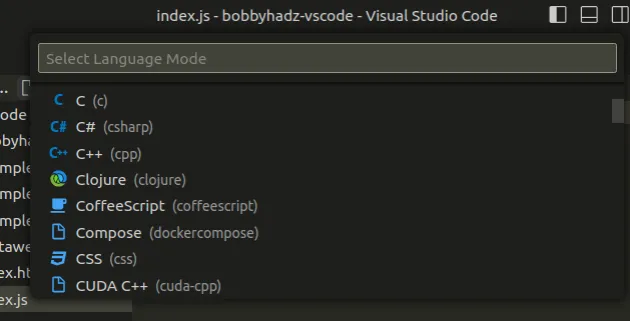
If you need to find the name of a language, click on the active language in the status bar at the bottom.
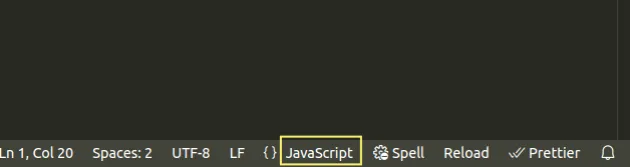
Then you can view the names of the languages in the drop-down menu, between the parentheses.
You can set the editor.snippetSuggestions setting to top to have your snippets appear above VS Code’s Intellisense.
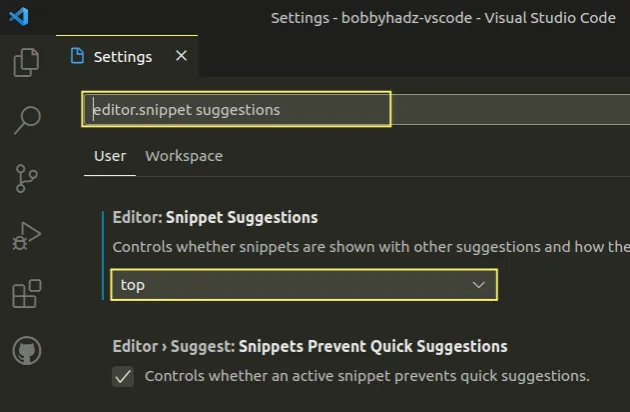
Once the option is set to top , the snippets will appear at the top, above Intellisense suggestions.
# Configure a shortcut for console.log() using an extension
An alternative approach is to use an extension that comes with predefined JavaScript code snippets.
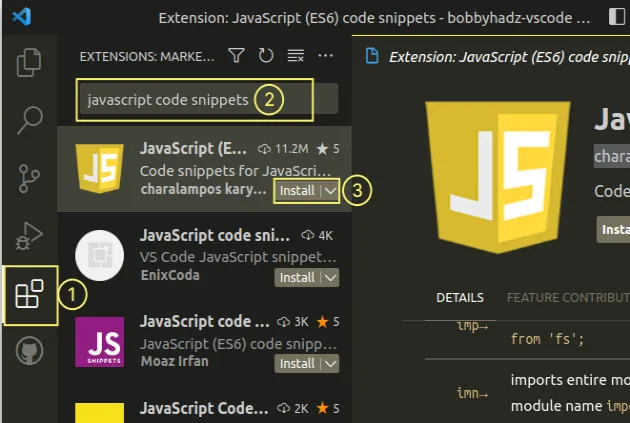
There is a very popular extension called JavaScript (ES6) code snippets that offers many snippets for commonly used functions and statements.
You can install the extension by:
- Clicking on Extensions in the left sidebar.
- You can also open the Extensions menu by pressing:
- Ctrl + Shift + X on Windows or Linux
- Command + Shift + X on macOS
- Typing javascript code snippets.

Make sure to install the JavaScript (ES6) code snippets extension from Charalampos Karypidis.
You can view all of the shortcuts the extension provides in the official page.
For example, you can use clg to use a console.log() snippet.
The extension also provides clo snippet to log an object.
If the suggestions don’t show after you start typing press Ctrl + Space (or Cmd + Space on macOS) to manually show the suggested snippets.
# Using the VS Code Turbo console log extension
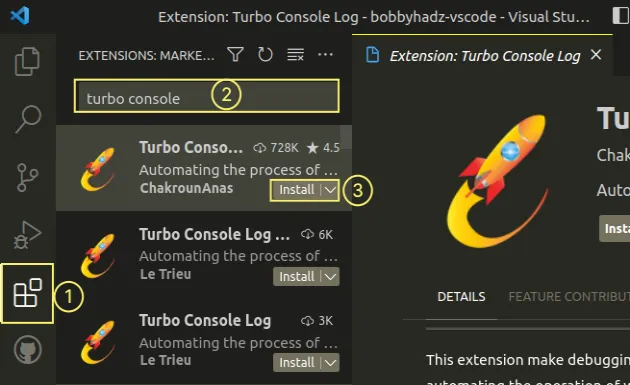
There is also an extension called Turbo Console Log that automates the process of logging messages in VS Code.
You can install the extension by:
- Clicking on Extensions in the left sidebar.
- You can also open the Extensions menu by pressing:
- Ctrl + Shift + X on Windows or Linux
- Command + Shift + X on macOS
- Typing turbo console log.
Using the extension is a two-step process:
- Select or hover a variable that you want to log.
- Press Ctrl + Alt + L (Windows and Linux) or Ctrl + option + L (macOS).
The log message is inserted on the next line, after the selected variable.
You can view the other supported features on the extension’s official page.
I wrote a book in which I share everything I know about how to become a better, more efficient programmer.
Быстрый вызов сниппета console.log() в VS Code c помощью горячих клавиш

JavaScript
В этом посте покажу как упростить и облегчить написание JS кода с помощью сниппета console.log() в Visual Studio Code.
Довольно часто мы используем команду console.log() и неплохо было бы повесить ее на горячие клавиши. Чтобы при нажатии на хоткеи в редактор автоматически вставлялся вызов console.log() c курсором внутри скобок, чтобы быстро вывести значение переменной в консоль.
Для этого нам необходимо создать новое сочетание клавиш, на вызов которого мы повесим вставку сниппета с нужным кодом. Поехали!)
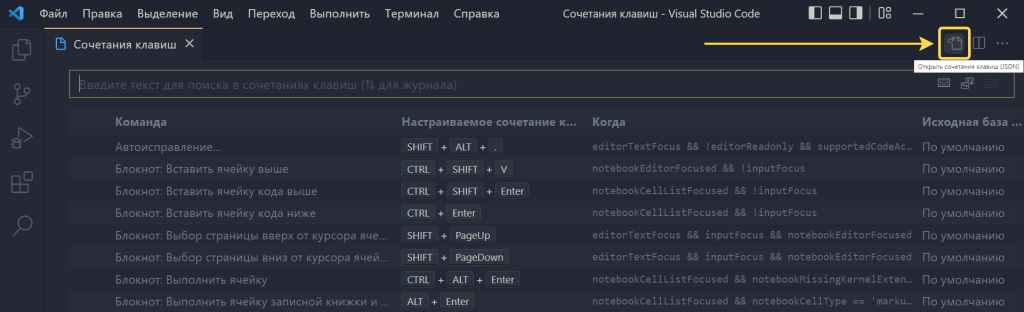
Заходим в Файл → Настройки → Сочетания клавиш
Далее, жмем на иконку в верхнем правом углу программы «Открыть сочетания клавиш (JSON)».
После этого попадаем в JSON файл keybindings.json , в котором будут описаны все пользовательские сочетания клавиш. Все сочетания клавиш описаны в виде объектов внутри массива. Если у вас пока нет сочетаний клавиш, то добавляем первое сочетание.
Добавим вызов данного сниппета на сочетание клавиш Ctrl + Shift + L . Выглядеть это будет вот так. Пример кода есть ниже в статье.
Код файла keybindings.json с единственным сниппетом для быстрого вызова console.log() :
Каждый пользовательский сниппет описан в видео объекта с полями:
key — для указания сочетания клавиш.
command — команда которая должна быть выполнена.
when — в какой момент должно работать сочетание клавиш.
args — дополнительные аргументы. В нашем случае в них записан сниппет который должен быть вставлен.Внутри сниппета $ обозначает текст который может выделен в момент вызова сниппета. $1 и $2 — позиции каретки для ввода текста. Сначала 1, после нажатия TAB, каретка переместится в позицию 2.
Теперь мы можем прожимать Ctrl + Shift + L и в файле будет вставляться console.log() . Если предварительно выделить переменную и прожать Ctrl + Shift + L , тогда эта переменная будет обернута командой console.log() .
Using console.log() debugging in Visual Studio Code
Using the new in-built JavaScript debugger in Visual Studio code you can use the browser developer tools Console right inside the editor.
I just published a “TikTok” style video on the official Visual Studio Code channel explaining this and – after lots of criticism for the quality of the video (lads, this is on purpose!) – people had more questions, so here goes.
In the video I use a project I have open with a launch.json file already defined, which means it opens the correct URL for you when you start debugging. You can, however, also do that by hand. And it even works without a local server. So, let’s do this.
Step 1: Create a folder and call it consoledebug
Step 2: Start Visual Studio Code, choose “open” – select that folder
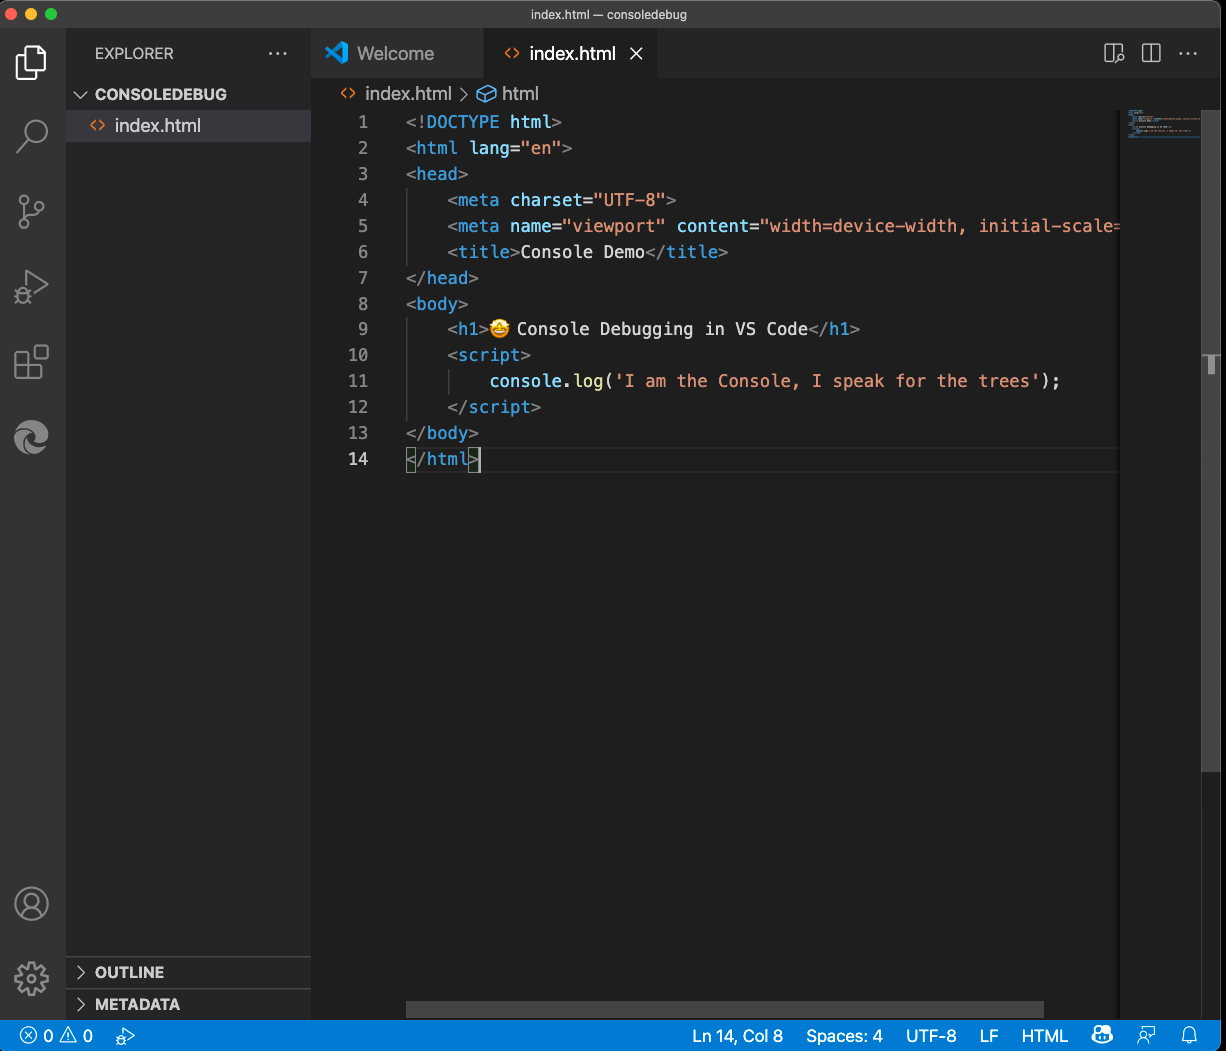
Step 3: Select New File, call it index.html
Step 4: Add some HTML /JS and save it
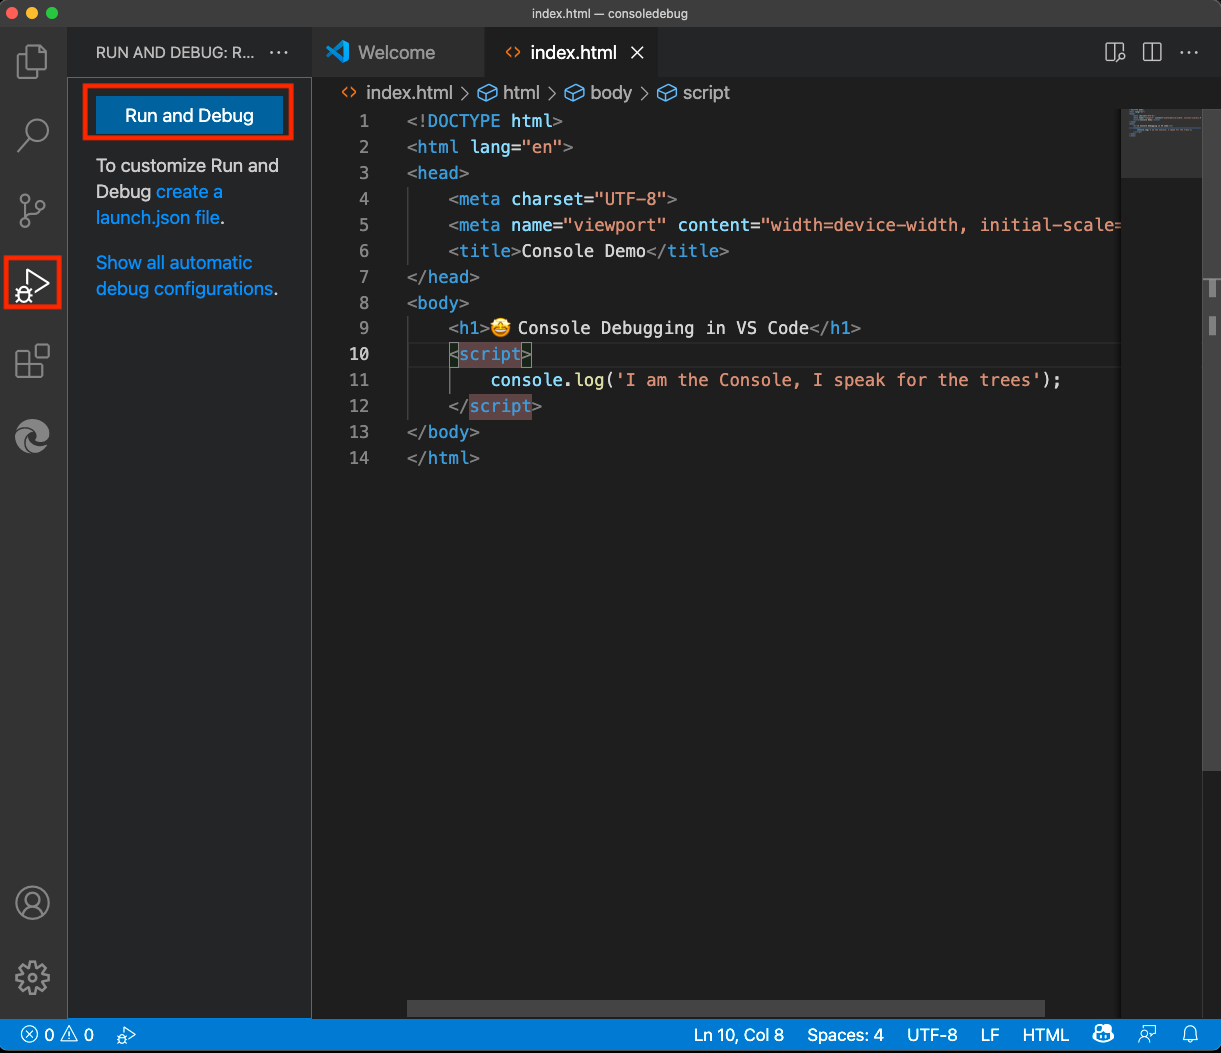
Step 5: Select the “Run and Debug” icon and press the “Run and Debug” button

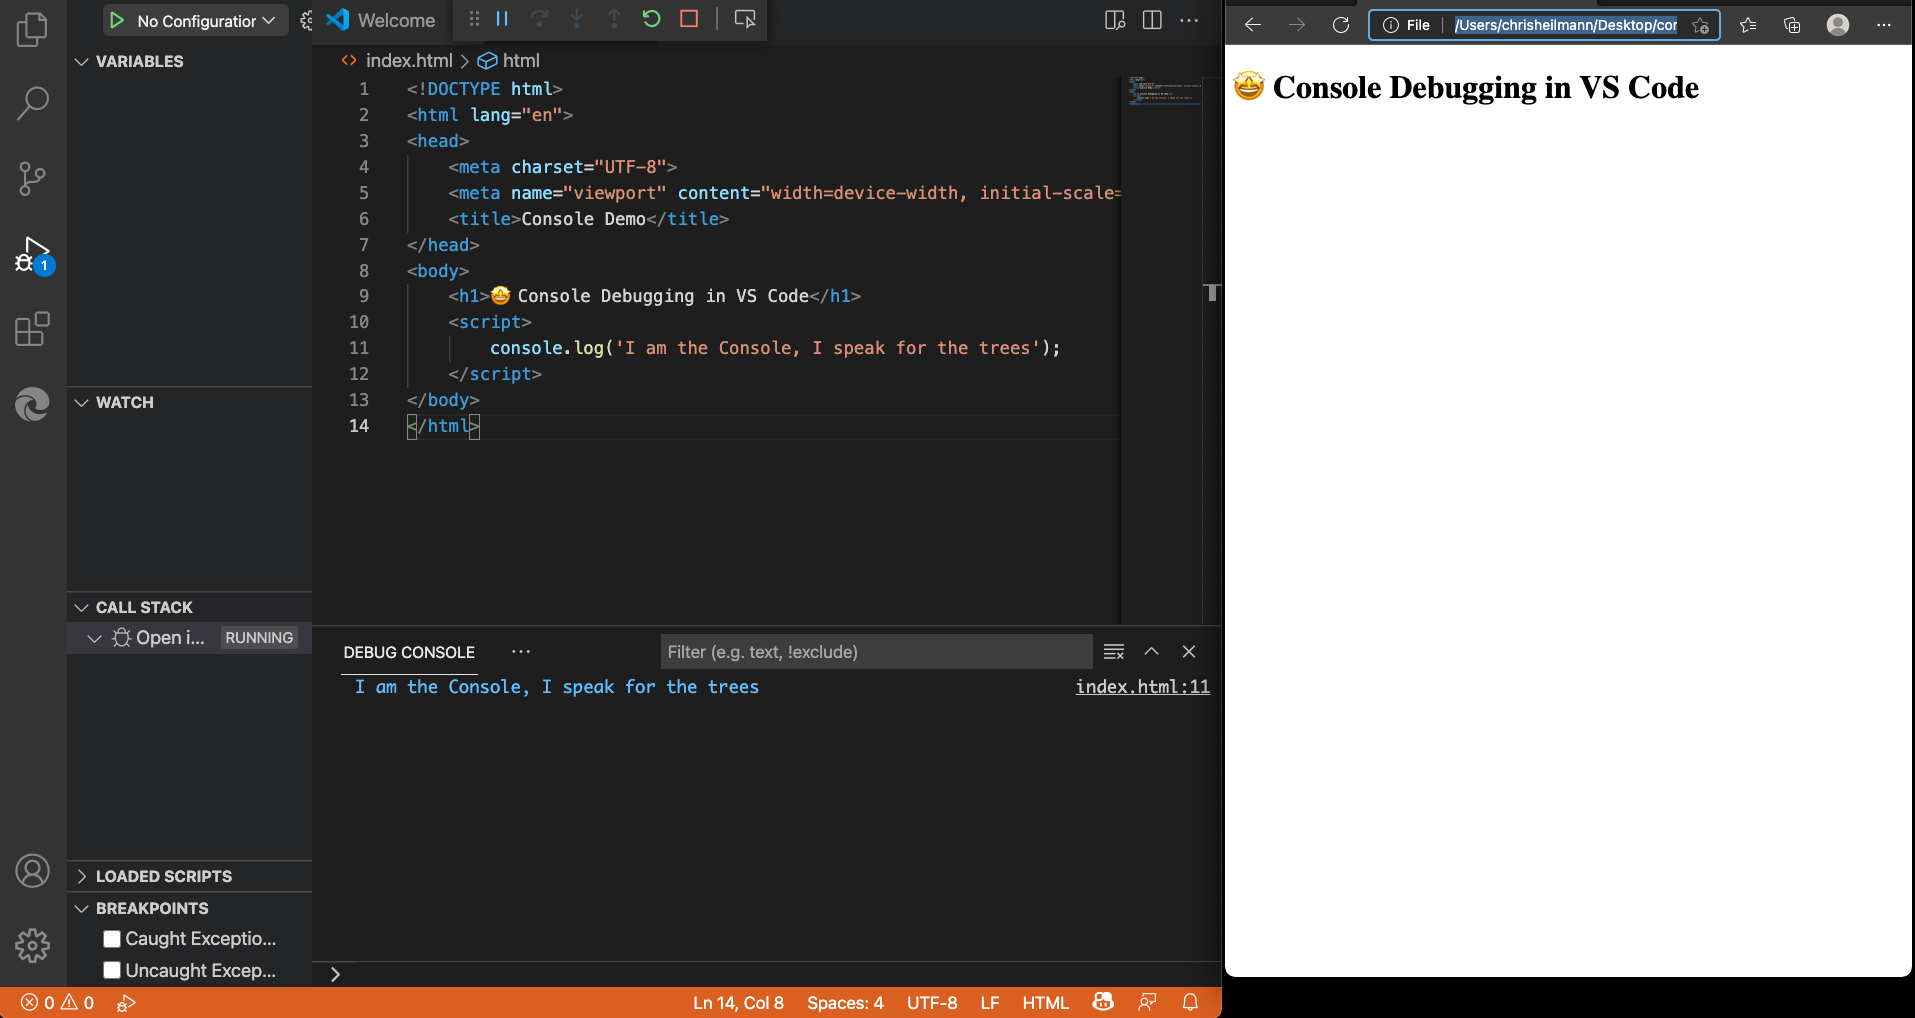
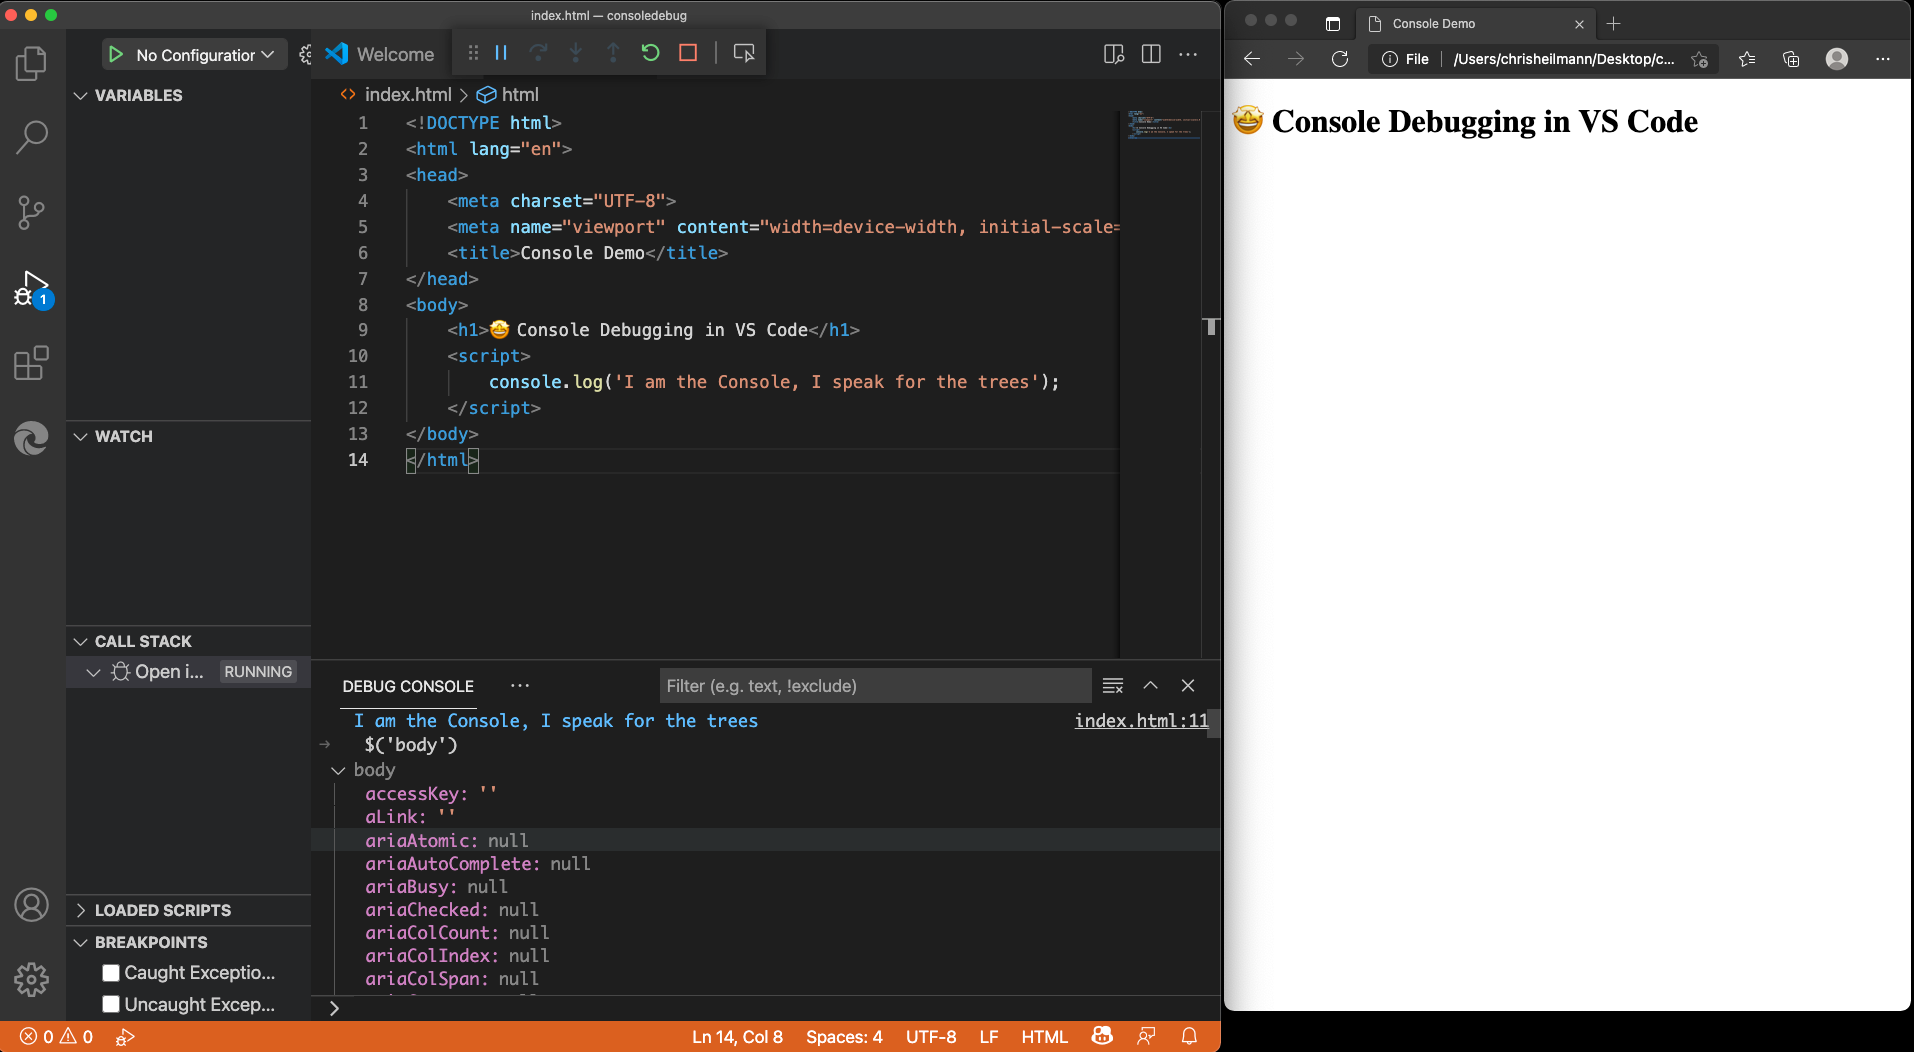
Visual Studio Code now opens a browser window for you and you can see the console.log message from the demo code in the Debug Console.

You can use the Debug Console to do anything you normally do in the Console of the browser tools. You also have access to all the convenience methods, like $ for document.querySelector. Try it out by using $(‘body’) in the Debug Console. You get all the information about the body element of the current document.

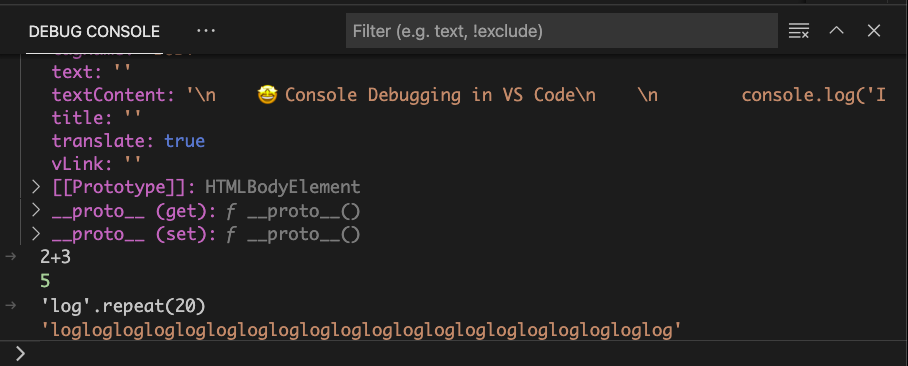
This is a full REPL console, and you can just type in any JavaScript to try out, for example 2+3 or ‘log’.repeat(20)

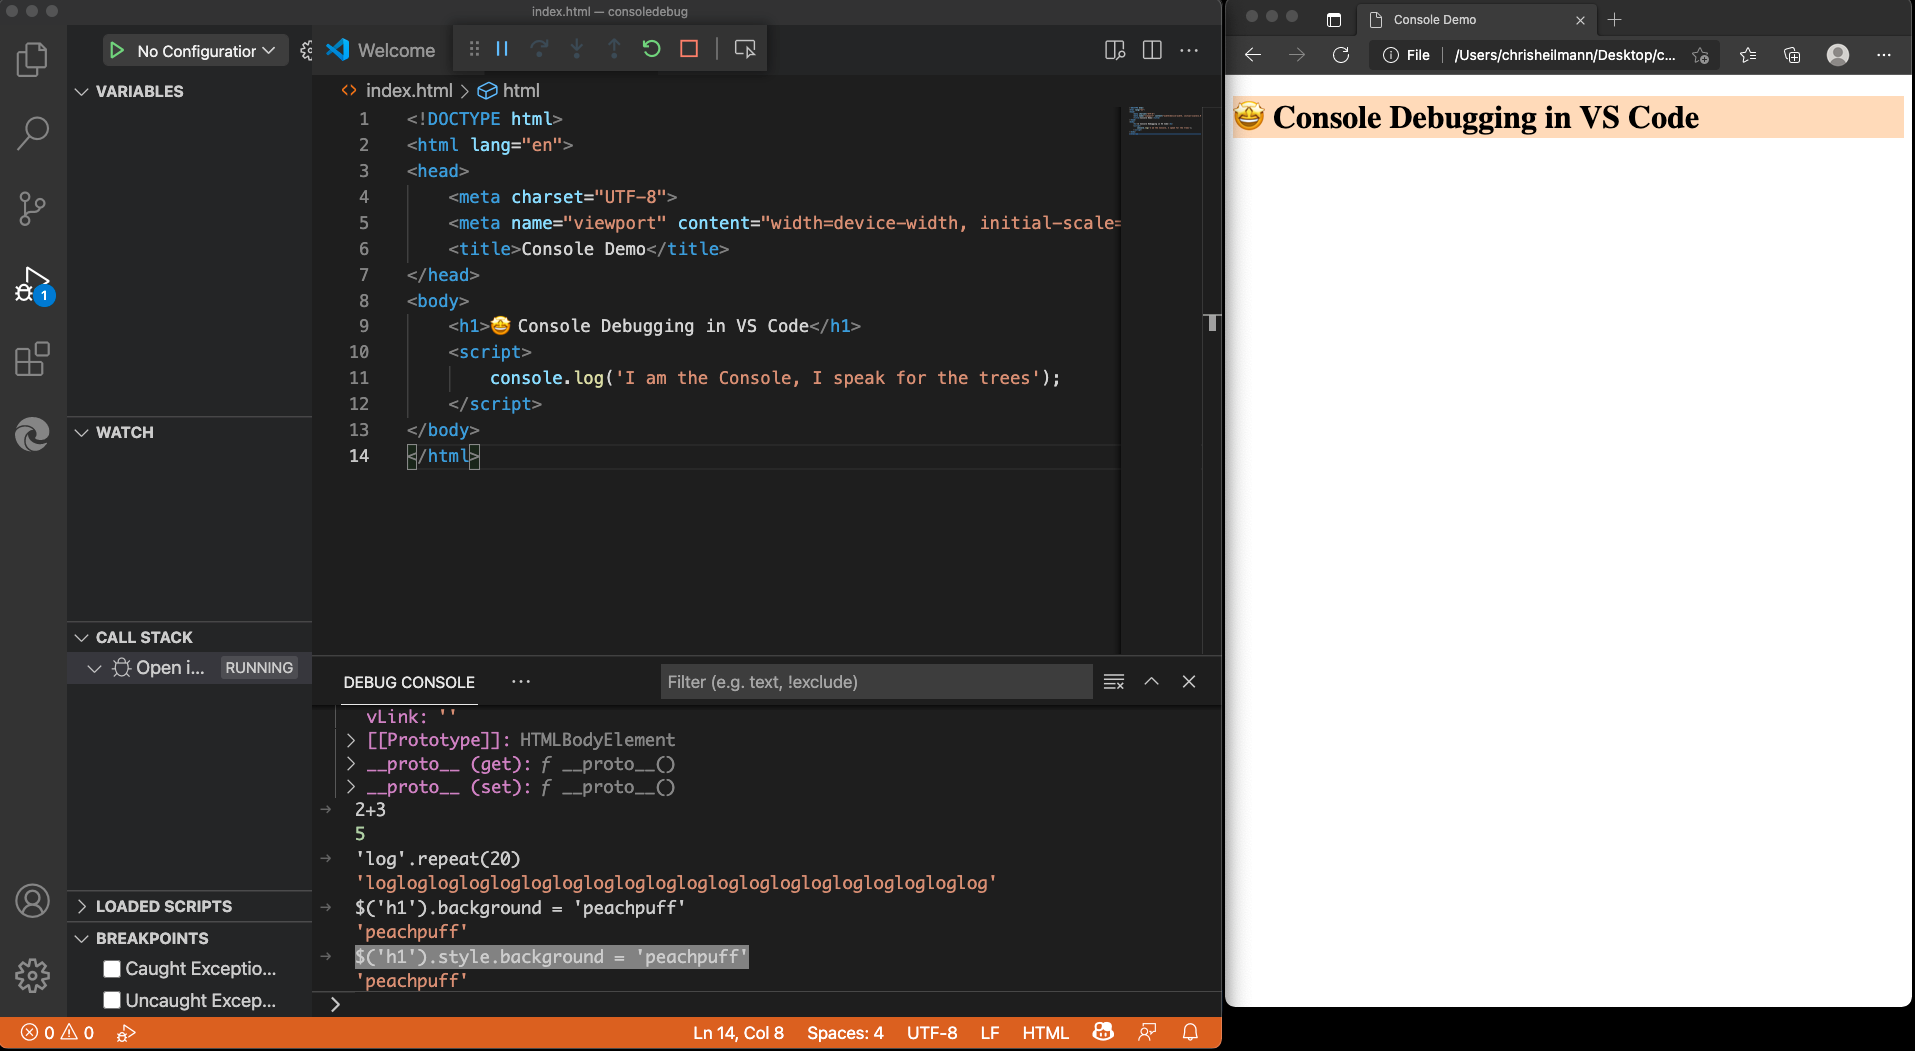
You also have full access to the Window object and the DOM of the current page, for example, to change the background colour of the document, you can use $(‘h1’).style.background = ‘peachpuff’ (and not what I did first in the screenshot).

For all the features of Console, check the documentation.
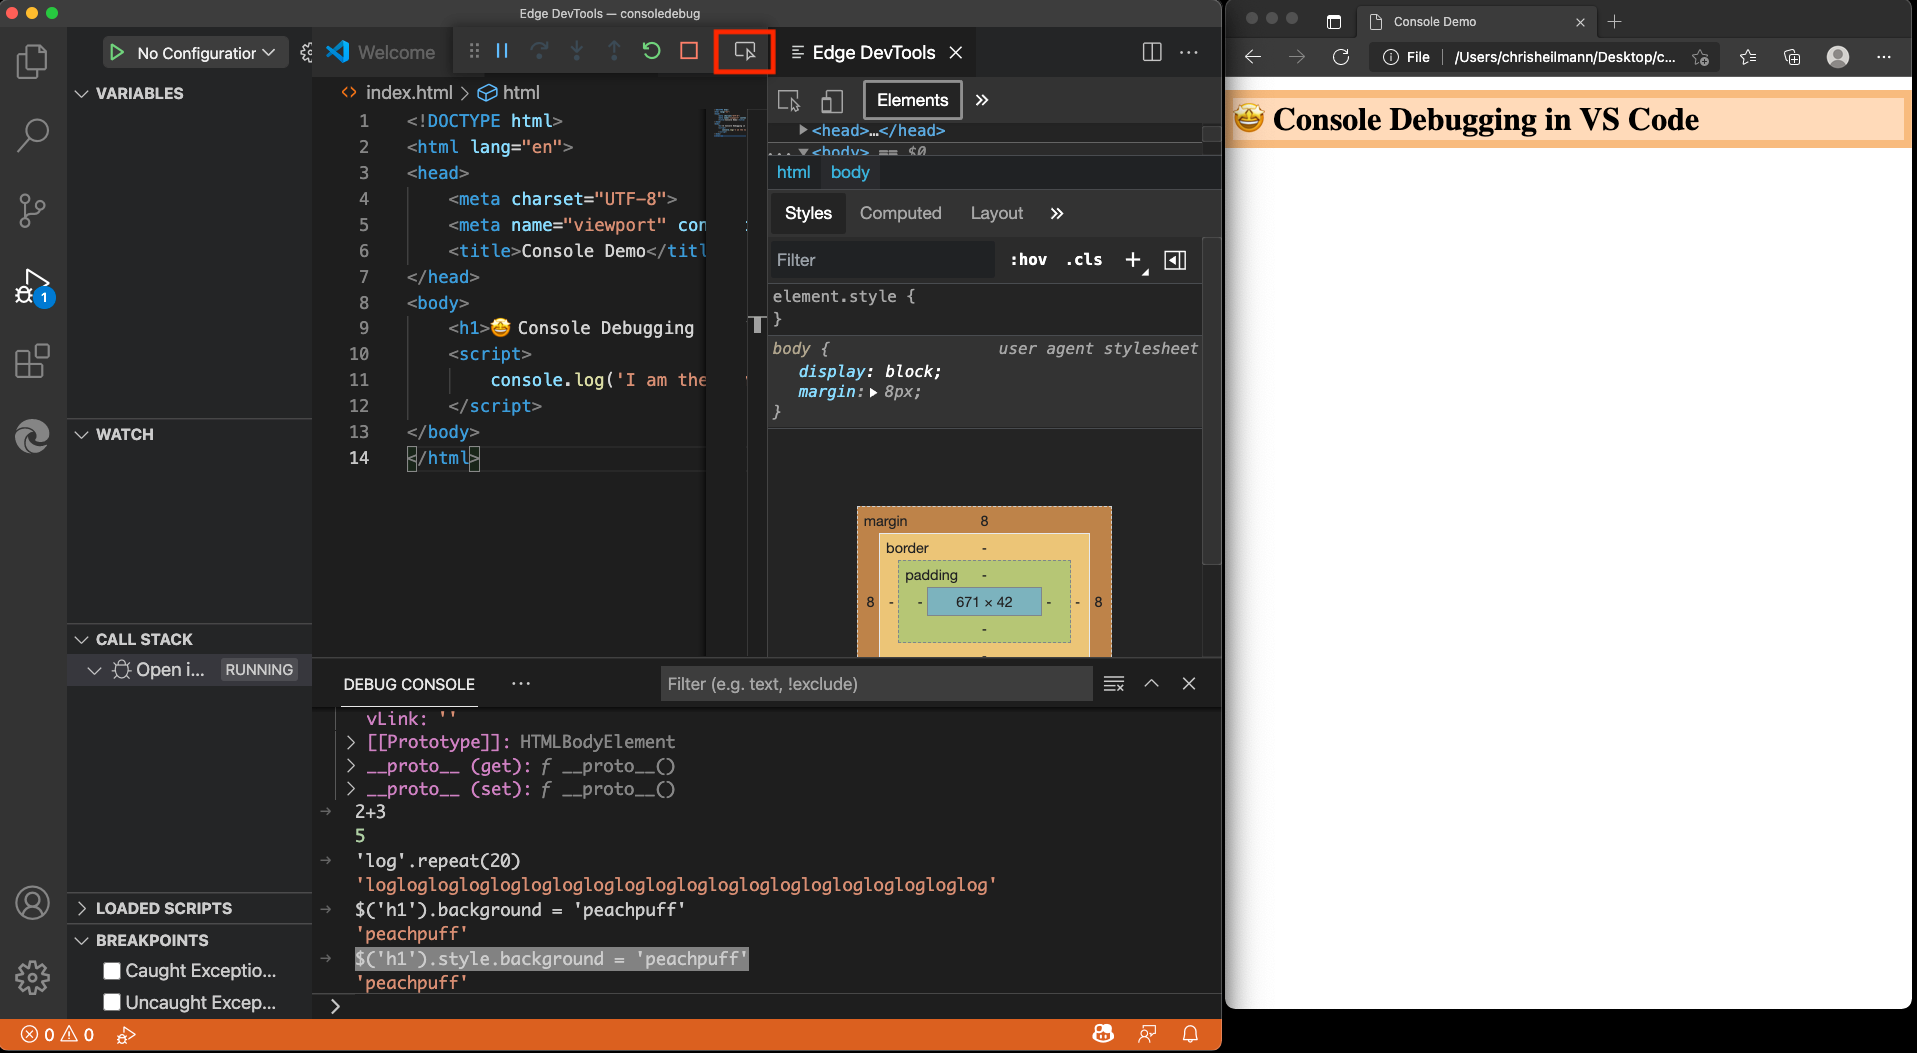
If you use Edge as your debugging browser, you also get something extra. Hitting the Inspect button on the debug bar will open the Developer Tools Elements and Network right inside your editor.

My other work:
Christian Heilmann is the blog of Christian Heilmann chris@christianheilmann.com (Please do not contact me about guest posts, I don’t do those!) a Principal Program Manager living and working in Berlin , Germany .
Theme by Chris Heilmann. SVG Icons by Dan Klammer . Hosted by MediaTemple. Powered by Coffee and Spotify Radio.