- How to Connect MySQL Database in Java Using Eclipse Step by Step
- How to Connect MySQL Database in Java Using Eclipse
- Downloading and Installing Eclipse
- Creating a Database and Table in MySQL
- Creating a Java Project in Eclipse
- Adding MySQL connector jar file in Eclipse
- Connecting Java Program with MySQL Database | JDBC Connection
- Establishing a Connection
- Using the DriverManager Class
- Specifying Database Connection URLs
- Java DB Database Connection URLs
- MySQL Connector/J Database URL
How to Connect MySQL Database in Java Using Eclipse Step by Step
Hello guys, Welcome to another tutorial, and in this tutorial, we will learn how to connect MySQL database in Java using Eclipse with simple and easy steps. Most of the time, whenever we try to connect our program to the database, we face a lot of problems, and even then, we cannot connect successfully. But if you follow this tutorial properly, you will be able to connect your Java program to the MySQL database using Eclipse quite easily.
So Let’s start our tutorial on How to Connect MySQL Database in Java using Eclipse or can say JDBC Connection in Eclipse with MySQL Database.
Watch Video Tutorial
How to Connect MySQL Database in Java Using Eclipse
- 1 How to Connect MySQL Database in Java Using Eclipse
- 1.1 Downloading and Installing Eclipse
- 1.2 Creating a Database and Table in MySQL
- 1.3 Creating a Java Project in Eclipse
- 1.4 Adding MySQL connector jar file in Eclipse
- 1.5 Connecting Java Program with MySQL Database | JDBC Connection
- 1.6 Inserting Data into The MySQL Database using Java
- 1.7 Updating Data in The MySQL Database using Java
- 1.8 How to Retrieve Data from MySQL Database in Java Using Eclipse
- 1.9 Deleting Data from the MySQL Database using Java
- 1.10 Conclusion
Downloading and Installing Eclipse
- The very First thing you need to do is to Download and Install Eclipse IDE on your system.
- Open your favorite browser and go to the official website of Eclipse www.eclipse.org.
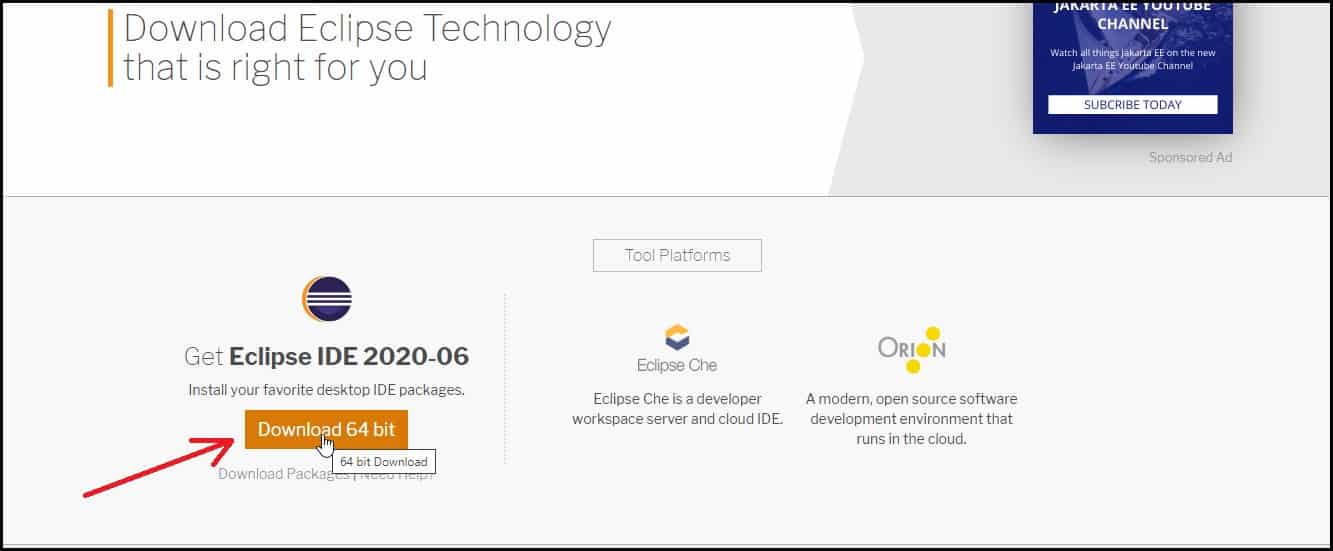
- When you enter the official website of the eclipse, you will see a download button in the top right corner. Click on that.

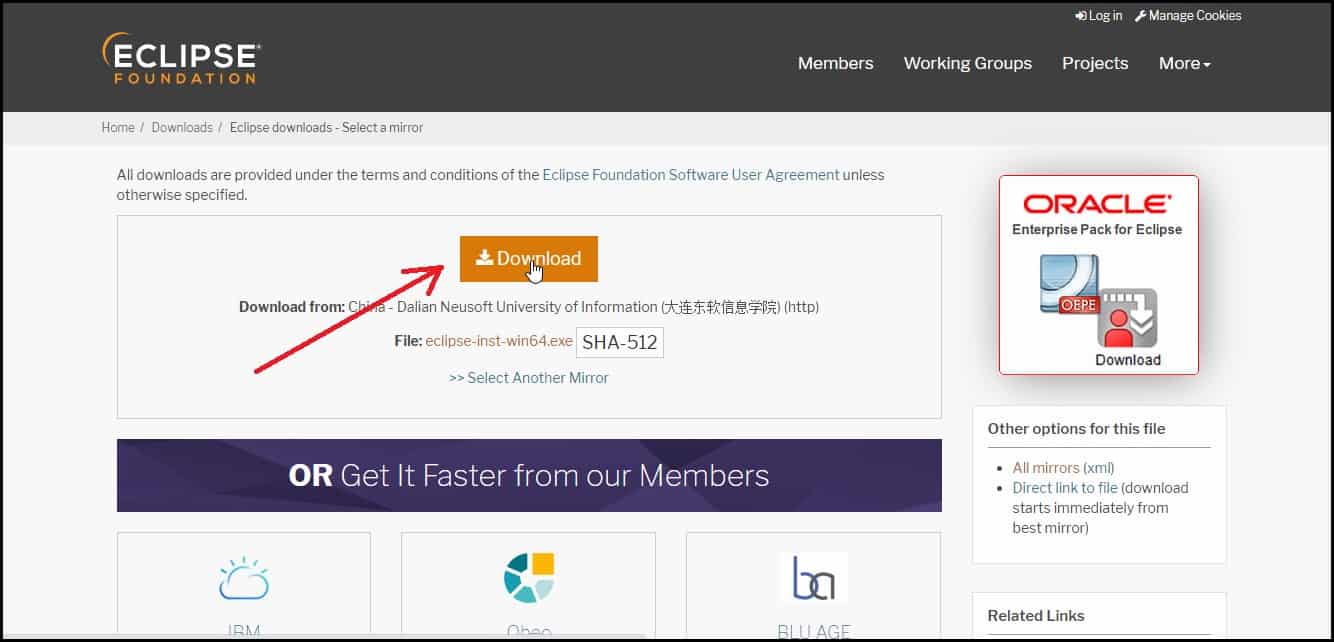
- After clicking on the Download Button, you will be redirected to another Web page. Click on the download button, as shown in the figure below.
- Now again, click on the Download button to download the executable eclipse file.
- After downloading the file, you need to install it in your system in the same way you install any application.
- In the next steps, we will see how to connect Eclipse to MySQL Database in Java.
Creating a Database and Table in MySQL
- To create a database and table, you can either choose MySQL command-line client or MySQL workbench, which is nothing but a GUI version of the MySQL console where we can visually design, model, and generates databases.
- If you don’t know how to install MySQL workbench in your system, then you can follow this guide, How to install MySQL Workbench.
- To get to know how to download and Install MySQL in your system so that you can Use MySQL command-line client, you can follow this guide.
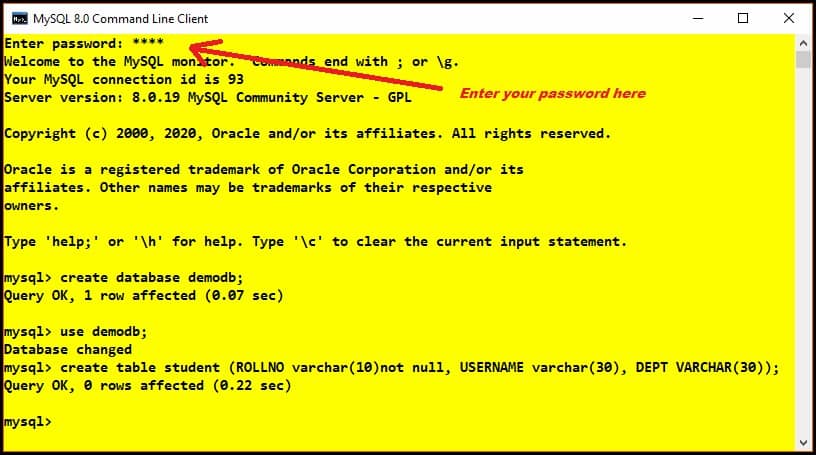
- I will use MySQL command-line client in this tutorial, open MySQL command-line client, and enter your password so that you can connect the MySQL database.
- This is the same password you provided while installing the MySQL database in your system.
- Now create a database named “demodb” and a table named “student” inside it with columns
- ROLLNO
- USERNAME
- DEPT
create table student ( ROLLNO varchar ( 10 ) not null , USERNAME varchar ( 30 ) , DEPT VARCHAR ( 30 ) ) ;
Creating a Java Project in Eclipse
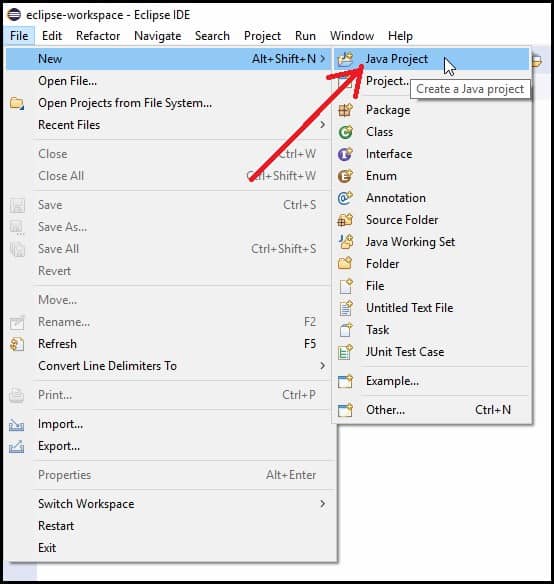
- Open Eclipse IDE and click on the Java Project under the new section of File Menu ( File>>New>>Java Project ).
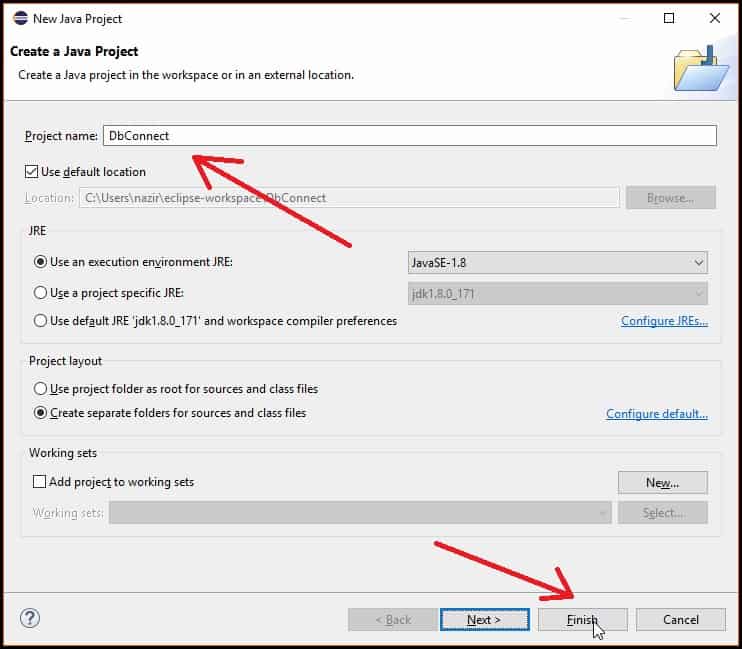
- Now give a name to your project (DbConnect in this example) and click on “Finish”.
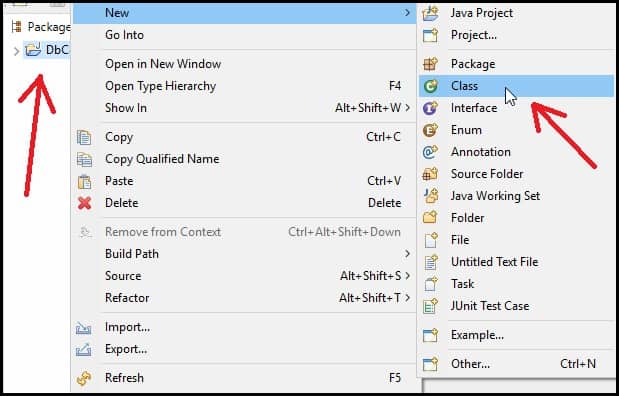
- Now right click on the project and create a new Java class (New>>Class).
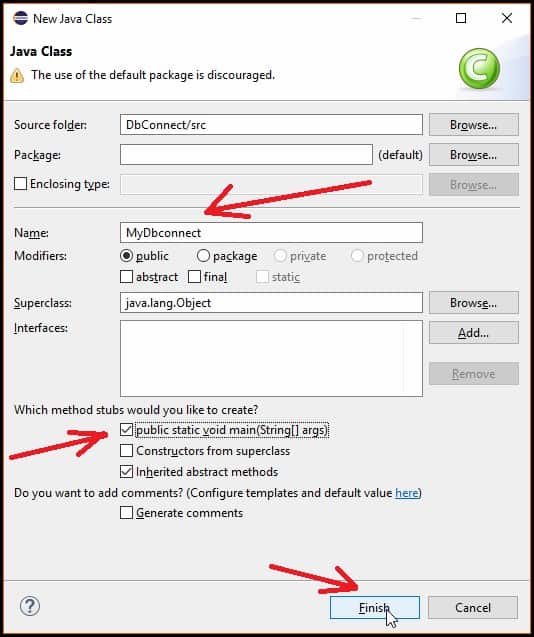
- Now give a name to your class(MyDbconnect in this Example), tick mark on the public static void main(String[] args), and then click on the Finish button as shown in the figure below.
Adding MySQL connector jar file in Eclipse
- In order to connect your java program with MySQL database, you need to include MySQL JDBC driver which is a JAR file, namely mysql-connector-java-8.0.28.jar. The version number in the Jar file can be different. So in this step, we will see how to add MySQL connector jar file in Eclipse.
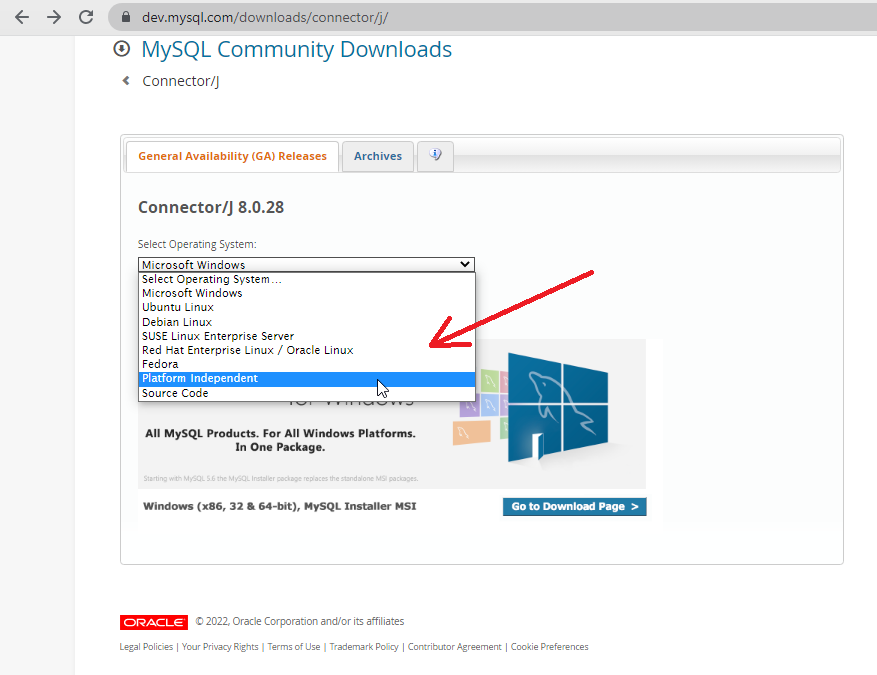
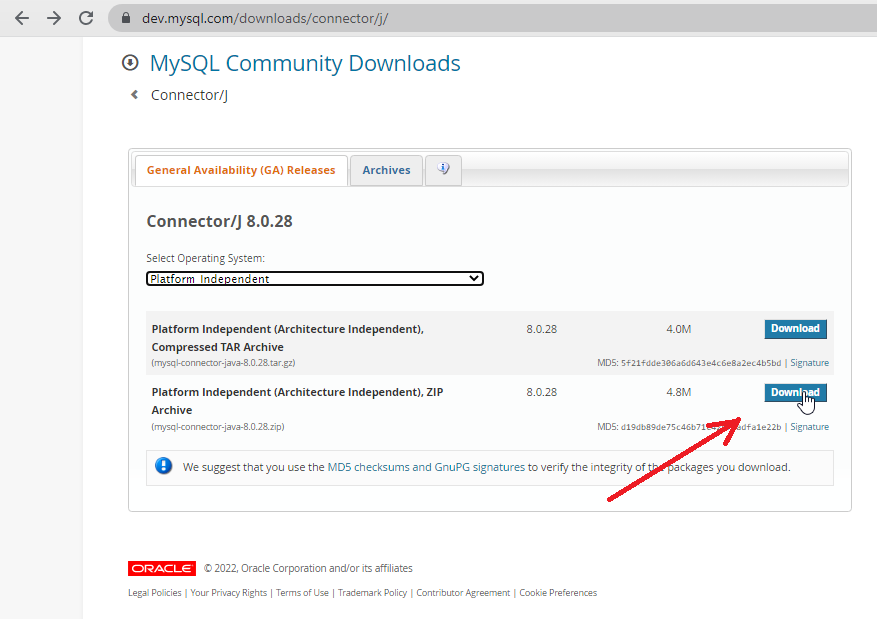
- You can download the latest version of MySQL connector from this link (MySQL Connector Java download) .
- After visiting the link, select platform independent from the drop-down menu as shown in the figure below.
- Then download the Platform Independent (Architecture Independent), ZIP Archive as shown below.
- Extract the zip archive and you will get the jar file.
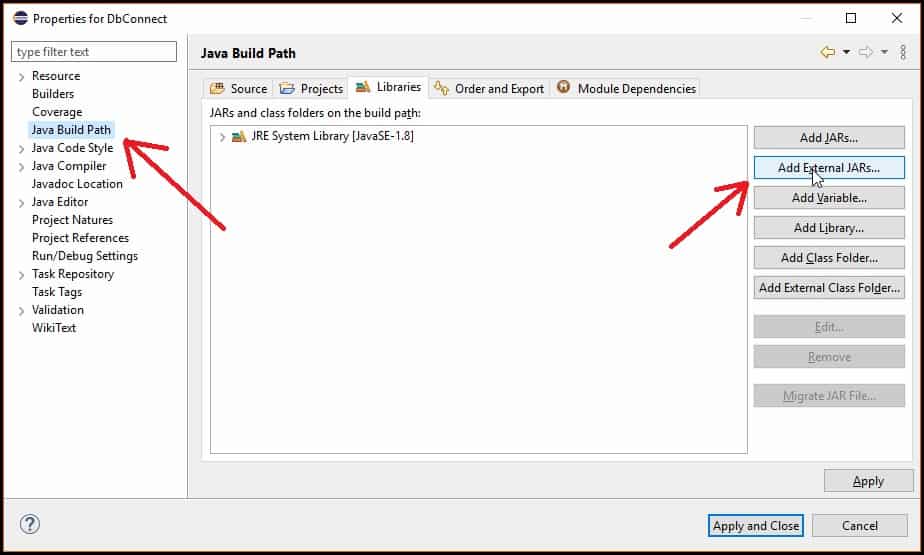
- Next, you have to include this jar file into your program so that you will be able to connect your java program with MySQL database.
- Right-click on the project, go to the properties section then select Java Build Path and click on the Add External JARs button.
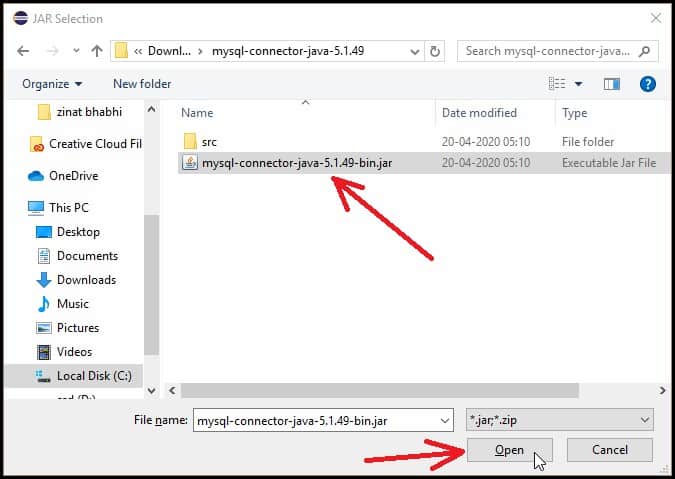
- After clicking on the button a pop-up window will appear where you have to select and open the jar file.
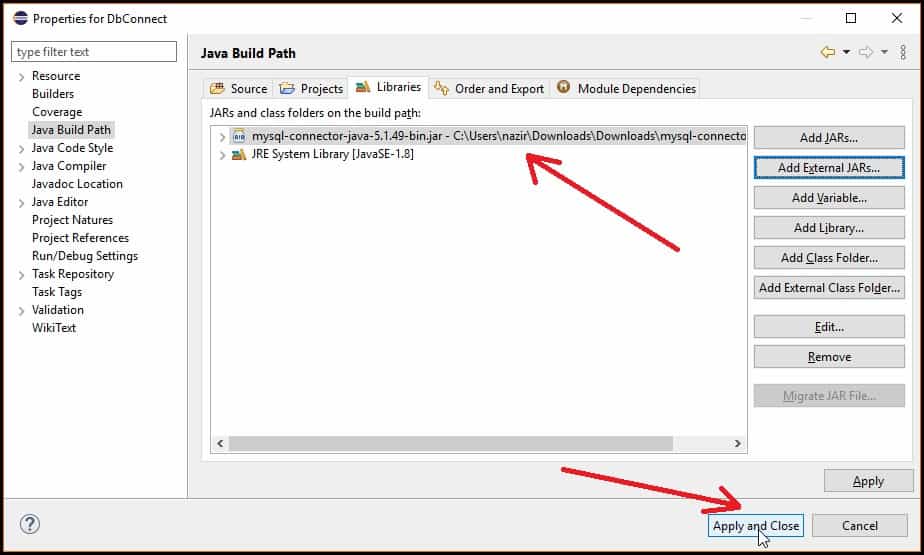
- You can see the added Jar file as shown in the figure below. Now click on the Apply and Close button.
Connecting Java Program with MySQL Database | JDBC Connection
- Establish a connection using DriverManager.getConnection(String URL) and it returns a Connection reference.
- In String URL parameter you have to write like this jdbc:mysql://localhost:3306/demodb”, “root”, “root” where,
Establishing a Connection
First, you need to establish a connection with the data source you want to use. A data source can be a DBMS, a legacy file system, or some other source of data with a corresponding JDBC driver. Typically, a JDBC application connects to a target data source using one of two classes:
- DriverManager : This fully implemented class connects an application to a data source, which is specified by a database URL. When this class first attempts to establish a connection, it automatically loads any JDBC 4.0 drivers found within the class path. Note that your application must manually load any JDBC drivers prior to version 4.0.
- DataSource : This interface is preferred over DriverManager because it allows details about the underlying data source to be transparent to your application. A DataSource object’s properties are set so that it represents a particular data source. See Connecting with DataSource Objects for more information. For more information about developing applications with the DataSource class, see the latest The Java EE Tutorial.
Note: The samples in this tutorial use the DriverManager class instead of the DataSource class because it is easier to use and the samples do not require the features of the DataSource class.
This page covers the following topics:
Using the DriverManager Class
Connecting to your DBMS with the DriverManager class involves calling the method DriverManager.getConnection . The following method, JDBCTutorialUtilities.getConnection , establishes a database connection:
public Connection getConnection() throws SQLException < Connection conn = null; Properties connectionProps = new Properties(); connectionProps.put("user", this.userName); connectionProps.put("password", this.password); if (this.dbms.equals("mysql")) < conn = DriverManager.getConnection( "jdbc:" + this.dbms + "://" + this.serverName + ":" + this.portNumber + "/", connectionProps); >else if (this.dbms.equals("derby")) < conn = DriverManager.getConnection( "jdbc:" + this.dbms + ":" + this.dbName + ";create=true", connectionProps); >System.out.println("Connected to database"); return conn; >The method DriverManager.getConnection establishes a database connection. This method requires a database URL, which varies depending on your DBMS. The following are some examples of database URLs:
- MySQL: jdbc:mysql://localhost:3306/ , where localhost is the name of the server hosting your database, and 3306 is the port number
- Java DB: jdbc:derby:testdb;create=true , where testdb is the name of the database to connect to, and create=true instructs the DBMS to create the database. Note: This URL establishes a database connection with the Java DB Embedded Driver. Java DB also includes a Network Client Driver, which uses a different URL.
This method specifies the user name and password required to access the DBMS with a Properties object.
- Typically, in the database URL, you also specify the name of an existing database to which you want to connect. For example, the URL jdbc:mysql://localhost:3306/mysql represents the database URL for the MySQL database named mysql . The samples in this tutorial use a URL that does not specify a specific database because the samples create a new database.
- In previous versions of JDBC, to obtain a connection, you first had to initialize your JDBC driver by calling the method Class.forName . This methods required an object of type java.sql.Driver . Each JDBC driver contains one or more classes that implements the interface java.sql.Driver . The drivers for Java DB are org.apache.derby.jdbc.EmbeddedDriver and org.apache.derby.jdbc.ClientDriver , and the one for MySQL Connector/J is com.mysql.cj.jdbc.Driver . See the documentation of your DBMS driver to obtain the name of the class that implements the interface java.sql.Driver . Any JDBC 4.0 drivers that are found in your class path are automatically loaded. (However, you must manually load any drivers prior to JDBC 4.0 with the method Class.forName .)
The method returns a Connection object, which represents a connection with the DBMS or a specific database. Query the database through this object.
Specifying Database Connection URLs
A database connection URL is a string that your DBMS JDBC driver uses to connect to a database. It can contain information such as where to search for the database, the name of the database to connect to, and configuration properties. The exact syntax of a database connection URL is specified by your DBMS.
Java DB Database Connection URLs
The following is the database connection URL syntax for Java DB:
jdbc:derby:[subsubprotocol:][databaseName][;attribute=value]*
- subsubprotocol specifies where Java DB should search for the database, either in a directory, in memory, in a class path, or in a JAR file. It is typically omitted.
- databaseName is the name of the database to connect to.
- attribute=value represents an optional, semicolon-separated list of attributes. These attributes enable you to instruct Java DB to perform various tasks, including the following:
- Create the database specified in the connection URL.
- Encrypt the database specified in the connection URL.
- Specify directories to store logging and trace information.
- Specify a user name and password to connect to the database.
See Java DB Developer’s Guide and Java DB Reference Manual from Java DB Technical Documentation for more information.
MySQL Connector/J Database URL
The following is the database connection URL syntax for MySQL Connector/J:
jdbc:mysql://[host][,failoverhost. ] [:port]/[database] [?propertyName1][=propertyValue1] [&propertyName2][=propertyValue2].
- host:port is the host name and port number of the computer hosting your database. If not specified, the default values of host and port are 127.0.0.1 and 3306, respectively.
- database is the name of the database to connect to. If not specified, a connection is made with no default database.
- failover is the name of a standby database (MySQL Connector/J supports failover).
- propertyName=propertyValue represents an optional, ampersand-separated list of properties. These attributes enable you to instruct MySQL Connector/J to perform various tasks.