- HTML Introduction
- What is HTML?
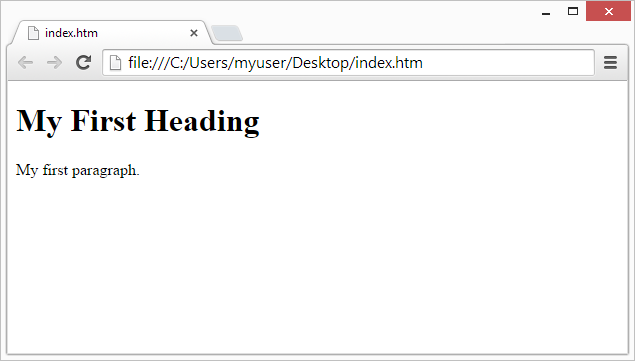
- A Simple HTML Document
- Example
- My First Heading
- Example Explained
- What is an HTML Element?
- Web Browsers
- HTML Page Structure
- This is a heading
- HTML History
- WRITER’S NAME
- TITLE OF WORK
- 1912
- What’s New? report template
- Links to the zips, templates and CSS files
- Further topics
- Using links in documents
- Tables
HTML Introduction
HTML is the standard markup language for creating Web pages.
What is HTML?
- HTML stands for Hyper Text Markup Language
- HTML is the standard markup language for creating Web pages
- HTML describes the structure of a Web page
- HTML consists of a series of elements
- HTML elements tell the browser how to display the content
- HTML elements label pieces of content such as «this is a heading», «this is a paragraph», «this is a link», etc.
A Simple HTML Document
Example
My First Heading
My first paragraph.
Example Explained
- The declaration defines that this document is an HTML5 document
- The element is the root element of an HTML page
- The element contains meta information about the HTML page
- The element specifies a title for the HTML page (which is shown in the browser’s title bar or in the page’s tab)
- The element defines the document’s body, and is a container for all the visible contents, such as headings, paragraphs, images, hyperlinks, tables, lists, etc.
- The element defines a large heading
- The
element defines a paragraph
What is an HTML Element?
An HTML element is defined by a start tag, some content, and an end tag:
The HTML element is everything from the start tag to the end tag:
Note: Some HTML elements have no content (like the
element). These elements are called empty elements. Empty elements do not have an end tag!
Web Browsers
The purpose of a web browser (Chrome, Edge, Firefox, Safari) is to read HTML documents and display them correctly.
A browser does not display the HTML tags, but uses them to determine how to display the document:
HTML Page Structure
Below is a visualization of an HTML page structure:
This is a heading
This is another paragraph.
Note: The content inside the section will be displayed in a browser. The content inside the element will be shown in the browser’s title bar or in the page’s tab.
HTML History
Since the early days of the World Wide Web, there have been many versions of HTML:
| Year | Version |
|---|---|
| 1989 | Tim Berners-Lee invented www |
| 1991 | Tim Berners-Lee invented HTML |
| 1993 | Dave Raggett drafted HTML+ |
| 1995 | HTML Working Group defined HTML 2.0 |
| 1997 | W3C Recommendation: HTML 3.2 |
| 1999 | W3C Recommendation: HTML 4.01 |
| 2000 | W3C Recommendation: XHTML 1.0 |
| 2008 | WHATWG HTML5 First Public Draft |
| 2012 | WHATWG HTML5 Living Standard |
| 2014 | W3C Recommendation: HTML5 |
| 2016 | W3C Candidate Recommendation: HTML 5.1 |
| 2017 | W3C Recommendation: HTML5.1 2nd Edition |
| 2017 | W3C Recommendation: HTML5.2 |
This tutorial follows the latest HTML5 standard.
WRITER’S NAME
TITLE OF WORK
1912
Written: November–December 1911
Published: February 1912
Translation: T. T. (from Esperanto)
Source: TITLE OF WORK , Workers’ Publishing Cooperative, 2nd edition, Paris 1912
Digitalisation: N. N.
Proof-reading: N. N.
HTML: N. N.
The changes you need to make in this section of the file are hopefully clear. You just need to fill in the bibliographical data on the text you’re working on, to the extent that the information is available in the book, article etc. The lines that are not applicable can be deleted; for example, a text that is not a translation doesn’t need a line about translation. A more detailed guide on the information going here can be found on this page.
Finally, the text in blue in the box above is a comment. You can make your own comments by starting a line with . These markers and everything in between will be a comment, and will not be visible in the normal browser view. You can also «comment out» parts of your text or code this way if you want to hide it temporarily, try out something etc.
You should paste the text you’re working on under the comment text above, and you should use the skills you learn during this tutorial to change the appearance of the text. After the text, there’s still one section that needs to be looked at.
There’s three bits here to consider. The easiest is the name of the link to the author’s archive main page. The two other bits are the relative locations of the mentioned files in the directory structure to the file that you’re working on currently. Like above, you should refer to the section below on this question.
That’s it for work-template.htm . Basically, copy your text in between these two sections, change the relevant information, and figure out the proper relative paths. The best way in the beginning is to just try some relative path, save the file, open the page in your browser and see if the link takes you where you want to go, while referring to the section on links below. This test method is one of the advantages of having the complete directory structure for the author on your own computer.
What’s New? report template
In addition to the text templates, the zip includes also the following file: my-mia-work/whats-new/whats-new/whatsnew-template.htm . When you finish a text you’re working on, you should fill in the template’s required fields (i.e. replace the example entries) — the date you uploaded the work, the name of the archive, other information for the work in question, and the name(s) of whoever took part in preparing the text for publication on MIA. You can also check out MIA’s What’s New? page for actual examples of entries to the page.
After inserting the relevant information in the template, open the file in your browser and click the links to test that the relative links actually point to the intended files, then send the file as an email attachment to David Walters every time you upload something new into the archive (you can also finish a number of works before sending in a report, rather than sending a separate report for each work). David will add it to our What’s New? page. As of December 2018, MIA’s What’s New? newsletter has almost 30,000 subscribers and it’s an important record of how the archive has grown over the years, so be sure to send David the information!
Links to the zips, templates and CSS files
Further topics
If you’re a beginner, you should first wrap your head around the stuff in the previous sections and take some time to put what you’ve learning into practice by preparing materials for uploading on MIA. Once you’re comfortable doing that (and if your mentor has accepted your HTML markup quality), you can proceed further. However, you can do most work for MIA with just what you’ve learned above.
Using links in documents
In a previous section you learned about anchors (links), and you also heard about going back and forth in the directory structure. Now that we’ve opened up the zip package and had a look at its contents, it’s time to take up one more complex topic: the kind of links you should put into documents published on MIA. While in principle linking to external websites is fine, mostly there’s no need to. However, all links that are made to documents on MIA should be relative, not absolute.
An absolute link to a document on MIA would look like this: https://www.marxists.org/archive/example-writer/1912/our-present-tasks.htm . This should never be used. Instead you should use relative links, the exact form of which depends on where the document with the link is in the directory structure.
If your document is in the directory my-mia-work/archive/example-writer/ , and you want to refer to the file some-file.htm in my-mia-work/archive/example-writer/1918/01/ , then your relative link looks like this:
The directory 1918 is in the same directory as your current document, so it’s kind of intuitive to understand that this is the way it’s done. However, what if you need to go back a directory level or two?
Let’s say your document is in the directory my-mia-work/archive/example-writer/1918/01/ and you need to refer to the works.css file that is in the directory my-mia-work/css/ . This is important, because at the start of every htm file you prepare for publication, you must make sure that the document finds the css file which contains the styles used in your document. Depending on where your document is located in the directory structure, the relative address of the css file changes, and you must take this change into account in your document.
So you’d need to go back four directory levels, then descend into the directory css and find the file works.css file there. Here’s how it’s done:
In other words, while there is no «special» way to go down a directory level (just write the name of the subdirectory), the way to go upwards a directory level is ../ — i.e. two dots and a forward slash.
Let’s try another way to figure this out in practice. Open the directory my-mia-work/archive/example-writer/1918/01/ in your computer’s file manager. Now, start going back directory levels in the file manager. Count how many levels you need to go up before you find the directory my-mia-work/css/ . It’s four. That’s how many ../ entries you need to add to the relative path in a file in my-mia-work/archive/example-writer/1918/01/ that needs to refer to the file my-mia-work/css/works.css .
Tables
If you do lots of markup, eventually you’ll come across works that have tables — and lots of them. After this section you should be able to make relatively complex tables.
Here’s an example of a table source code.
| First row, first cell | First row, second cell | First row, third cell |
| Second row, first cell | Second row, second cell | Second row, third cell |
| Third row, first cell | Third row, second cell | Third row, third cell |
. and here’s how it looks like in the browser:
| First row, first cell | First row, second cell | First row, third cell |
| Second row, first cell | Second row, second cell | Second row, third cell |
| Third row, first cell | Third row, second cell | Third row, third cell |
| First row, first cell | First row, second cell | First row, third cell |
| Second row, first cell | Second row, second cell | Second row, third cell |
| Third row, first cell | Third row, second cell | Third row, third cell |
In other words, instead of being on three separate rows, the three pairs are one the same (source file) row, one directly after the other:
. Even the row tags are on the same line.
However, you should always aim at writing clear and «human-readable» HTML markup, and not write everything in one line just because it has no effect how it appears in the browser. Most probably you won’t be looking after the pages you’ve made yourself forever, so others will need to be able to read what you’ve written. So it’s a good idea to make their work easier!
The example table is with borders around each cell. This is good for tables with lots of rows and columns, especially ones where cells span multiple rows and/or columns. Consider the table at this link. It would be a lot more difficult to read if there was no borders around the cells, as it would be unclear just which columns the headings should refer to. But simple tables (like this one) do fine without borders. For a table without borders, just leave out the class=»border» everywhere in the table:
| First row, first cell | First row, second cell | First row, third cell |
| Second row, first cell | Second row, second cell | Second row, third cell |
| Third row, first cell | Third row, second cell | Third row, third cell |
. and it will look like this:
| First row, first cell | First row, second cell | First row, third cell |
| Second row, first cell | Second row, second cell | Second row, third cell |
| Third row, first cell | Third row, second cell | Third row, third cell |
| Left | Center | Center |
| Left | Center | Center |
| Left | Center | Center |
| Left | Center | Center |
| Left | Center | Center |
| Left | Center | Center |
A cell can be made to span more than one column with the attribute colspan red»>x » , where x is the number of columns you want the cell to span; the attribute for rows is, similarly, rowspan red»>x » . So, if you want a table where one cell spans two rows and two columns, you’d write:
| First and second row, first cell | First row, second cell | |
| Second row, second cell | ||
| Third row, first cell | Third row, second cell | Third row, third cell |
. and it will look like this:
| First and second row, first cell | First row, second cell | |
| Second row, second cell | ||
| Third row, first cell | Third row, second cell | Third row, third cell |
| 1st row, 1st cell | 1st row, 2nd cell | 1st row, 3rd cell |
| 2nd row, 1st cell | 2nd row, 2nd cell | 2nd row, 3rd cell |
| 3rd row, 1st cell | 3rd row, 2nd cell | 3rd row, 3rd cell |
| 4th row, 1st cell | 4th row, 2nd cell | 4th row, 3rd cell |
| 5th row, 1st cell | 5th row, 2nd cell | 5th row, 3rd cell |
This example table is probably too small to merit an alternate colour on every other line in actual practice, but if you have a look at this page, for example, maybe you can see how alternate colouring might help keep contents in their own line.