- Флажки
- Элементы формы html флажок
- Value
- Additional attributes
- Using checkbox inputs
- Handling multiple checkboxes
- Checking boxes by default
- Providing a bigger hit area for your checkboxes
- Indeterminate state checkboxes
- Validation
- Examples
- HTML
- CSS
- JavaScript
- Technical summary
- Specifications
- Browser compatibility
- See also
- Found a content problem with this page?
- MDN
- Support
- Our communities
- Developers
- Элементы формы html флажок
- Флажок
- Изучаемые технологии
- Переключатели
- Укажите пол
- Выберите технологию
Флажки
Флажки (жарг. чекбоксы) используют, когда необходимо выбрать произвольное количество вариантов из предложенных или поставить галочку в одном пункте. Если требуется выбор одного варианта из нескольких, то для этого следует предпочесть переключатели (radiobutton). Флажок создается следующим образом.
Атрибуты флажков перечислены в табл. 1.
| Атрибут | Описание |
|---|---|
| name | Имя флажка для идентификации поля. |
| disabled | Блокирует флажок для выбора. |
| form | Идентификатор формы для связывания флажка с элементом . |
| type | Для флажка значение должно быть checkbox . |
| checked | Предварительное выделение флажка. |
| value | Задаёт, какой текст будет отправлен на сервер. |
| autofocus | Элемент получает фокус после загрузки документа. |
| required | Перед отправкой формы обязательно следует поставить галочку. |
Как обычно, флажки нельзя вкладывать внутрь ссылок и кнопок.
Использование флажков показано в примере 1.
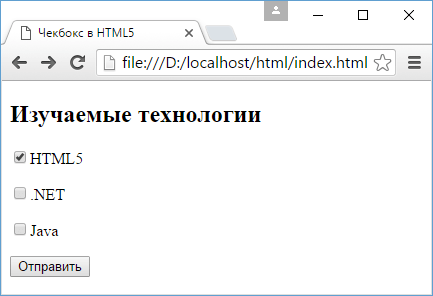
Пример 1. Создание флажков
Поскольку флажки здесь являются одной группой, то значение атрибута name у них одинаковое. В результате получим следующее (рис. 1).

Рис. 1. Вид флажков в браузере
Элементы формы html флажок
Note: Radio buttons are similar to checkboxes, but with an important distinction — same-named radio buttons are grouped into a set in which only one radio button can be selected at a time, whereas checkboxes allow you to turn single values on and off. Where multiple same-named controls exist, radio buttons allow one to be selected out of them all, whereas checkboxes allow multiple values to be selected.
Value
A string representing the value of the checkbox. This is not displayed on the client-side, but on the server this is the value given to the data submitted with the checkbox’s name . Take the following example:
form> div> input type="checkbox" id="subscribeNews" name="subscribe" value="newsletter" /> label for="subscribeNews">Subscribe to newsletter?label> div> div> button type="submit">Subscribebutton> div> form>
In this example, we’ve got a name of subscribe , and a value of newsletter . When the form is submitted, the data name/value pair will be subscribe=newsletter .
If the value attribute was omitted, the default value for the checkbox is on , so the submitted data in that case would be subscribe=on .
Note: If a checkbox is unchecked when its form is submitted, neither the name nor the value is submitted to the server. There is no HTML-only method of representing a checkbox’s unchecked state (e.g. value=unchecked ). If you wanted to submit a default value for the checkbox when it is unchecked, you could include JavaScript to create a within the form with a value indicating an unchecked state.
Additional attributes
A boolean attribute indicating whether this checkbox is checked by default (when the page loads). It does not indicate whether this checkbox is currently checked: if the checkbox’s state is changed, this content attribute does not reflect the change. (Only the HTMLInputElement ‘s checked IDL attribute is updated.)
Note: Unlike other input controls, a checkbox’s value is only included in the submitted data if the checkbox is currently checked . If it is, then the value of the checkbox’s value attribute is reported as the input’s value, or on if no value is set. Unlike other browsers, Firefox by default persists the dynamic checked state of an across page loads. Use the autocomplete attribute to control this feature.
Using checkbox inputs
We already covered the most basic use of checkboxes above. Let’s now look at the other common checkbox-related features and techniques you’ll need.
Handling multiple checkboxes
The example we saw above only contained one checkbox; in real-world situations you’ll be likely to encounter multiple checkboxes. If they are completely unrelated, then you can just deal with them all separately, as shown above. However, if they’re all related, things are not quite so simple.
For example, in the following demo we include multiple checkboxes to allow the user to select their interests (see the full version in the Examples section).
fieldset> legend>Choose your interestslegend> div> input type="checkbox" id="coding" name="interest" value="coding" /> label for="coding">Codinglabel> div> div> input type="checkbox" id="music" name="interest" value="music" /> label for="music">Musiclabel> div> fieldset>
In this example you will see that we’ve given each checkbox the same name . If both checkboxes are checked and then the form is submitted, you’ll get a string of name/value pairs submitted like this: interest=coding&interest=music . When this string reaches the server, you need to parse it other than as an associative array, so all values, not only the last value, of interest are captured. For one technique used with Python, see Handle Multiple Checkboxes with a Single Serverside Variable, for example.
Checking boxes by default
To make a checkbox checked by default, you give it the checked attribute. See the below example:
fieldset> legend>Choose your interestslegend> div> input type="checkbox" id="coding" name="interest" value="coding" checked /> label for="coding">Codinglabel> div> div> input type="checkbox" id="music" name="interest" value="music" /> label for="music">Musiclabel> div> fieldset>
Providing a bigger hit area for your checkboxes
Beyond accessibility, this is another good reason to properly set up elements on your forms.
Indeterminate state checkboxes
In addition to the checked and unchecked states, there is a third state a checkbox can be in: indeterminate. This is a state in which it’s impossible to say whether the item is toggled on or off. This is set using the HTMLInputElement object’s indeterminate property via JavaScript (it cannot be set using an HTML attribute):
A checkbox in the indeterminate state has a horizontal line in the box (it looks somewhat like a hyphen or minus sign) instead of a check/tick in most browsers.
There are not many use cases for this property. The most common is when a checkbox is available that «owns» a number of sub-options (which are also checkboxes). If all of the sub-options are checked, the owning checkbox is also checked, and if they’re all unchecked, the owning checkbox is unchecked. If any one or more of the sub-options have a different state than the others, the owning checkbox is in the indeterminate state.
This can be seen in the below example (thanks to CSS Tricks for the inspiration). In this example we keep track of the ingredients we are collecting for a recipe. When you check or uncheck an ingredient’s checkbox, a JavaScript function checks the total number of checked ingredients:
- If none are checked, the recipe name’s checkbox is set to unchecked.
- If one or two are checked, the recipe name’s checkbox is set to indeterminate .
- If all three are checked, the recipe name’s checkbox is set to checked .
So in this case the indeterminate state is used to state that collecting the ingredients has started, but the recipe is not yet complete.
const overall = document.querySelector("#enchantment"); const ingredients = document.querySelectorAll("ul input"); overall.addEventListener("click", (e) => e.preventDefault(); >); for (const ingredient of ingredients) ingredient.addEventListener("click", updateDisplay); > function updateDisplay() let checkedCount = 0; for (const ingredient of ingredients) if (ingredient.checked) checkedCount++; > > if (checkedCount === 0) overall.checked = false; overall.indeterminate = false; > else if (checkedCount === ingredients.length) overall.checked = true; overall.indeterminate = false; > else overall.checked = false; overall.indeterminate = true; > >
Note: If you submit a form with an indeterminate checkbox, the same thing happens as if the checkbox were unchecked — no data is submitted to represent the checkbox.
Validation
Checkboxes do support validation (offered to all s). However, most of the ValidityState s will always be false . If the checkbox has the required attribute, but is not checked, then ValidityState.valueMissing will be true .
Examples
The following example is an extended version of the «multiple checkboxes» example we saw above — it has more standard options, plus an «other» checkbox that when checked causes a text field to appear to enter a value for the «other» option. This is achieved with a simple block of JavaScript. The example includes implicit labels, with the directly inside the . The text input, without a visible label, includes the aria-label attribute which provides its accessible name. This example also includes some CSS to improve the styling.
HTML
form> fieldset> legend>Choose your interestslegend> div> label> input type="checkbox" id="coding" name="interest" value="coding" /> Coding label> div> div> label> input type="checkbox" id="music" name="interest" value="music" /> Music label> div> div> label> input type="checkbox" id="art" name="interest" value="art" /> Art label> div> div> label> input type="checkbox" id="sports" name="interest" value="sports" /> Sports label> div> div> label> input type="checkbox" id="cooking" name="interest" value="cooking" /> Cooking label> div> div> label> input type="checkbox" id="other" name="interest" value="other" /> Other label> input type="text" id="otherValue" name="other" aria-label="Other interest" /> div> div> button type="submit">Submit formbutton> div> fieldset> form>
CSS
html font-family: sans-serif; > form width: 600px; margin: 0 auto; > div margin-bottom: 10px; > fieldset background: cyan; border: 5px solid blue; > legend padding: 10px; background: blue; color: cyan; > JavaScript
const otherCheckbox = document.querySelector("#other"); const otherText = document.querySelector("#otherValue"); otherText.style.visibility = "hidden"; otherCheckbox.addEventListener("change", () => if (otherCheckbox.checked) otherText.style.visibility = "visible"; otherText.value = ""; > else otherText.style.visibility = "hidden"; > >);
Technical summary
Specifications
Browser compatibility
BCD tables only load in the browser
See also
- :checked , :indeterminate : CSS selectors that let you style checkboxes based on their current state
- HTMLInputElement : HTML DOM API that implements the element
- CSS property compatibility table for form controls
Found a content problem with this page?
This page was last modified on Jun 13, 2023 by MDN contributors.
Your blueprint for a better internet.
MDN
Support
Our communities
Developers
Visit Mozilla Corporation’s not-for-profit parent, the Mozilla Foundation.
Portions of this content are ©1998– 2023 by individual mozilla.org contributors. Content available under a Creative Commons license.
Элементы формы html флажок

Флажок
Флажок представляет элемент, который может находиться в двух состояниях: отмеченном и неотмеченном. Флажок создается с помощью элемента input с атрибутом type=»checkbox» :
Изучаемые технологии
Атрибут checked позволяет установить флажок в отмеченное состояние.
Переключатели
Переключатели или радиокнопки похожи на флажки, они также могут находиться в отмеченном или неотмеченном состоянии. Только для переключателей можно создать одну группу, в которой одновременно можно выбрать только один переключатель. Например:
Для создания радиокнопки надо указать атрибут type=»radio» . И теперь другой атрибут name указывает не на имя элемента, а на имя группы, к которой принадлежит элемент-радиокнопка. В данном случае у нас две группы радиокнопок: gender и tech . Из каждой группы мы можем выбрать только один переключатель. Опять же чтобы отметить радиокнопку, у нее устанавливается атрибут checked :
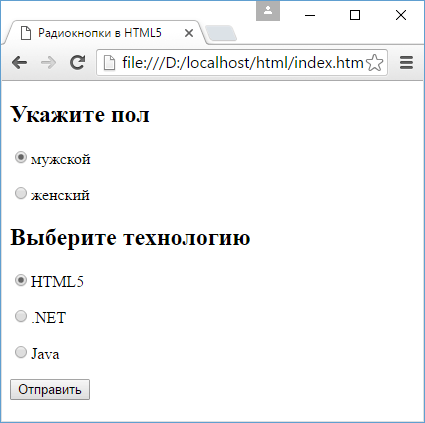
Важное значение играет атрибут value , который при отправке формы позволяет серверу определить, какой именно переключатель был отмечен: