- Checkbox Validation in Javascript
- Introduction
- Checkbox Validation In Javascript
- Creating an HTML Checkbox
- Adding the Javascript Code
- Using addEventListener()
- Multiple Checkbox Validation in Javascript
- Conclusion
- Validate Checkbox in JavaScript
- Use the checked Property to Validate the Checkbox in JavaScript
- Related Article — JavaScript Checkbox
Checkbox Validation in Javascript

Checkboxes are square-shaped boxes and can be used as a form of input to get information like survey opinions, favorites, etc. These checkboxes can be used when there are few options for the user to select and in cases where the user can select multiple choices as input. The checkbox is marked with a tick symbol when it is selected by the user. The concept of checkbox validation is to check whether the checkbox is marked as selected by the user using javascript.
Introduction
Checkboxes are widely used to get input from users on web pages. Validating a checkbox is important to ensure that any of the checkboxes are selected and also to find which checkbox is selected by the user. Checkboxes are usually used at the end of agreements as an option to accept the agreement on the website, and they are also used in questions where more than one option is a possible answer.
Checkbox Validation In Javascript
- A checkbox is an input component with a type named checkbox . The input tag also has optional attributes such as id and name .
- There is a need to select the checkbox in the DOM to validate the checkbox using javascript.
- The document.getElementById(); method can be used to select the checkbox in the DOM using the name specified in the id attribute in the input tag. The syntax of document.getElementById(); method is,
The method returns an element that represents the HTML elements present in the DOM. This element will have access to all the properties and methods present in the HTML elements, such as color , style , width , etc.
- We can use the checked property present in the checkbox element to validate whether a checkbox is selected are not. This checked property returns true if the checkbox is marked with a tick and returns false if the checkbox is not marked with a tick and this property can be accessed by the Element returned by the getElementById method.
- An if..else condition can be used combined with the above property to validate the checkbox with the click of a button.
The DOM(Document Object Model) is a data representation of all the elements present in the webpage. The DOM provides an interface to modify and change the document structure of the web page. The elements in DOM are represented as nodes and objects. All the methods that allow the selection of elements from HTML such as getElementbyId() , querySelectorAll are present in the DOM.
Creating an HTML Checkbox
A checkbox in HTML can be created by using the input tag specified with the type=»checkbox» . The syntax for creating a checkbox in HTML is,
The other optional attributes are as follows,
- The id attributes are used to represent the checkbox with a unique name.
- The name
- The value attribute is the value associated with the checkbox which will be sent to the server after pressing the submit button.
Usually, a label tag is used to give the values that are printed next to the checkbox. A label tag has the following syntax,
This value CLICK will be displayed next to the checkbox.
There are also a few other optional attributes that can be specified in the checkbox,
- The required attribute can be used in cases when the checkbox element is present inside a form element to apply the constraint that the checkbox must be selected before submitting the form using the button of type submit .
- The checked attribute can be used to mark the check box as checked by default on loading the page.
The following HTML code can be used to create a checkbox,
The above example creates a simple checkbox at the top left corner of the screen. The output for the above example is displayed below,


Adding the Javascript Code
Consider the case in which the user has to accept an agreement and a checkbox is used for the purpose; the javascript code to select the checkbox element from DOM and validate it is given in the script section of the following code,
The above example checks whether a checkbox is checked or not by using the checked property of the input of type checkbox element selected from the DOM using the document.getElementById() method. The checked method returns true if the checkbox is marked as checked and returns false if the checkbox is not marked as selected. The text in the h4 header element is modified by using the innerHTML function, which is used to set the text to be displayed in the browser. The validate() function is called by pressing the Submit button and validating the checkbox. The output is shown in the following images,


While using the form tag in HTML, we can use the required option in the input tag of the checkbox to give a condition that the checkbox must be selected to submit the form.
The above example can also be modified by this method by adding the form tag and the required tag in the input as follows,
The following image shows the output when the required option is used,

Using addEventListener()
The addEventListener() method can be used to add an event with the checkbox, which will invoke a function whenever there is a change of state in the event. The syntax for addEventListener() method is,
The above function applies the event to the complete webpage or the full DOM.
We can also add an event to specific elements that are returned by the getElementbyId method. The syntax for such functions are,
The name_of_Event represent the Event name that is going to be associated with the checkbox. The function_to_be_invoked is the name of the function that will be called whenever there is a state change according to the event. Few mostly used events are,
- click event, which gets invoked by the click of the cursor.
- submit event, which gets invoked by the click of the button with type as submit .
- mouseover event, which gets invoked when the cursor moves over the element on which the event is applied.
- change event, which gets invoked when there is a change of state in the element.
The following code illustrates the use of the addEventListener() method to add an event to the checkbox element, which will call the validate function whenever the state of the checkbox is changed,
In the above example, the button is removed and an event is attached to the checkbox which will call the validate() function whenever the user interacts with the checkbox. The output images for the above example will be,

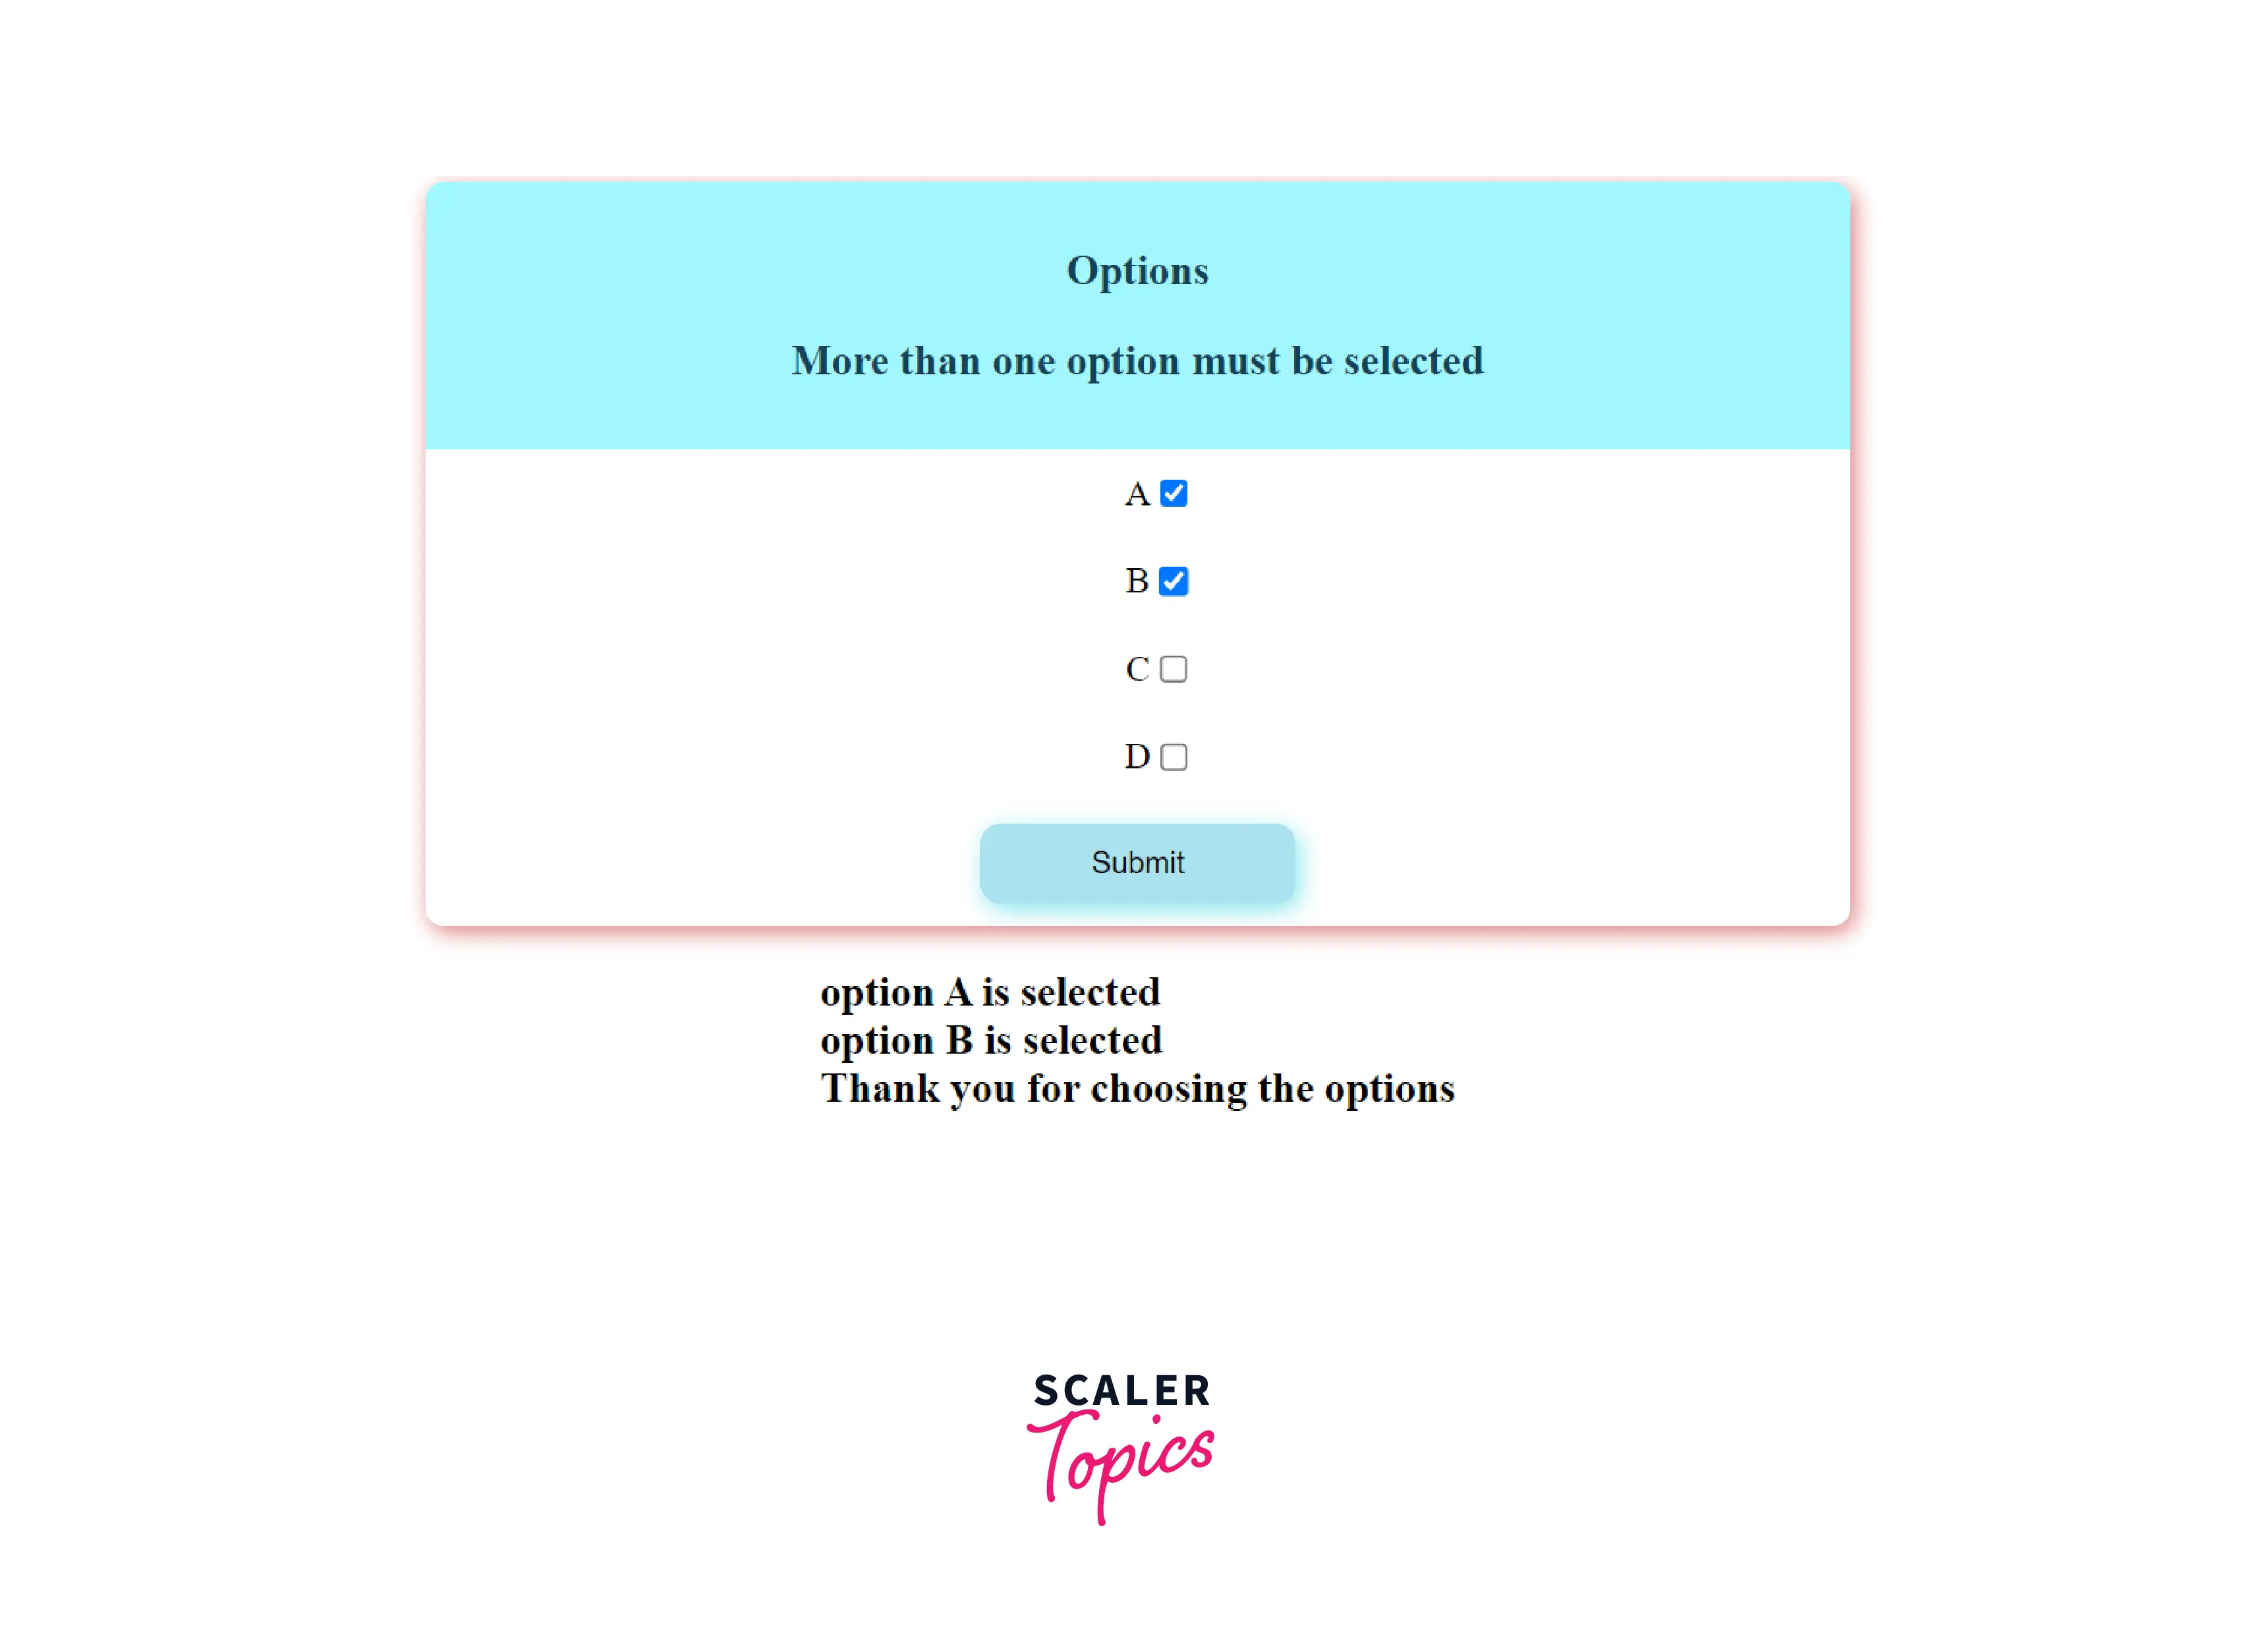
Multiple Checkbox Validation in Javascript
We can also validate multiple checkboxes by creating an array of checkboxes and performing validations on each checkbox in the array using javascript. The following code is an example of how to apply the validation constrain that at least three checkboxes must have been selected,
In the above example, multiple checkboxes are validated by using an array of checkboxes.
- The options in the checkboxes are stored as an array called options .
- The querySelectorAll method is used to select all the checkbox elements from the DOM. This method is similar to the getElementById() method but uses the tag names to select the elements in the DOM. The syntax of the querySelectorAll method is,
The CSS selector or strings is used to represent the tags. The input[type=»checkbox»] string is used to select all the checkboxes on the web page. The function returns a node list with all the checkbox elements.
- A forEach loop is used to iterate over all the elements in the list returned by the querySelectorAll method. The syntax of forEach() loop is,
All the arguments of the function are optional. The value represents the elements present in the array, and the index is the index number of the array. The array_elements has all the elements in the current variable under iteration.
- As part of the forEach() loop, the checkbox is validated using the checked property, and the currently checked checkbox is appended to the marked_checkboxes array using the push() function.
- The marked_checkboxes array is finally evaluated using the length property to check whether there are at least two checkboxes that are in the state selected. The output of the above example is displayed below,

Conclusion
- Checkboxes are used as a form of input in HTML to receive a fixed option as input from the user.
- A checkbox can be created using an input tag with type=checkbox .
- Validation of checkboxes must be done to apply constraints and find whether a checkbox is checked or not.
- The validation of the checkbox in javascript can be done using the checked property of the checkbox element. This property returns true when the checkbox is selected.
- The addEventListener() method can be used to apply the change event to the checkbox to validate whenever the user interacts with the checkbox.
- Multiple checkbox validations can be done with the help of an array of checkbox elements.
Validate Checkbox in JavaScript

In this article, we will introduce checkbox validation in JavaScript using the checked property of the input element.
Use the checked Property to Validate the Checkbox in JavaScript
The input element in JavaScript is used to take input from the user. This can be used inside forms as well.
It provides us with a checked property to validate the checkbox in JavaScript. The checked property will return true if the user checks the checkbox; else, it will return false .
Below we have an HTML document. We have a label and a button inside the body element.
Using the label element, we can provide a label to the checkbox. The input element is wrapped around the label element.
To make this input a checkbox, we have to set its type to checkbox , and we also have to provide the input with an ID of checkbox to access this element inside JavaScript.
html> head> body> label for="Select Checkbox"> input type="checkbox" id="checkbox"> Accept label> button id="submit">Submitbutton> script> const checkbox = document.getElementById('checkbox'); const btn = document.getElementById('submit'); btn.onclick = () => if(!checkbox.checked) console.log("Checkbox selected: ", checkbox.checked); else console.log("Checkbox selected: ", checkbox.checked); >; script> body> html> Here, we first stored the reference of the checkbox element, which we have defined inside our HTML using DOM API’s getElementById() method. Similarly, we did this for the submit button as well.
Now that we have the checkbox and the submit button stored inside the checkbox and btn variables, we use them to perform validation. Here, we set an onclick() element on the btn , which, on the press, will execute a function.
Inside this function, we used a condition statement and checked if the checkbox.checked is true or not.
Notice that we have used an exclamation mark ! inside the if block. This means that if the user does not check the checkbox, checkbox.checked will return false, and !false will become true .
Since the user has not selected the checkbox, we entered inside the if block and then printed Checkbox selected: false .
Otherwise, if the user clicks the checkbox, we will go inside the else block, and the message printed on the console will be Checkbox selected: true .
Sahil is a full-stack developer who loves to build software. He likes to share his knowledge by writing technical articles and helping clients by working with them as freelance software engineer and technical writer on Upwork.