- Live Chat System in PHP Free Source Code
- Live Chat Support Website Benefits
- Features of Live Chat System in PHP
- Development of Chat System
- Conclusions
- Inquiries
- Recommended articles you might read:
- Simple Live Chat With PHP Websockets (Free Download)
- TABLE OF CONTENTS
- PHP LIVE CHAT
- DOWNLOAD RATCHET WEBSOCKET LIBRARY
- PART 1) PHP WEBSOCKET LIVE CHAT
- PART 2) LIVE CHAT PAGE
- 2A) THE HTML
- 2B) LIVE CHAT JAVASCRIPT
- DOWNLOAD & NOTES
- SUPPORT
- EXAMPLE CODE DOWNLOAD
- EXTRA BITS & LINKS
- IMPROVEMENT IDEAS
- DYNAMIC PROPERTIES
- COMPATIBILITY CHECKS
- LINKS & REFERENCES
- YOUTUBE TUTORIAL
- THE END
Live Chat System in PHP Free Source Code
The Live Chat system in PHP is an interactive tool. It can quickly narrow your choices and contact multiple vendors, customers, etc. Also, it can give your business a significant impact on user experience.
Live Chat Support Website Benefits
A live chat support website is an excellent advantage for those who are business owners. Here’s a quick overview of having a live chat system according to Kayako.
- Good experiences spread through word of mouth: 29% of consumers have told friends or colleagues about a positive live chat experience
- Live chat can increase purchases: 38% of consumers are more likely to buy from a company if they offer live chat support
- Live chat can boost customer loyalty: 51% of consumers are more likely to stay with or buy again from a company if they offer live chat support
- And, they’re happy to spend more!: 63% of people who spend between $250-500 a month online are the most likely to both buy from and be loyal to companies that offer live chat.
Features of Live Chat System in PHP
- Easy Login System
Development of Chat System
If you want to develop a GROUP chat system in PHP like live chat ticketing system that is used in ticket businesses. Then you are in the right track because I have here a live chat code in PHP with a demo.
Download Source code Below.
Conclusions
This PHP Projects is only for a demonstration. About a simple Live Chat System that allows businesses to communicate, or chat, in real-time with visitors to their website.
Inquiries
If you have any comments or suggestions about the Simple PHP Projects with Source Code Please message us directly.
Recommended articles you might read:
- Simple ChatBox Using PHP/MYSQL
- Create Simple Chatbox with Send Photo Feature Using PHP/MYSQL
- Chatbot In Python Tutorial With Source Code
- Simple User Profile With Update Profile Info Using PHP/MYSQL
- Employee Performance and Evaluation Management System using PHP
- Free Online Public Access Catalog (OPAC) Using PHP MySQLi Source Code
- Online Enrollment System Complete Source Code
- Complete Reservation System Source Code
- Personal Collection Point of Sales Software
- Book Storage System Source Code
This system is an interactive tool. It can quickly narrow your choices and contact multiple vendors, customers, etc. Also, it can give your business a significant impact on user experience.
Simple Live Chat With PHP Websockets (Free Download)
Welcome to a tutorial on how to create a simple live chat application with PHP and WebSockets. Looking to add live chat features to your website or portal? Let us walk through an example in this guide – Read on!
TABLE OF CONTENTS
PHP LIVE CHAT
All right, let us now get into more details on the PHP live chat.
DOWNLOAD RATCHET WEBSOCKET LIBRARY
- As above, a copy of Ratchet is required.
- An easy way is to use Composer to fetch the latest version.
- Open the command line, navigate to your HTTP folder – cd YOUR-HTTP-FOLDER .
- Run composer require cboden/ratchet . This will automatically download the latest version into the vendor/ folder.
PART 1) PHP WEBSOCKET LIVE CHAT
if (defined("STDIN")) < return true; >if (array_key_exists("SHELL", $_ENV)) < return true; >if (!array_key_exists("REQUEST_METHOD", $_SERVER)) < return true; >if (empty($_SERVER["REMOTE_ADDR"]) && !isset($_SERVER["HTTP_USER_AGENT"]) && count($_SERVER["argv"])>0) < return true; >return false; > if (!is_cli()) < exit("Please run this in the command line."); >// (B) LOAD RATCHET // https://github.com/ratchetphp/Ratchet // composer require cboden/ratchet require "vendor/autoload.php"; use Ratchet\MessageComponentInterface; use Ratchet\ConnectionInterface; use Ratchet\Server\IoServer; use Ratchet\Http\HttpServer; use Ratchet\WebSocket\WsServer; // (C) CHAT CLASS class Chat implements MessageComponentInterface < // (C1) PROPERTIES private $debug = true; // debug mode protected $clients; // connected clients // (C2) CONSTRUCTOR - INIT CLIENTS LIST public function __construct () < $this->clients = new \SplObjectStorage; if ($this->debug) < echo "Chat server started.\r\n"; >> // (C3) ON CLIENT CONNECT - STORE INTO $THIS->CLIENTS public function onOpen (ConnectionInterface $conn) < $this->clients->attach($conn); if ($this->debug) < echo "Client connected: resourceId>\r\n"; > > // (C4) ON CLIENT DISCONNECT - REMOVE FROM $THIS->CLIENTS public function onClose (ConnectionInterface $conn) < $this->clients->detach($conn); if ($this->debug) < echo "Client disconnected: resourceId>\r\n"; > > // (C5) ON ERROR public function onError (ConnectionInterface $conn, \Exception $e) < $conn->close(); if ($this->debug) < echo "Client error: resourceId> | getMessage()>\r\n"; > > // (C6) ON RECEIVING MESSAGE - SEND TO EVERYONE public function onMessage (ConnectionInterface $from, $msg) < $msg = strip_tags($msg); if ($this->debug) < echo "Received message from resourceId>: \r\n"; > foreach ($this->clients as $client) < $client->send($msg); > > > // (D) START! $server = IoServer::factory(new HttpServer(new WsServer(new Chat())), 8080); // @CHANGE if not port 8080 $server->run();- A “safety check” to make sure the script is run from the command line.
- Load and use the Ratchet library.
- The mechanics of the chat application:
- (C3) We store all clients into $this->clients when they connect to the WebSocket server.
- (C4) Remove the clients from $this->clients when they disconnect.
- (C6) On receiving a message from any client, we loop through $this->clients and forward the message to everyone.
- Start the live chat server.
Yep. That’s all for the “complicated chat server”.
PART 2) LIVE CHAT PAGE
2A) THE HTML
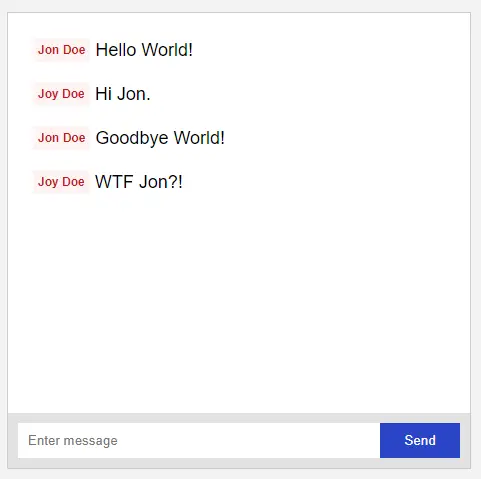
- is where we show all the chat messages.
- is where we ask the user for a name before launching the chat.
- is the “send message” box. This is hidden at first, will only show after the user enters a name and successfully connects to the WebSocket server.
2B) LIVE CHAT JAVASCRIPT
var chat = < // (A) INIT - GET HTML ELEMENTS host : "ws://localhost:8080/", // @CHANGE to your own! name : "", // current user name socket : null, // websocket object hMsg : null, // html chat messages hName : null, // html set name form hNameSet : null, // html set name field hNameGo : null, // html set name submit hSend : null, // html send message form hSendTxt : null, // html send message field hSendGo : null, // html send message submit init : () =>< chat.hMsg = document.getElementById("chat-messages"); chat.hName = document.getElementById("chat-name"); chat.hNameSet = document.getElementById("chat-name-set"); chat.hNameGo = document.getElementById("chat-name-go"); chat.hSend = document.getElementById("chat-send"); chat.hSendTxt = document.getElementById("chat-send-text"); chat.hSendGo = document.getElementById("chat-send-go"); chat.hNameGo.disabled = false; >, // (B) SWAP BETWEEN SET NAME/SEND MESSAGE FORM swap : direction => < if (direction) < chat.hName.classList.add("hide"); chat.hSend.classList.remove("hide"); >else < chat.hSend.classList.add("hide"); chat.hName.classList.remove("hide"); >>, // (C) START CHAT start : () => < // (C1) SET NAME + SWAP HTML FORM chat.name = chat.hNameSet.value; chat.swap(1); chat.hSendGo.disabled = true; // (C2) CREATE WEB SOCKET chat.socket = new WebSocket(chat.host); // (C3) ON OPEN - ENABLE CHAT chat.socket.onopen = e =>chat.hSendGo.disabled = false; // (C4) ON CLOSE - SWAP BACK TO "SET NAME" chat.socket.onclose = e => chat.swap(0); // (C5) ON RECEIVING DATA - UPDATE HTML CHAT chat.socket.onmessage = e => < let msg = JSON.parse(e.data), row = document.createElement("div"); row.className = "chat-row"; row.innerHTML = `; // (C6) ON ERROR chat.socket.onerror = e => < chat.swap(0); console.error(e); alert(`Failed to connect to $`); >; return false; >, // (D) SEND MESSAGE send : () => < chat.socket.send(JSON.stringify(< n: chat.name, m: chat.hSendTxt.value >)); chat.hSendTxt.value = ""; return false; > >; window.onload = chat.init;- init() Runs on window load. All it does is literally get all the HTML elements.
- swap() Swap the HTML interface between “set name” and “send message”.
- start() When the user enters the name and clicks on “start”. Long story short, create a WebSocket object, connect to the server, and update the HTML chat on receiving messages.
- send() Self-explanatory. Send a chat message to the server.
DOWNLOAD & NOTES
Here is the download link to the example code, so you don’t have to copy-paste everything.
SUPPORT
600+ free tutorials & projects on Code Boxx and still growing. I insist on not turning Code Boxx into a «paid scripts and courses» business, so every little bit of support helps.
EXAMPLE CODE DOWNLOAD
Click here for the source code on GitHub gist, just click on “download zip” or do a git clone. I have released it under the MIT license, so feel free to build on top of it or use it in your own project.
EXTRA BITS & LINKS
That’s all for this guide, and here is a small section on some extras that may be useful to you.
IMPROVEMENT IDEAS
- Do a “unique name check” after connecting to the server to make sure that there are no clashes.
- Announce when users connect/disconnect from the chat.
- Save the messages to the database, or store them in the browser.
- If you want to create “chat rooms”, a possibility is to:
- Turn $clients into a nested array in 1-chat-server.php . For example, $clients[«PUBLIC»] = [] , $clients[«TECH»] = [] , $clients[«LIFE»] = [] .
- On connect, the client needs to provide the group name, or we will put them into PUBLIC by default.
- When the client sends a message, forward it to everyone in the group only.
Yep, the possibilities are endless – It is up to you to complete your own system now.
DYNAMIC PROPERTIES
- At the time of writing, PHP 8.2+ throw a lot of “creation of dynamic property is deprecated” for the PHP Ratchet library. If you do not know what that means, follow up with this.
- The script has set error_reporting(E_ALL & ~E_DEPRECATED) to mute the deprecation notices.
- Not sure if PHP Ratchet will be updated, will keep a look out and change to another sockets library if required.
- Other possible “fixes”:
- Edit the Ratchet library files, add #[\AllowDynamicProperties] before the class definitions.
- Or set class XYZ extends stdClass
COMPATIBILITY CHECKS
Works across all modern browsers.
LINKS & REFERENCES
YOUTUBE TUTORIAL
THE END
Thank you for reading, and we have come to the end of this guide. That took quite a lot of research, work, and I can easily see why some people are charging money for it… But I hope that this has helped you in your project, and if you want to share anything, please feel free to comment below. Good luck and happy coding!