?>
We will implement login functionality on form submit in login.php . We will include Chat.php module to handle user login with method loginUsers() . We will store user login details in SESSION variables for further use in system.
$loginError = ''; if (!empty($_POST['username']) && !empty($_POST['pwd'])) < include ('Chat.php'); $chat = new Chat(); $user = $chat->loginUsers($_POST['username'], $_POST['pwd']); if(!empty($user)) < $_SESSION['username'] = $user[0]['username']; $_SESSION['userid'] = $user[0]['userid']; $lastInsertId = $chat->insertUserLoginDetails($user[0]['userid']); $_SESSION['login_details_id'] = $lastInsertId; header("Location:index.php"); > else < $loginError = "Invalid username or password!"; >> Step3: Create Chat System HTML index.php , we will include Bootstrap, jQuery and CSS files to create chat system interface with Bootstrap.
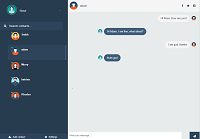
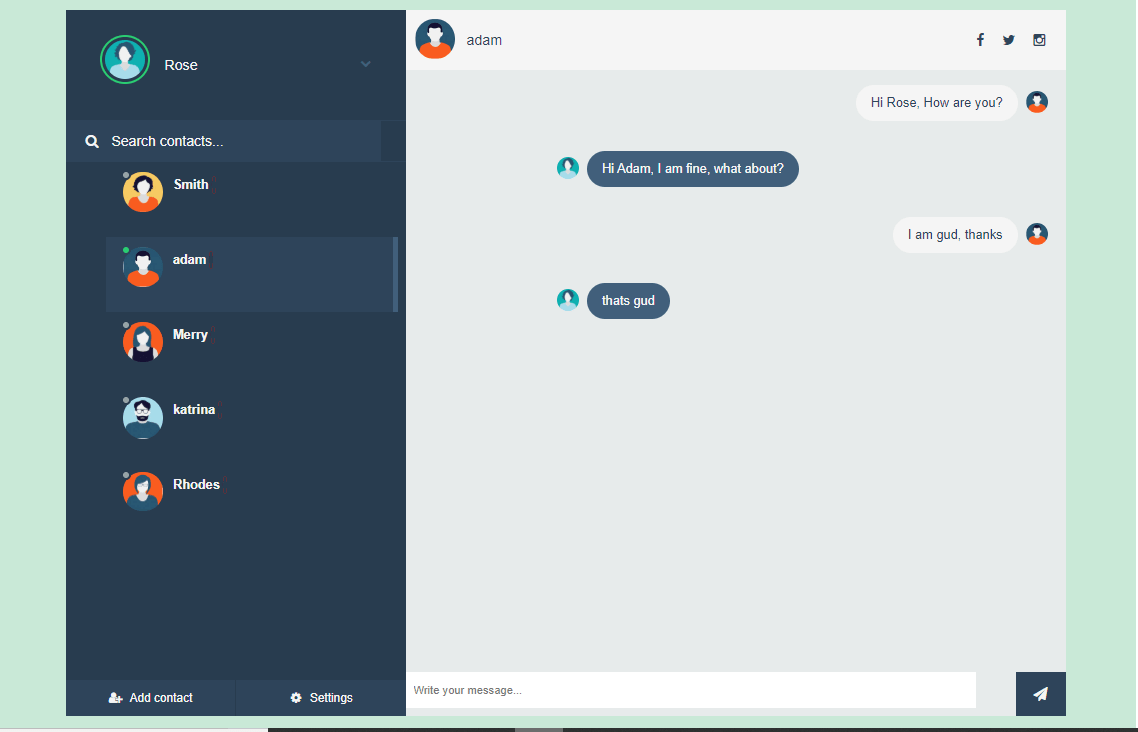
After user logged in, it will redirect to index.php where we will display chat system with users list and user chat details. So now we will create chat system HTML to load chat details from MySQL database tables after successful user login.
So first we will get details of current logged in chat user details from database table chat_users using chat method getUserDetails() from Chat.php .
Now we will get details of all chat user from database table chat_users using chat method chatUsers() from Chat.php and display users list.
'; $chatUsers = $chat->chatUsers($_SESSION['userid']); foreach ($chatUsers as $user) < $status = 'offline'; if($user['online']) < $status = 'online'; >$activeUser = ''; if($user['userid'] == $currentSession) < $activeUser = "active"; >echo ''; echo '
'; echo ' '; echo '
'; echo '
'; echo '
'.$user['username'].''.$chat->getUnreadMessageCount($user['userid'], $_SESSION['userid']).'
'; echo ' '; echo '
'; echo '
'; echo ''; > echo '
'; ?>
and finally we will get details of current active chat user’s chat from database table chat using chat method getUserChat() from Chat.php and display chat details.
getUserDetails($currentSession); foreach ($userDetails as $user) < echo '
'; echo '
'.$user['username'].'
'; echo '
'; echo ' '; echo ' '; echo ' '; echo '
'; > ?>
getUserChat($_SESSION['userid'], $currentSession); ?>
Step4: Handle User Chat Reply chat.js when click message send button and call function sendMessage()
$(document).on("click", '.submit', function(event) < var to_user_id = $(this).attr('id'); to_user_id = to_user_id.replace(/chatButton/g, ""); sendMessage(to_user_id); >); We will create a JavaScript function sendMessage() in chat.js in which we will make Ajax request to chat_action.php with action insert_chat to insert user chat to database and update user’s conversation with replied message.
function sendMessage(to_user_id) < message = $(".message-input input").val(); $('.message-input input').val(''); if($.trim(message) == '') < return false; >$.ajax(< url:"chat_action.php", method:"POST", data:, dataType: "json", success:function(response) < var resp = $.parseJSON(response); $('#conversation').html(resp.conversation); $(".messages").animate(< scrollTop: $('.messages').height() >, "fast"); > >); > In chat_action.php , we will call chat method insertChat() to insert chat details.
insertChat($_POST['to_user_id'], $_SESSION['userid'], $_POST['chat_message']); > ?> The method insertChat() from Chat.pm to insert user chat.
chatTable." (reciever_userid, sender_userid, message, status) VALUES ('".$reciever_userid."', '".$user_id."', '".$chat_message."', '1')"; $result = mysqli_query($this->dbConnect, $sqlInsert); if(!$result) < return ('Error in query: '. mysqli_error()); >else < $conversation = $this->getUserChat($user_id, $reciever_userid); $data = array( "conversation" => $conversation ); echo json_encode($data); > > ?> Step5: Update Chat User list Info chat.js , we will create function updateUserList() to update chat user list information like user online status by making Ajax request to chat_action.php .
function updateUserList() < $.ajax(< url:"chat_action.php", method:"POST", dataType: "json", data:, success:function(response) < var obj = response.profileHTML; Object.keys(obj).forEach(function(key) < // update user online/offline status if($("#"+objChat in php and mysql.userid).length) < if(objChat in php and mysql.online == 1 && !$("#status_"+objChat in php and mysql.userid).hasClass('online')) < $("#status_"+objChat in php and mysql.userid).addClass('online'); >else if(objChat in php and mysql.online == 0) < $("#status_"+objChat in php and mysql.userid).removeClass('online'); >> >); > >); > In chat_action.php , we will handle Ajax request action to return chat users information as JSON.
chatUsers($_SESSION['userid']); $data = array( "profileHTML" => $chatUsers, ); echo json_encode($data); > ?> Step6: Update Active User Chat Details chat.js , we will create function updateUserChat() to update active user chat details by making Ajax request to chat_action.php .
function updateUserChat() < $('li.contact.active').each(function()< var to_user_id = $(this).attr('data-touserid'); $.ajax(< url:"chat_action.php", method:"POST", data:, dataType: "json", success:function(response) < $('#conversation').html(response.conversation); >>); >); > In chat_action.php , we will handle Ajax request action to return chat details as JSON data response.
getUserChat($_SESSION['userid'], $_POST['to_user_id']); $data = array( "conversation" => $conversation ); echo json_encode($data); > ?> Step7: Update User’s Unread Message Count chat.js , we will create function updateUnreadMessageCount() to update user unread message count by making Ajax request to chat_action.php .
function updateUnreadMessageCount() < $('li.contact').each(function()< if(!$(this).hasClass('active')) < var to_user_id = $(this).attr('data-touserid'); $.ajax(< url:"chat_action.php", method:"POST", data:, dataType: "json", success:function(response) < if(response.count) < $('#unread_'+to_user_id).html(response.count); >> >); > >); > In chat_action.php , we will handle Ajax request action to return user’s unread message count as JSON data response.
getUnreadMessageCount($_POST['to_user_id'], $_SESSION['userid']); $data = array( "count" => $count ); echo json_encode($data); > ?> Step8: Update User Typing Status chat.js , we will handle user’s typing status by making Ajax request to chat_action.php to update typing as yes if user typing on input focus event.
$(document).on('focus', '.message-input', function()< var is_type = 'yes'; $.ajax(< url:"chat_action.php", method:"POST", data:, success:function() < >>); >); We will also update typing status as no if user stop typing on input blur event
$(document).on('blur', '.message-input', function()< var is_type = 'no'; $.ajax(< url:"chat_action.php", method:"POST", data:, success:function() < >>); >); In chat_action.php , we will update user’s typing status to database table.
updateTypingStatus($_POST["is_type"], $_SESSION["login_details_id"]); > ?> The chat method updateTypingStatus() from Chat.php .
chatLoginDetailsTable." SET is_typing = '".$is_type."' WHERE "; mysqli_query($this->dbConnect, $sqlUpdate); > ?> Step9: Get User Typing Status chat.js , we will create function showTypingStatus() to show user typing status by making Ajax request to chat_action.php .
function showTypingStatus() < $('li.contact.active').each(function()< var to_user_id = $(this).attr('data-touserid'); $.ajax(< url:"chat_action.php", method:"POST", data:, dataType: "json", success:function(response) < $('#isTyping_'+to_user_id).html(response.message); >>); >); > In chat_action.php , we will handle Ajax request action to return user’s user typing status as JSON data response.
fetchIsTypeStatus($_POST['to_user_id']); $data = array( "message" => $message ); echo json_encode($data); > ?> The chat method fetchIsTypeStatus() from Chat.php .
chatLoginDetailsTable." WHERE userid = '".$userId."' ORDER BY last_activity DESC LIMIT 1"; $result = $this->getData($sqlQuery); $output = ''; foreach($result as $row) < if($row["is_typing"] == 'yes')< $output = ' - Typing. Step10: Handle Chat User Logout logout.php , we will handle user logout functionality and update user offline status.
updateUserOnline($_SESSION['userid'], 0); $_SESSION['username'] = ""; $_SESSION['userid'] = ""; $_SESSION['login_details_id']= ""; header("Location:index.php"); ?> You will also like these tutorials:
Build Live Chat System with Ajax, PHP & MySQL Create Event Calendar with jQuery, PHP and MySQL Build Invoice System with PHP & MySQL Push Notification System with PHP & MySQL Create Bootstrap Cards with PHP and MySQL Build Content Management System with PHP & MySQL Convert Unix Timestamp To Readable Date Time in PHP Ajax Drop Down Selection Data Load with PHP & MySQL Inventory Management System with Ajax, PHP & MySQL Drag and Drop File Upload using jQuery and PHP Load Dynamic Content in Bootstrap Popover with Ajax, PHP & MySQL You can view the live demo from the Demo link and can download the full script from the Download link below.
93 thoughts on “ Build Live Chat System with Ajax, PHP & MySQL ” 1. Warning: Use of undefined constant MYSQL_ASSOC – assumed ‘MYSQL_ASSOC’ (this will throw an Error in a future version of PHP) in C:\wamp64\www\fb\Chat.php on line 30
Источник
Чат на php, mysql, ajax
Итак, вы освоили основы php и решили написать что-то полезное. Конечно же это будет чат. В статье показано как написать чат на php используя технологию ajax и базу данных mysql . Ajax будем использовать для того , чтобы страница при отправке сообщений не перезагружалась [заметка про Ajax]. Ну для начала вам нужно написать регистрацию для будущего чата. Кто не читал статью как это делать, то вот она «Система регистрации на сайте«. Внимание: при создании регистрации сделайте БД с именем chat . Теперь когда пользователи могут регистрироваться у нас в чате, приступим к написанию самого скрипта для обмена сообщениями на сайте. У нас есть страница index.php , то есть главная. Там после строки: html-код (то есть каркас) и javascript (JQuery) код, которым мы будем отправлять данные на сервер и каждые 5 секунд подгружать сообщения в div . В базу данных, помимо таблицы с пользователями ( users ), добавьте еще такой дамп (это таблица messages в которой мы будем хранить сообщения пользователей):
CREATE TABLE `messages` ( `id` INT( 5 ) NOT NULL AUTO_INCREMENT , `login` VARCHAR( 200 ) NOT NULL , `message` VARCHAR( 1000 ) NOT NULL , PRIMARY KEY ( `id` ) ); #messages Как вы заметили, в функции добавления сообщений в базу отправляет Ajax запрос файлу add_mess.php , который уже добавит его в таблицу messages . Вот код этого файла:
Теперь последний код нашего чата, это php скрипт, который достает данные из БД и отдает их функции load_messes() на вывод. Вот он:
Вот и все скрипты закончены. Теперь осталось лишь все собрать. А для особо ленивых, выложу архив со всеми скриптами и дампом базы данных. Исходники чата на php+mysql+ajax. Останется лишь создать БД с именем chat , залить дамп и скрипты. Но, хотел сказать, что такая версия чата очень простая, без наворотов и без защиты от флудеров и т.д.
Источник