- How to center a div in CSS
- Center div Horizontally In CSS
- 1. Center div Horizontally using margin method
- 2. Center div Horizontally using flexbox
- 3. Center div Horizontally Using Position absolute and margin auto
- 4. Center div horizontally using position absolute and translateX
- 5. Center div Horizontally using table
- 6. Center div Horizontally Using Display table-cell
- 2. Center div Vertically In CSS
- 1. Center div Vertically Using flexbox
- 2. Center div Vertically Using Absolute position and margin auto
- 3. Center div Vertically Using position absolute and translateY
- 4. Center div Vertically Using the table
- Выравниваем блок по центру страницы
- Вариант 1. Отрицательный отступ.
- Вариант 2. Автоматический отступ.
- Вариант 3. Таблица.
- Вариант 4. Псевдо-элемент.
- Вариант 5. Flexbox.
- Вариант 6. Transform.
- Вариант 7. Кнопка.
- Бонус
How to center a div in CSS
In this article, we are going to learn how to center a div in CSS both horizontally and vertically using 15 different methods with examples.
As a web developer, one of the most common things that you will most frequently need to do is to center a div element using CSS .
- Using align property
- Using flexbox (justify-content)
- Position absolute and margin auto
- Position absolute and translateX
- Using table
- Using CSS table property
- Using flexbox (align-items)
- Position absolute and margin auto (vertical center)
- Position absolute and translateY (vertical center)
- Using table (vertical center)
- Using CSS table property (vertical center)
Center div Horizontally In CSS
Let’s see how you can align div elements to center horizontally. We have discussed 5 different ways for it, of which margin auto and flexbox is the most commonly used method.
1. Center div Horizontally using margin method
To center a div element horizontally you can simply use the margin property of CSS. It is the easiest way to align a div to the center.
Give margin-left: auto and margin-right: auto to the element or you can use shorthand margin: 0 auto , this will automatically adjust the element to the center of its parent element horizontally by leaving equal spaces to its left and right side.
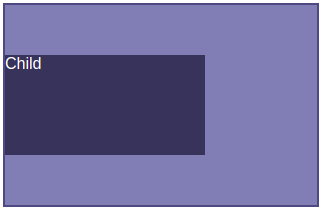
Here is an example in which a child element is aligned to the center using margin property.
/* center element using margin property */ .center < margin: 0 auto; >.parent < padding: 20px; background: #7E89B4; border: 2px solid #4B5681; >.child

Note : To align any element to center horizontally you need to keep 2 things in mind:
- The element must be a block label element. If the display property of an element is inline or inline-block then it will not center using align property.
- The width of the element should be smaller than the parent element. If the element is itself bigger than its parent then will be unable to get equal spacing from its left and right side and hence won’t center.
2. Center div Horizontally using flexbox
One of the best ways to align the div element to the center horizontally is by using the CSS flexbox.
Using flexbox you can position any element in 2D (horizontal and vertical). Here we will center div horizontally.
First, add display: flex property to the parent of the div element to make it a flex container, then use the justify-content property. Set justify-content: center to center horizontally.
Remember the flex property should be applied to the parent element. Here is the example code.
/* center element using flexbox */ .center < display: flex; justify-content: center; >.parent < border: 2px solid #4B5681; background: #7E89B4; padding: 20px; >.child
3. Center div Horizontally Using Position absolute and margin auto
An element having an absolute position is like a floating element in the parent element. You can move it wherever you want within the document.
To align the child element center horizontally you need to apply left: 0 , right: 0 , and margin-left: auto , margin-right: auto to the element ( margin: 0 auto shorthand).
.parent < position: relative; border: 2px solid #4B5681; background: #7E89B4; height: 100px; >/* center element using position absolute and margin auto */ .child

4. Center div horizontally using position absolute and translateX
Using position property and translateX you can align the element horizontally as well as vertically to center. Here we will see horizontal alignment.
For this, the position of the parent element should be relative and the position of the child element should be absolute .
Now, shift the child element 50% to its left.
This left shift of 50% will make the child element start from midway to the right side of the parent element.

You can see in the above picture we want to center the box horizontally but it starts from the middle of the parent element. So we can apply the translateX property and move the child element 50% in a negative direction which will align it in the center. Now add transform: translateX(-50%) to finally center the child element.
5. Center div Horizontally using table
Using a table to design a page layout is not used nowadays, but it’s worth it to know that you can use this to center the element horizontally.
To center an element horizontally in the table use text-align: center to parent and display: inline-block to the child element.
To see the code in effect width of the child should be less than the parent element so we have set the parent width to 100vw for understanding purposes.
Here is HTML and CSS code as an example.
6. Center div Horizontally Using Display table-cell
CSS enables us to change ordinary elements into the effect of table elements. Using this feature and concept used in the above approach you can center the element horizontally.
Set display: table-cell and text-align: center to the parent element and display: inline-block to the child element.
2. Center div Vertically In CSS
Now we will see how to center a div vertically in CSS. For most cases you can refer above methods of horizontal alignment and add a few more properties to center it vertically also, but anyway we will discuss it in detail.
1. Center div Vertically Using flexbox
Using flexbox you can align elements both in the horizontal and vertical direction. Here we will align the div in the vertical direction.
First, you need to define display: flex to the parent element. Now the element inside this parent element becomes flex items.
To align the child elements vertically use the align-items property and set its value as the center .
/* Center vertically */ .parent < display: flex; align-items: center; border: 2px solid #4B5681; background: #7E89B4; height: 200px; >.child
2. Center div Vertically Using Absolute position and margin auto
We already know the element having an absolute position is can be moved very easily within the webpage. Using this we can also align to the center.
To align the child element center vertically you need to apply top: 0 , bottom: 0 and margin-top: auto , margin-bottom: auto to the element ( margin: auto 0 shorthand).
3. Center div Vertically Using position absolute and translateY
In the same way, you centered the element horizontally using position absolute and translateX, you can use translateY to center the element vertically.
To do this set position: relative to the parent element and position: absolute to the child element and top: 50% .
This will flow the child element to start from the verticle middle of the parent element, which is not the center but you can use transform: translateY(-50%) to shift it up by 50% which will make it verticle align to the center.
4. Center div Vertically Using the table
As we have discussed above you can also use the table to create a layout and center element (not recommended).
To center an element vertically in the table use vertical-align: middle to parent and display: inline-block to the child element.
To see the code in effect height of the child should be less than the height parent element so we have set the parent height to 200px for understanding purposes.
Выравниваем блок по центру страницы
Очень часто стоит задача выровнять блок по центру страницы / экрана, да ещё и так, чтобы без ява-скрипта, без задания жёстких размеров или отрицательных отступов, ещё чтобы и скроллбары работали у родителя, если блок превышает его размеры. В сети ходят достаточно много однообразных примеров как выровнять блок по центру экрана. Как правило большинство из них основаны на одних принципах.
Ниже представлены основные способы решения задачи, их плюсы и минусы. Чтобы понимать суть примеров, рекомендую уменьшить высоту / ширину окошка Result в примерах по указанным ссылкам.
Вариант 1. Отрицательный отступ.
Позиционируем блок атрибутами top и left на 50%, и заранее зная высоту и ширину блока, задаём отрицательный margin, который равен половине размера блока. Огромным минусом данного варианта является то, что нужно подсчитывать отрицательные отступы. Так же блок не совсем корректно ведёт себя в окружении скроллбаров — он попросту обрезается так как имеет отрицательные отступы.
Вариант 2. Автоматический отступ.
Менее распространённый, но схожий с первым. Для блока задаём ширину и высоту, позиционируем атрибутами top right bottom left на 0, и задаём margin auto. Плюсом данного варианта являются рабочие скроллбары у родителя, если у последнего задана 100% ширина и высота. Минусом данного способ является жёсткое задание размеров.
Вариант 3. Таблица.
Задаём родителю табличные стили, ячейке родителя устанавливаем выравнивание текста по центру. А блоку задаём модель строчного блока. Минусами мы получаем не рабочие скроллбары, и в целом не эстетичность «эмуляции» таблицы.
Чтобы добавить скролл в данный пример, придётся добавить в конструкцию ещё один элемент.
Пример: jsfiddle.net/serdidg/xkb615mu.
Вариант 4. Псевдо-элемент.
Данный вариант лишён всех проблем, перечисленных у предыдущих способов, а так же решает первоначально поставленные задачи. Суть состоит в том, чтобы у родителя задать стили псевдо-элементу before, а именно 100% высоту, выравнивание по центру и модель строчного блока. Так же само и у блока ставится модель строчного блока, выравнивание по центру. Чтобы блок не «падал» под псевдо-элемент, когда размеры первого больше чем родителя, указываем родителю white-space: nowrap и font-size: 0, после чего у блока отменяем эти стили следующими — white-space: normal. В данном примере font-size: 0 нужен для того, чтобы убрать образовавшийся пробел между родителем и блоком в связи с форматированием кода. Пробел можно убрать и иными способами, но лучшим считается просто его не допускать.
либо, если вам нужно, чтобы родитель занимал только высоту и ширину окна, а не всей страницы:
Вариант 5. Flexbox.
Одним из самых простых и элегантных способов является использования flexbox. Но имейте ввиду, что центральное позиционирование сохраняется даже если родительский блок меньше дочернего, последний будет выходить за рамки и обрезаться.
В случае, если при уменьшении родительского блока дочерний не должен обрезаться по краям, используйте авто маржины:
Вариант 6. Transform.
Подходит в случае если мы ограничены структурой, и нет возможности манипулировать родительским элементом, а блок выровнять как-то нужно. На помощь придёт css функция translate() . При значение 50% абсолютное позиционирование расположит верхний левый угол блока точно по центру, затем отрицательное значение translate сдвинет блок относительно своих собственных размеров. Учтите, что могут всплыть негативные эффекты в виде размытых граней или начертания шрифта. Также подобный способ может привести к проблемах с вычислением положения блока с помощью java-script’а. Иногда для компенсации потери 50% ширины из-за использования css свойства left может помочь заданное у блока правило: margin-right: -50%; .
Вариант 7. Кнопка.
Пользователь azproduction предложил вариант, где блок обрамляется в тег button. Кнопка имеет свойство центрировать всё, что находится у неё внутри, а именно элементы строчной и блочно-строчной (inline-block) модели. На практике использовать не рекомендую.
Бонус
Используя идею 4-го варианта, можно задавать внешние отступы для блока, и при этом последний будет адекватно отображаться в окружении скроллбаров.
Пример: jsfiddle.net/serdidg/ugnp8ry7.
Так же можно выравнивать картинку по центру, и в случае если картинка больше родителя, масштабировать её по размеру родителя.
Пример: jsfiddle.net/serdidg/Lhpa1s70.
Пример с большой картинкой: jsfiddle.net/serdidg/tor2yudn.