- jquery making html
- 3 Answers 3
- jQuery Create Element And Append To Webpage
- Create Element jQuery
- jQuery Create div
- Append Created Element To Webpage
- 1. append() Method
- 2. prepend() Method
- 3. before() Method
- 4. after() Method
- jQuery Create Element with Class
- jQuery Create Element with ID
- Conclusion
- How to structure JSON and build HTML via jQuery
jquery making html
At first i make variables with divs i will use. But i am having hard time making it all together this time.. I left 2 lines which doesnt want to work with chaining. At first i am wrapping image with crop, and then i am adding hover div after crop div. But. 2nd line doesn’t work. I tried in numerous ways. No luck so far. Seems like it is impossible to add something that is added with «wrap». Maybe I am doing wrong, so maybe someone of you could help ? 🙂 Thanks.
3 Answers 3
DOM manipulations on elements not inserted in the page might be a little tricky.
after , for example, can only work on an element having a parent. Here is its implementation :
Similarly, wrap will call before which has a symmetric implementation.
What works is to build your tree by using append and starting from the most external element :
cover.append(crop); crop.append(image); cover.append(hover); @Wish You’re right, this didn’t work. See edited answer : you’d better only use append, starting from the most external elements.
Ye, this will be the way to go. Also found got something similar just by playing. Wrap probably is just bugged.. But also your argument «hover isn’t in the page so after can’t insert anything after it.» doesnt seem to be valid aswell. I can make hover.append(peel).append(links).append(a) and then image.after(hover) and all the divs are there.
you can achieve that in this way:
image.wrap(total).wrap(cover).wrap(crop) .closest('.crop') .after(a.wrap(hover).wrap(peel).wrap(links).closest('.hover')); @dystroy’s answer is not totally correct: you can insert thing after a node in memory
cover.append(crop).append(hover).appendTo('body'); you’ll find all the 3 nodes were appended to DOM
the key point is $.wrap . when you wrap something, not like other operation, jQuery will create a new copy, at this time, the wrapper in the dom is not the same reference with the one created in memory any more.
take the first line as example:
var domCrop = image.wrap(total).wrap(cover).wrap(crop) .closest('.crop'); console.log(domCrop.is(crop)); //false, domCrop and the corp in mem not point to the same ref the last but not least, in actually, I don’t like this way to extend the dom node. it made the code hard to write and maintain.
(function($) < $.fn.peel = function(options) < var defaults = <>; var settings = $.extend(<>,defaults, options); var html = '' + ' ' + ' ' + ' ' + ' ' + ' ' + ' FB' + ' ' + ' ' + ' ' + ' ' + ''; return this.each(function() < $(this).load(function() < var $image = $(this); //introduced a placeholder. //not to replace the $image directly, just for keeping all the event handler bound to $image. var $placeholder = $('').insertAfter($image); $(html).find('.crop').append($image) .end() .replaceAll($placeholder); >); >); >; >)(jQuery); jQuery Create Element And Append To Webpage
In this tutorial, you will learn how jQuery create element with classes and id and then append it to the webpage. You will learn how to create elements with class, id, and attributes with different methods.
Creating elements dynamically is the most common task in web development. You need to create and attach different attributes to the element like id, class, attributes, styles, events, etc.
With jQuery , it becomes quite easy to perform these tasks sometimes with just one line of code. Let’s see how it works.

Dynamically creating elements in the webpage can make your webpage more engaging and attractive.
Table of content — jQuery Create Element
Create Element jQuery
To create HTML element using jQuery, use $() function. A string is passed as an argument to the function.
jQuery checks if the passed string is a CSS selector then it selects the element from the webpage, and if the string looks like an HTML (i.e ) then it creates the element and returns it.
Note : The jQuery() function can be written as $() .
Let’s create a paragraph element using jQuery.
// creating a paragraph $(""); // creating a paragraph with text $("
Hello World!
"); // storing the element in a variable var p = $("Hello World!
");After creating the element jQuery also returns the reference to the element which you can store in a variable and use later.
jQuery Create div
String passed in the $() function is case sensitive when you try to select an element using CSS selector (like $(«p.box») and $(«p.Box») are different) but when you create element then string is non case sensitive (like $(«») and $(«») are same).
To create a div element, you can use $() function and pass , , , etc as argument.
Append Created Element To Webpage
Just creating the element will not show it on the webpage. To show the element on the webpage, you need to append it to the desired location.
To append an element to the webpage using jQuery, you can use the following methods.
1. append() Method
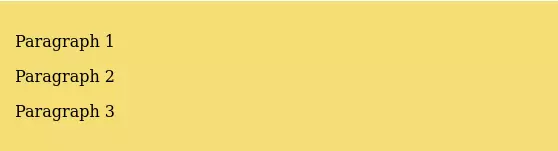
The append() method appends the element as the last child to the parent element (on which it is called).
For example, if we have 2 paragraphs in a div element and we append the 3rd paragraph to the div element by using the append() method then it will become the last child (3rd paragraph) of the div element.
Paragraph 1 Paragraph 2
2. prepend() Method
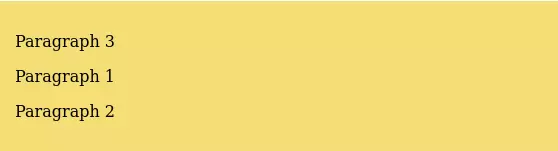
The prepend() method appends the element as the first child to the parent element (on which it is called).
If a parent element already has 2 elements and a new element is added to it using prepend() method then the new element will become the first child of the parent element.
Paragraph 1 Paragraph 2
3. before() Method
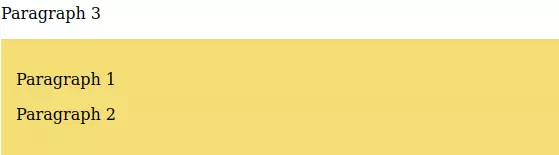
The before() method inserts the element before the element on which it is called and makes it the previous sibling of the element.
Paragraph 1 Paragraph 2
4. after() Method
The after() method inserts the element after the element on which it is called and makes it the next sibling of the element.
Paragraph 1 Paragraph 2

jQuery Create Element with Class
To add a class to an element, use the addClass() method.
Pass the class name as a string parameter to the method. You can pass multiple class names separated by a space.
var newDiv = $(""); // add a class newDiv.addClass("box"); // add to body $("body").append(newDiv);jQuery Create Element with ID
To add an ID to an element, use the attr() method.
The attr() method accepts two parameters: the name of the attribute and the value of the attribute.
Pass 2 parameters to the method: the name of the attribute «id» and the value of the attribute (here «box» in the example).
var newDiv = $(""); // add an id newDiv.attr("id", "box"); // add to body $("body").append(newDiv);You can also use the attr() method to add other attributes also to the element just pass the attribute name and the value as a string.
Conclusion
This is the end of the tutorial on how jQuery create element with class and id and append the element at various locations on the page. You can do a lot of things using this like creating a to-do list app using jQuery.
How to structure JSON and build HTML via jQuery
I have become a big fan of mustache.js recently for doing exactly this kind of thing.
if I tweak calvinf’s JSON format a little then this is an example using mustache.js:
If you want a speed benchmark for JavaScript templating libraries I found this link useful:
mustache.js is a good templating system to check out. I’d also take a look at jquery-tmpl as it’ll likely be included in jQuery 1.5 based on comments jeresig has made. github.com/jquery/jquery-tmpl
Resig’s templating is super-dangerous, as it fails to HTML-encode by default (or even optionally). Anything you build on it is doomed to a thousand HTML-injection XSS security holes. Stay well away. (Mustache does not make this grievous error.)
@bobince — while I completely agree that not have the option of HTML-encoding input in a client-side Javascript is no good at all, isn’t it a better practice to handle the HTML-encoding on the server side?
@Sean: Only if you’re producing the HTML itself on the server side, which presumably you’re not if you’re templating with mustache. Passing HTML-encoded text back in a JSON object for placement in a template is inappropriate; what if you wanted to use the same text in another context too, like writing to an attribute via DOM, or putting in an alert() box? The process of HTML-encoding should always be done at the point of inserting text into HTML.