- Bottom navigation bar kotlin
- Bottom Navigation Bar in Android with Example | Kotlin
- You Might Also Like
- How To Download And Install Gbwhatsapp Pro (2022) Latest Version For Android
- Splash Screen Tutorial in Android with Example
- Option Menu in Android With Example
- This Post Has One Comment
- Bottom Navigation Bar Android Using Kotlin
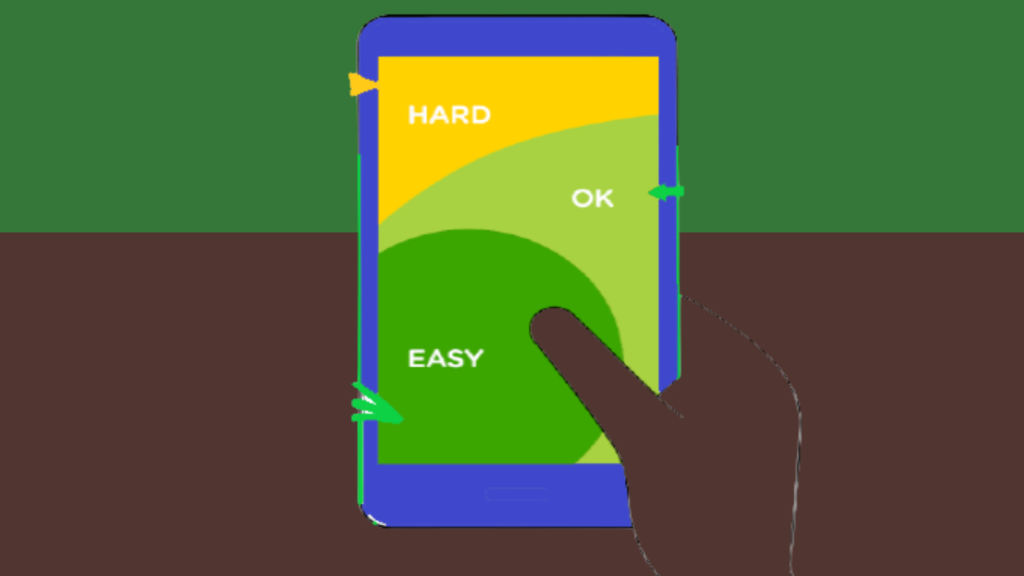
- What the app will look like?
- What will you learn from this tutorial?
- Getting Started – Bottom Navigation Bar Android
- Customizing the Icon and Text
- Where to go next?
- Share this:
Bottom navigation bar kotlin

Bottom Navigation Bar in Android with Example | Kotlin
- Post author: Sagar Paliwal
- Post published: August 7, 2021
- Post category: Android Development
- Post comments: 1 Comment
The bottom Navigation Bar is a material component that allows you to quickly explore and transition between top-level views with just a single click or tap. So, in this Android tutorial, we’ll learn how to make a bottom navigation bar in fragments using binding.
Instagram, Facebook, and other popular applications use the bottom navigation bar. Let’s look at how to create a functional Bottom Navigation Bar in an Android app in this tutorial. Here’s a look at a sample Bottom Navigation Bar:

- Top-level and frequently-used actions should be placed near the bottom of the screen since they are easier to reach with one-handed or one-thumb interactions.
This is something to avoid in the bottom navigation bar.
The tap targets will be too close together if you have more than five destinations in your bottom navigation. When a bottom nav bar has too many tabs, it can be physically challenging for users to tap the one they desire. And the complexity of your program grows with each extra tab you add.
Steps for Bottom Navigation Bar
Step 1: Open Android Studio and create a new project.
Step 2: Include the dependency in the file build.gradle(app).
// implementation 'androidx.lifecycle:lifecycle-livedata-ktx:2.3.1'//livedata dependency implementation 'androidx.lifecycle:lifecycle-viewmodel-ktx:2.3.1' // lifecycle dependency implementation 'androidx.navigation:navigation-fragment-ktx:2.3.5' // navigation dependency implementation 'androidx.navigation:navigation-ui-ktx:2.3.5' // navigation dependency
Step 3: enable the view binding in your project.
–> Add this code to your build.gradle(app) file in the android section.
Step 4: In activity_main.xml –>open the res/layout/activlty_main.xml file and Add BottomNavigationView widget. You must include one fragment in this layout file. It will act as a storage container for the many fragments.
Step 5: Adds items to the bottom navigation bar’s menu –> To make a Menu, go to the app’s res(right-click) -> New -> Android Resource Directory and pick Menu as the Resource Type->ok.
Click on the app -> res -> menu(right-click) -> New -> Menu Resource File and name it bottom_nav_menu.
We’re using Menu in this menu file to act as a container for menu items. Each has a title, an icon, and an id.
Step 6: Creating Fragments–> Now that we have our Bottom Navigation Bar, we’d like it to be functional by redirecting us to a different fragment/activity when we click an item. Create a fragment for each item in this example and navigate to it whenever the corresponding item is clicked. We’ll make three Fragments because we made three items in the Bottom Navigation Bar. To make a Fragment, open the app (right-click) and select New -> Fragment -> Fragment (Blank). DashBoard fragment is the name of the fragment, and fragment_dashboard is the name of the corresponding XML file. To keep things simple, each of the three fragments will only contain a TextView.
Step 7: To display the fragment dashboard.xml, the code of DashBoardFragment.kt and DashBoardViewModel are listed below.
package com.sagar.bottomnavogationbar.ui.dashboard import android.os.Bundle import android.view.LayoutInflater import android.view.View import android.view.ViewGroup import android.widget.TextView import androidx.fragment.app.Fragment import androidx.lifecycle.Observer import androidx.lifecycle.ViewModelProvider import com.sagar.bottomnavogationbar.R import com.sagar.bottomnavogationbar.databinding.FragmentDashboardBinding class DashboardFragment : Fragment() < private lateinit var dashboardViewModel: DashboardViewModel private var _binding: FragmentDashboardBinding? = null private val binding get() = _binding!! override fun onCreateView( inflater: LayoutInflater, container: ViewGroup?, savedInstanceState: Bundle? ): View? < dashboardViewModel = ViewModelProvider(this).get(DashboardViewModel::class.java) _binding = FragmentDashboardBinding.inflate(inflater, container, false) val root: View = binding.root val textView: TextView = binding.textDashboard dashboardViewModel.text.observe(viewLifecycleOwner, Observer < textView.text = it >) return root > override fun onDestroyView() < super.onDestroyView() _binding = null >>
package com.sagar.bottomnavogationbar.ui.dashboard import androidx.lifecycle.LiveData import androidx.lifecycle.MutableLiveData import androidx.lifecycle.ViewModel class DashboardViewModel : ViewModel() < private val _text = MutableLiveData().apply < value = "This is dashboard Fragment Section" >val text: LiveData = _text >
Step 8: Create two more fragments for the remaining 2 items in the same way. The files fragment_home.xml, HomeFragment.kt, HomeViewModel, fragment_notification.xml, and NotificationsFragment.kt,NotificationsViewModel are listed below, in that order.
package com.sagar.bottomnavogationbar.ui.home import android.os.Bundle import android.view.LayoutInflater import android.view.View import android.view.ViewGroup import android.widget.TextView import androidx.fragment.app.Fragment import androidx.lifecycle.Observer import androidx.lifecycle.ViewModelProvider import com.sagar.bottomnavogationbar.R import com.sagar.bottomnavogationbar.databinding.FragmentHomeBinding class HomeFragment : Fragment() < private lateinit var homeViewModel: HomeViewModel private var _binding: FragmentHomeBinding? = null private val binding get() = _binding!! override fun onCreateView( inflater: LayoutInflater, container: ViewGroup?, savedInstanceState: Bundle? ): View? < homeViewModel = ViewModelProvider(this).get(HomeViewModel::class.java) _binding = FragmentHomeBinding.inflate(inflater, container, false) val root: View = binding.root val textView: TextView = binding.textHome homeViewModel.text.observe(viewLifecycleOwner, Observer < textView.text = it >) return root > override fun onDestroyView() < super.onDestroyView() _binding = null >>
package com.sagar.bottomnavogationbar.ui.home import androidx.lifecycle.LiveData import androidx.lifecycle.MutableLiveData import androidx.lifecycle.ViewModel class HomeViewModel : ViewModel() < private val _text = MutableLiveData().apply < value = "This is home Fragment Section" >val text: LiveData = _text >
–> fragment_notifications.xml , NotificationsFragment and Notificationsviewmodel are listed below.
package com.sagar.bottomnavogationbar.ui.notifications import android.os.Bundle import android.view.LayoutInflater import android.view.View import android.view.ViewGroup import android.widget.TextView import androidx.fragment.app.Fragment import androidx.lifecycle.Observer import androidx.lifecycle.ViewModelProvider import com.sagar.bottomnavogationbar.R import com.sagar.bottomnavogationbar.databinding.FragmentNotificationsBinding class NotificationsFragment : Fragment() < private lateinit var notificationsViewModel: NotificationsViewModel private var _binding: FragmentNotificationsBinding? = null private val binding get() = _binding!! override fun onCreateView( inflater: LayoutInflater, container: ViewGroup?, savedInstanceState: Bundle? ): View? < notificationsViewModel = ViewModelProvider(this).get(NotificationsViewModel::class.java) _binding = FragmentNotificationsBinding.inflate(inflater, container, false) val root: View = binding.root val textView: TextView = binding.textNotifications notificationsViewModel.text.observe(viewLifecycleOwner, Observer < textView.text = it >) return root > override fun onDestroyView() < super.onDestroyView() _binding = null >>
package com.sagar.bottomnavogationbar.ui.notifications import androidx.lifecycle.LiveData import androidx.lifecycle.MutableLiveData import androidx.lifecycle.ViewModel class NotificationsViewModel : ViewModel() < private val _text = MutableLiveData().apply < value = "This is notifications Fragment Section" >val text: LiveData = _text >
Step 9: Connect fragments for navigation –> To make a Navigation, go to the app’s res(right-click) -> New -> Android Resource Directory and pick Navigation as the Resource Type->ok.
Click on the app -> res -> Navigation (right-click) -> New -> Navigation Resource File and name it mobile_navigation.
Step 10: In MainActivity.kt file –> Now that we have everything we need, all that remains is to code the MainActivity.kt to connect everything to the application. Add a binding and navController in MainActivity.kt file.
package com.sagar.bottomnavogationbar import android.os.Bundle import android.view.Window import android.view.WindowManager import com.google.android.material.bottomnavigation.BottomNavigationView import androidx.appcompat.app.AppCompatActivity import androidx.navigation.findNavController import androidx.navigation.ui.AppBarConfiguration import androidx.navigation.ui.setupActionBarWithNavController import androidx.navigation.ui.setupWithNavController import com.sagar.bottomnavogationbar.databinding.ActivityMainBinding class MainActivity : AppCompatActivity() < private lateinit var binding: ActivityMainBinding override fun onCreate(savedInstanceState: Bundle?) < super.onCreate(savedInstanceState) //binding binding = ActivityMainBinding.inflate(layoutInflater) setContentView(binding.root) val navView: BottomNavigationView = binding.navView val navController = findNavController(R.id.nav_host_fragment_activity_main) val appBarConfiguration = AppBarConfiguration( setOf( R.id.navigation_home, R.id.navigation_dashboard, R.id.navigation_notifications ) ) setupActionBarWithNavController(navController, appBarConfiguration) navView.setupWithNavController(navController) >>
- We hope that this guide will assist you in quickly creating Bottom Navigation Bar in Android. If you have any problems, please post them in the comments section and we will gladly assist you.
You Might Also Like

How To Download And Install Gbwhatsapp Pro (2022) Latest Version For Android

March 25, 2022
Splash Screen Tutorial in Android with Example

July 25, 2021
Option Menu in Android With Example
This Post Has One Comment
Bottom Navigation Bar Android Using Kotlin
Hi again, Bottom Navigation Bar is another amazing part of Android development. When you need something like simple navigation for your app, the Android Bottom Navigation Bar is one of the choices. It is very easy to implement and I will show you how. Like always, I will guide you to this awesome component by using Kotlin programming language. So, let’s do it!
What the app will look like?
The app will look like this after you finish this tutorial:

What will you learn from this tutorial?
- Understand how to implement the Bottom Navigation Bar on Android.
- Understand about the BottomNavigationView customization.
Note: In this post, I used Android Studio 3.5.3, make sure you use the latest Android Studio, or if you already install it, be sure to check the latest update. The Kotlin version that I used is Kotlin 1.3.61.
Getting Started – Bottom Navigation Bar Android
Open your Android Studio and choose to Start a new Android Studio Project. Then set the Application Name BottomNavBar and select Kotlin as the language. Give the Activity Name MainActivity and wait until the Android Studio finishes preparing your project.
Create a new XML resource file under res/menu directory named menu_bottom_navigation.xml
This menu resource file will contain your menu items for the bottom navigation bar. For the drawable resources, you can use your own drawable files.
Next open activity_main.xml inside res/layout directory and replace the code given below:
Creating a bottom navigation bar will require you to use a BottomNavigationView widget from Android. This is just a simple layout for learning purposes.
- The app:itemBackground is for setting the color for each navigation bar item.
- app:itemIconSize to set the size of navigation bar icons.
- app:menu is where you set the menu content from your XML resource you added before.
Next, open MainActivity.kt file and modify the code below:
package com.thesimplycoder.bottomnavbar import androidx.appcompat.app.AppCompatActivity import android.os.Bundle import kotlinx.android.synthetic.main.activity_main.* class MainActivity : AppCompatActivity() < override fun onCreate(savedInstanceState: Bundle?) < super.onCreate(savedInstanceState) setContentView(R.layout.activity_main) bottomNav.setOnNavigationItemSelectedListener < when (it.itemId) < R.id.menu_home -> < setContent("Home") true >R.id.menu_notification -> < setContent("Notification") true >R.id.menu_search -> < setContent("Search") true >R.id.menu_profile -> < setContent("Profile") true >else -> false > > > private fun setContent(content: String) < setTitle(content) tvLabel.text = content >> Handling the click or tap action for each navigation item requires you to implement the setOnNavigationItemSelectedListener to the bottom navbar. Each item will have specific action above but on this guide, I keep it simple to just set the label of the TextView tvLabel .
This is where the navbar looks like when you run the app:

And this is where it looks like if only has less than three items:

Customizing the Icon and Text
What if you want a different color other than the default colorPrimary of each icon and text? It is very simple. You just create a custom selector of it. Create a new XML resource file under res/color directory named selector_nav_item.xml
This means, when the item is selected or active, the color is colorAccent and when it is inactive or unselected, the color is kinda a semi-black color. You could use your own color though.
Next, open the activity_main.xml and modify the BottomNavigationView widget to be like this:
The difference is just the addition of itemIconTint and itemTextColor . That’s it!

Where to go next?
You can download this full code from the link below:
Be sure to check my other cool posts here about:
I hope you like my post, comment and share it with love!