- How TO — Blog Layout
- How To Create a Blog Layout
- Example
- Blog Name
- TITLE HEADING
- TITLE HEADING
- About Me
- Popular Post
- Follow Me
- Footer
- Example
- Blog and Other Pages
- Creating a New Page
- Blog Page
- Blog I write about things I encounter while learning web programming. Blog Entries
- Blog Entries
- Blog Entry as Sub-Page
- First Entry April 7, 2015 This is my very first blog entry.
- Get started with your blog entries!
- Second Blog Entry
- Projects Page
- Projects Here you will soon find my web projects.
- Contact Page
- Contact You can contact me by email: spammails@gmx.ch Marco Jakob Switzerland
- What’s next?
- HTML Blog
- Link Blog Page
- Link Post Pages
- Blog Posts Element
- Blog Block Presets
- Edit Posts
- Edit Post Texts
- Change Featured Image
- Blog Templates
- Blog Posts Template
- Post Template
- Export HTML Blog
- Preview Blog And Posts
How TO — Blog Layout
Learn how to create a responsive blog layout with CSS.
Learn how to create a responsive blog layout that varies between two and full-width columns depending on screen width.
Resize the browser window to see the responsive effect:
How To Create a Blog Layout
Step 1) Add HTML:
Example
Blog Name
TITLE HEADING
Title description, Dec 7, 2017
Some text..
TITLE HEADING
Title description, Sep 2, 2017
Some text..
About Me
Some text about me in culpa qui officia deserunt mollit anim..
Popular Post
Follow Me
Some text..
Footer
Step 2) Add CSS:
Example
body font-family: Arial;
padding: 20px;
background: #f1f1f1;
>
/* Header/Blog Title */
.header padding: 30px;
font-size: 40px;
text-align: center;
background: white;
>
/* Create two unequal columns that floats next to each other */
/* Left column */
.leftcolumn <
float: left;
width: 75%;
>
/* Right column */
.rightcolumn float: left;
width: 25%;
padding-left: 20px;
>
/* Fake image */
.fakeimg background-color: #aaa;
width: 100%;
padding: 20px;
>
/* Add a card effect for articles */
.card background-color: white;
padding: 20px;
margin-top: 20px;
>
/* Clear floats after the columns */
.row:after content: «»;
display: table;
clear: both;
>
/* Footer */
.footer padding: 20px;
text-align: center;
background: #ddd;
margin-top: 20px;
>
/* Responsive layout — when the screen is less than 800px wide, make the two columns stack on top of each other instead of next to each other */
@media screen and (max-width: 800px) .leftcolumn, .rightcolumn <
width: 100%;
padding: 0;
>
>
Tip: Go to our CSS Website Layout Tutorial to learn more about website layouts.
Tip: Go to our CSS Responsive Web Design Tutorial to learn more about responsive web design and grids.
Blog and Other Pages
Our portfolio thus far only has a home page. Most websites have more than one page, of course. In this part we will add additional pages.
Creating a New Page
We’ll create three new pages: One page for our own blog, one for projects, and one for contact information.
These three sites represent our “main pages”. We must keep in mind that we might later want to add additional sub-pages. For example, there will be a sub-page for every blog entry. To have a nice structure it makes sense to create subfolders for each page.
Every subfolder will get its own index.html file that is automatically displayed when the folder is opened in the browser.
To create a new page is easy. It is best to copy the previous index.html so you already have the basic structure. Then, of course, we must make a few adjustments to each new page.
Important: Make sure that you don’t use any special characters or spaces when naming sub-folders and files. As a best practice you should only use standard, lowercase letters. You may separate multiple words with a dash (`-`).
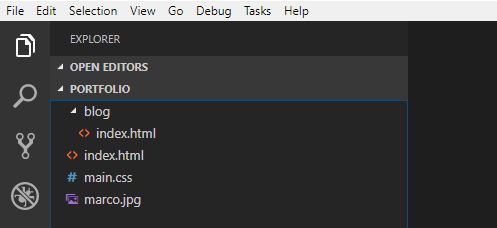
Blog Page
Create a subfolder in your portfolio folder named blog . Copy the index.html file into the new subfolder. Now your file structure should look like this:
Open the copied file blog/index.html in your browser. You will notice that two things do not work:
Since we are in a subfolder, the path to the files are not correct. For the image to appear we would need to use ../marco.jpg or /marco.jpg instead of marco.jpg in the src attribute. But probably you will not want the same image on the blog page. So you can remove the entire img element.
In CSS it is common to define CSS rules for the entire project. Thus it is important that we reference the same CSS file in the blog page. We achieve this by changing the URL from main.css to /main.css . The leading / searches for the file in the root folder. The following shows the entire link element:
blog/index.html
This change should cause the styling from our CSS to also be applied to the blog page.
Next we change the title and content.
blog/index.html — Blog Overview
Blog
I write about things I encounter while learning web programming.
Blog Entries
In the HTML code above you can see some special tags: . Between these tags we can write a comment in HTML. Comments are intended to be read only for us programmers and are ignored by the browser.
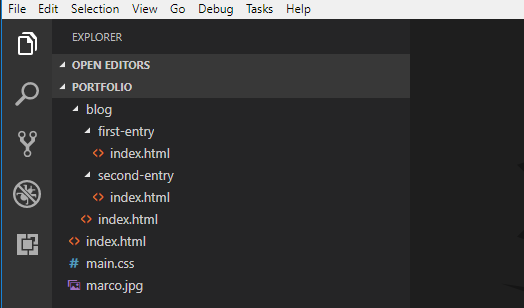
Blog Entry as Sub-Page
Our blog needs some entries. We create a separate HTML page for each blog entry. Create a subfolder within the blog folder with the name first-entry . Use your file explorer to copy the file blog/index.html into the new subfolder.

Open the blog entry and change the content as follows:
blog/first-entry/index.html
First Entry
April 7, 2015
This is my very first blog entry.
Here I’ve included a new HTML element ( hr ). You will easily find out what it does by experimenting with it or by doing a quick internet search.
Get started with your blog entries!
I recommend that you immediately start to write your own blog entries. You could write a short entry every time you learned something new about programming. For inspiration I list a few things that you could write about:
With such blog entries you will advance much faster in mastering programming. This is why:
- You will be aware of what you have learned → higher motivation!
- You can look up things in your personal documentation, for example links to helpful sites.
- You will practice HTML and CSS while writing the entries.
- If you publish your website online you can make your blog accessible to others. This enables you to share your knowledge or to ask someone to help you with a problem.
- If you publish your portfolio, I would be very interested in having a look at it! Please share your link somewhere in the comments below.
Do not wait too lang and get started right away. It is worth it!
Second Blog Entry
Hint: Create a subfolder for each blog post (with an index.html page). This will give you a nice order where you can put pictures and other files for blog entries into separate subfolders.
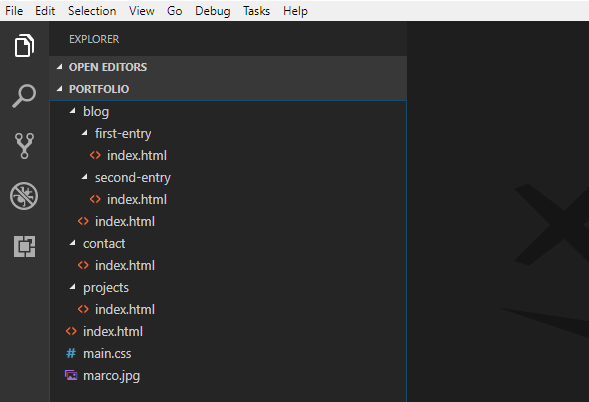
Projects Page
If we later design various websites or web applications, it would be nice to have a separate page to showcase our projects. We will prepare such a projects page, albeit with no content yet.
Proceed as we did for the blog page above and create a subfolder projects with a file index.html .
projects/index.html
Projects
Here you will soon find my web projects.
Contact Page
The last of our main pages is a contact page. Create a subfolder contact with a file index.html .
Important: Carefully consider what information you want to make public! For example, do not publish your primary email address, because you might receive some spam messages.
contact/index.html
       Contact You can contact me by email: spammails@gmx.ch  Marco Jakob
Switzerland
In the address you’ll find a new item:
. It causes a line break. Also note the special link with mailto: and the email address. This link opens the standard email program and creates a new email with prefilled address.
Now we already have five HTML pages.
What’s next?
What’s missing is a navigation so we can easily switch between our pages.
HTML Blog

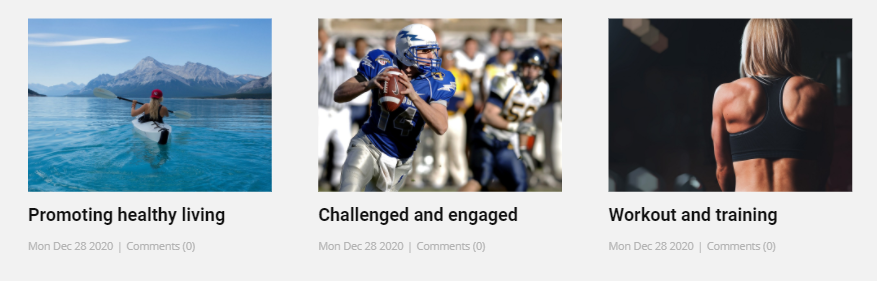
Create and modify the HTML Blog and its Posts with Nicepage. The following example shows how Posts will look on a website.
NOTE: You can edit the Posts in the Nicepage Desktop Application and export to WordPress and Joomla if needed.
The following paragraphs explain each step in detail.
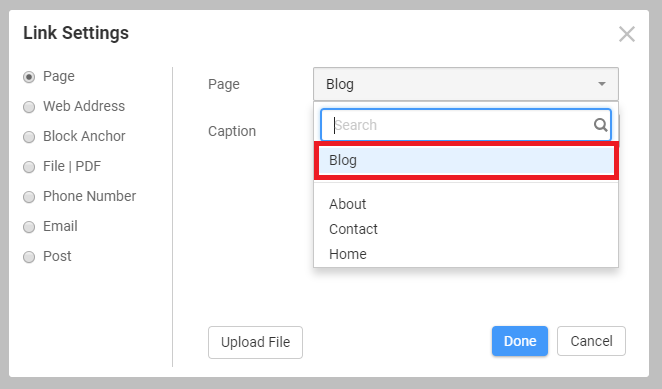
Link Blog Page
Add a link to the Blog in the Menu Items and Link Settings Dialogs. It works in the Applications, WordPress Plugin, and Joomla Extension.
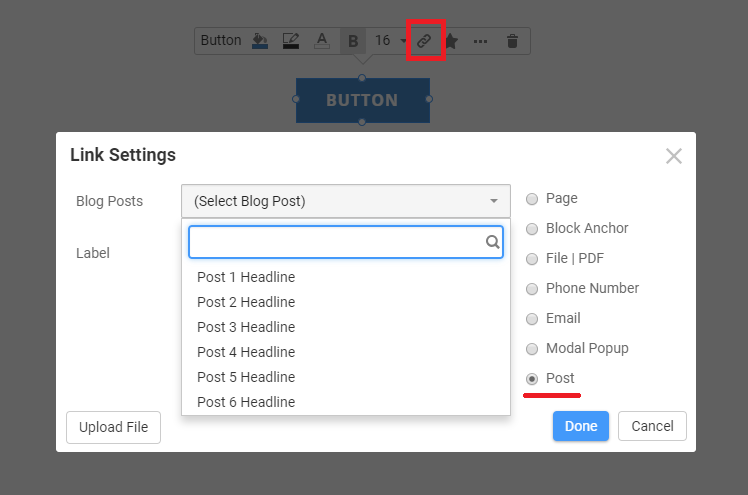
Link Post Pages
You can also add a link to Blog and Posts in the Edit Link Dialog for the Button and Hyperlink Elements.
Blog Posts Element
You can use the Blog Posts Element in a Block of an existing page, such as Home or a new page.
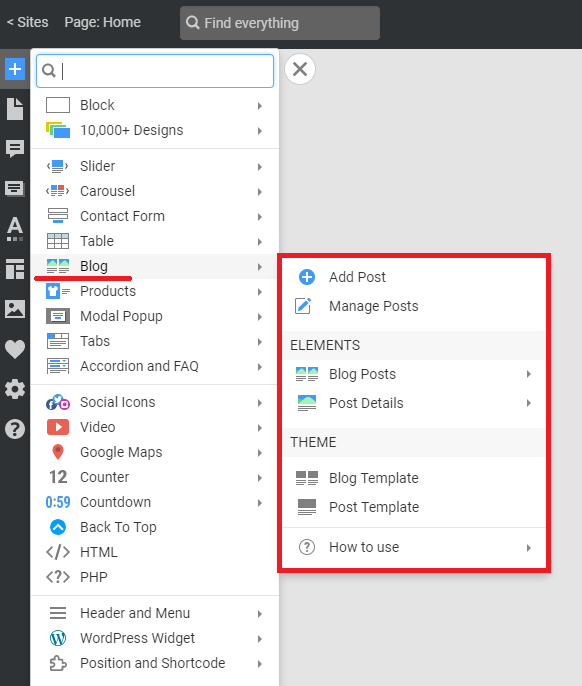
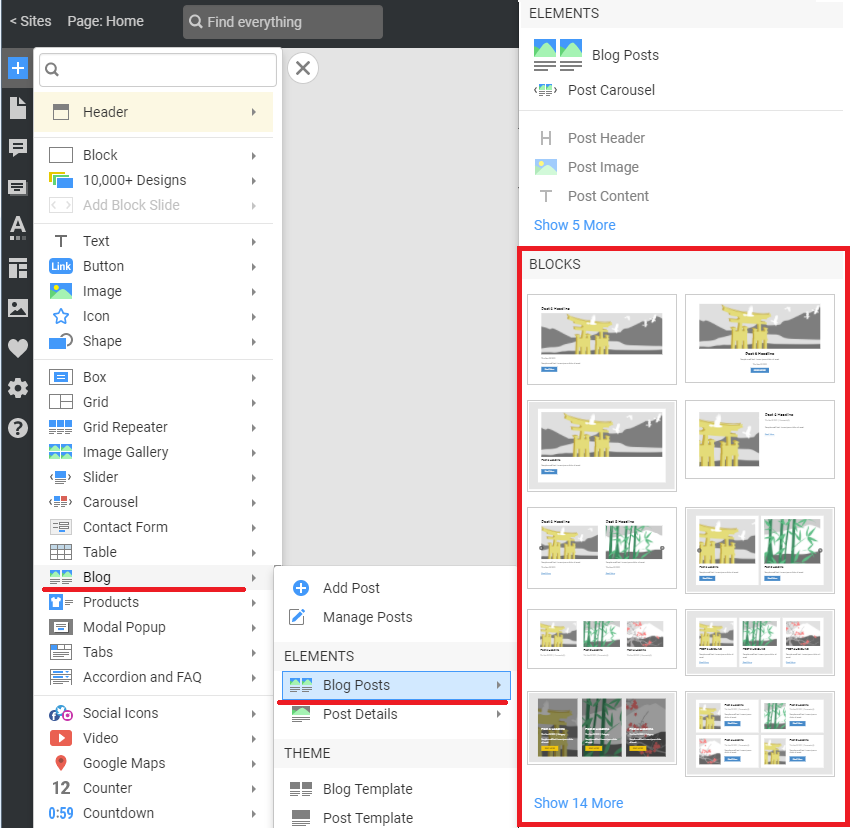
Blog Block Presets
You can start with the Blog Posts Presets in the Add Panel’s Blog section.
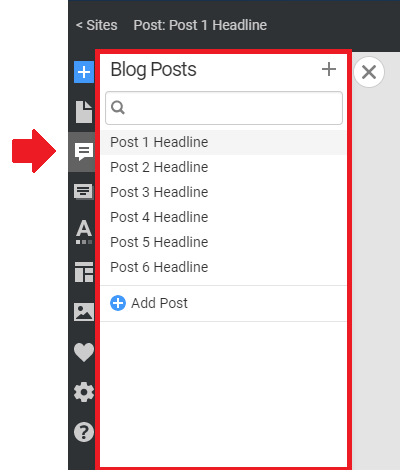
Edit Posts
Add and edit Posts that appear in the Blog Posts Element added to a Block on a Web Page.
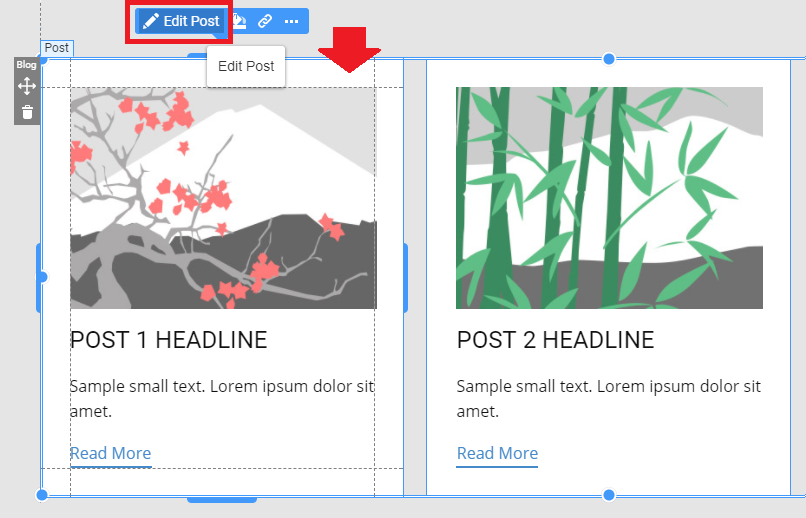
Edit Post Texts
Use the Post Edit Button for the selected item of the Blog Posts Element. You can click on the same Edit Post Button for the Post Details Element.
Change Featured Image
Modify the Featured Image for a Blog Post in HTML in the Post Edit Mode. You can edit the Featured Image by clicking on the Change Image Button in the Property Panel.
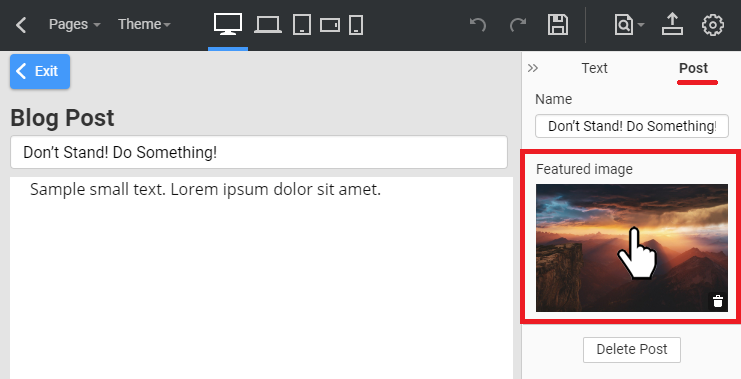
For your convenience, you can change the Featured Image by clicking on the Change Image icon for the selected Post in the Editor.
Blog Templates
Please note that for the HTML Blog, you need to modify only the Post Template.
Blog Posts Template
NOTE: To use this Project for WordPress and Joomla exports, you can edit the Theme -> Blog Template. You can skip this section for the HTML Blog.
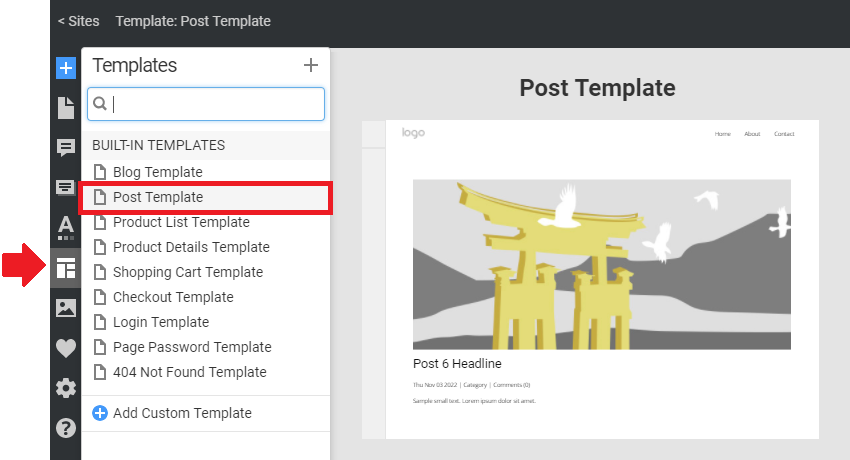
Post Template
Edit the layout for your HTML Posts by customizing the Theme Panel -> Post Template.
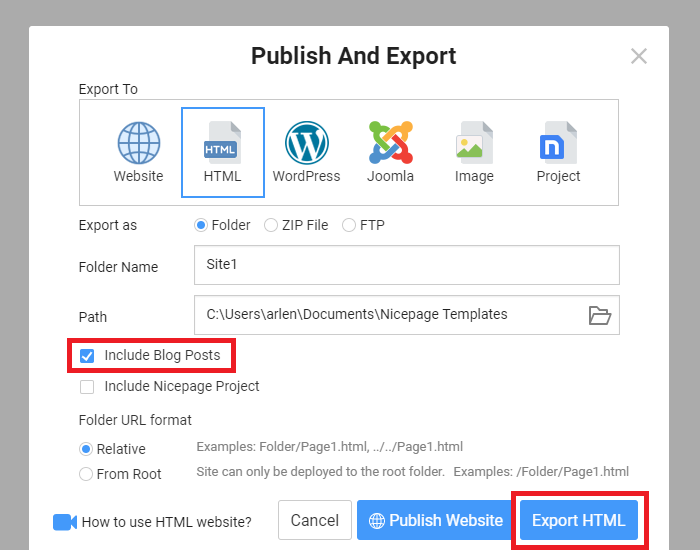
Export HTML Blog
In the Publish dialog, select the HTML Tab.
NOTE: Check the Include Blog Posts option in the Publish dialog and export the HTML Blod and Posts to the Blog folder.
Click the Export HTML button. You will create the Blog folder in the exported ZP file or folder.
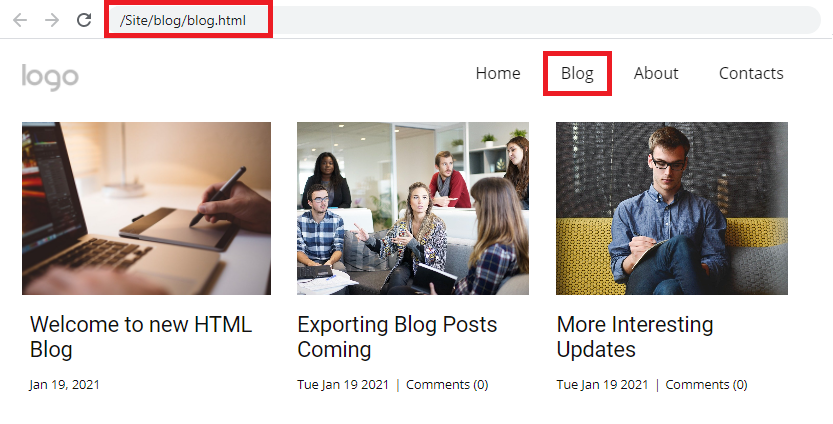
Preview Blog And Posts
Open the page in a browser from the Publish Success dialog. After the export, the HTML Blog will look like the following on the live site in a browser.
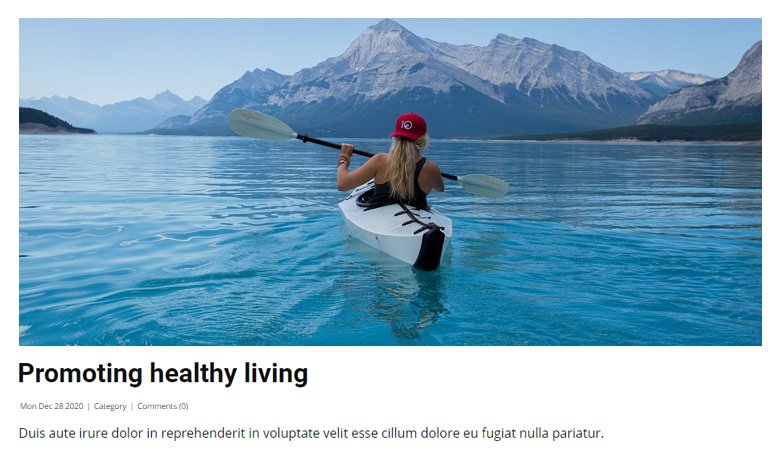
The live Post will look like the following example. The exported Posts use the layout of the Post Template.
## Summary — Overview — Link Blog Page — Link Post Pages — Blog Posts Element — Blog Block Presets — Edit Posts — Edit Post Texts — Change Featured Image — Blog Templates — Blog Posts Template — Post Details Template — Export HTML Blog — Preview Blog And Post Pages ## Overview Create and modify the **HTML Blog** and its Posts with Nicepage. The following example shows how Posts will look on a website. !html-blog.png! **NOTE:** You can edit the Posts in the Nicepage Desktop Application and export to WordPress and Joomla if needed. The following paragraphs explain each step in detail. ## Link Blog Page Add a link to the Blog in the Menu Items and Link Settings Dialogs. It works in the Applications, WordPress Plugin, and Joomla Extension. !link-to-blog-page.png! ## Link Post Pages You can also add a link to Blog and Posts in the Edit Link Dialog for the Button and Hyperlink Elements. !linking-to-posts.png! ## Blog Posts Element You can use the [Blog Posts Element](page:83207) in a Block of an existing page, such as Home or a new page. !blog-posts.png! ## Blog Block Presets You can start with the Blog Posts Presets in the Add Panel’s Blog section. !blog-posts-presests.png! ## Edit Posts Add and edit Posts that appear in the [Blog Posts Element](page:83207) added to a Block on a Web Page. !managing-html-posts.png! ### Edit Post Texts Use the Post Edit Button for the selected item of the Blog Posts Element. You can click on the same Edit Post Button for the Post Details Element. !edit-post-blog-posts.png! ### Change Featured Image Modify the Featured Image for a Blog Post in HTML in the Post Edit Mode. You can edit the Featured Image by clicking on the Change Image Button in the Property Panel. !featured-image-for-post.png! For your convenience, you can change the Featured Image by clicking on the Change Image icon for the selected Post in the Editor. ## Blog Templates Please note that for the HTML Blog, you need to modify only the Post Template. ### Blog Posts Template NOTE: To use this Project for WordPress and Joomla exports, you can edit the Theme -> Blog Template. You can skip this section for the HTML Blog. ### Post Template Edit the layout for your HTML Posts by customizing the Theme Panel -> Post Template. !post-template-for-posts.png! ## Export HTML Blog In the Publish dialog, select the HTML Tab. **NOTE:** Check the Include Blog Posts option in the Publish dialog and export the HTML Blod and Posts to the Blog folder. Click the **Export HTML** button. You will create the Blog folder in the exported ZP file or folder. !include-blog-posts-option-for-html-export.png! ## Preview Blog And Posts Open the page in a browser from the Publish Success dialog. After the export, the HTML Blog will look like the following on the live site in a browser. !html-blog-browser.png! The live Post will look like the following example. The exported Posts use the layout of the Post Template. !html-post-layout.png! ##