Hello Spring Security
This section covers the minimum setup for how to use Spring Security with Spring Boot and then points you to next steps after that.
The completed starter application can be found in our samples repository. For your convenience, you can download a minimal Spring Boot + Spring Security application prepared by Spring Initializr.
Updating Dependencies
You first need to add Spring Security to your application’s classpath; two ways to do this are to use Maven or Gradle.
Starting Hello Spring Security Boot
With Spring Security on the classpath, you can now run the Spring Boot application. The following snippet shows some of the output that indicates that Spring Security is enabled in your application:
$ ./mvnw spring-boot:run . INFO 23689 --- [ restartedMain] .s.s.UserDetailsServiceAutoConfiguration : Using generated security password: 8e557245-73e2-4286-969a-ff57fe326336 . $ ./gradlew :bootRun . INFO 23689 --- [ restartedMain] .s.s.UserDetailsServiceAutoConfiguration : Using generated security password: 8e557245-73e2-4286-969a-ff57fe326336 . $ java -jar target/myapplication-0.0.1.jar . INFO 23689 --- [ restartedMain] .s.s.UserDetailsServiceAutoConfiguration : Using generated security password: 8e557245-73e2-4286-969a-ff57fe326336 . Now that you have it running, you might try hitting an endpoint to see what happens. If you hit an endpoint without credentials like so:
$ curl -i http://localhost:8080/some/path HTTP/1.1 401 . then Spring Security denies access with a 401 Unauthorized .
And if you hit an endpoint with credentials (found in the console output) as follows:
$ curl -i -u user:8e557245-73e2-4286-969a-ff57fe326336 http://localhost:8080/some/path HTTP/1.1 404 . then Spring Boot will service the request, returning a 404 Not Found in this case since /some/path doesn’t exist.
- Better understand what Spring Boot enables in Spring Security by default
- Read about common use cases that Spring Security helps with
- Start configuring authentication
Runtime Expectations
The default arrangement of Spring Boot and Spring Security affords the following behaviors at runtime:
- Requires an authenticated user for any endpoint (including Boot’s /error endpoint)
- Registers a default user with a generated password at startup (the password is logged to the console; in the preceding example, the password is 8e557245-73e2-4286-969a-ff57fe326336 )
- Protects password storage with BCrypt as well as others
- Provides form-based login and logout flows
- Authenticates form-based login as well as HTTP Basic
- Provides content negotiation; for web requests, redirects to the login page; for service requests, returns a 401 Unauthorized
- Mitigates CSRF attacks
- Mitigates Session Fixation attacks
- Writes Strict-Transport-Security to ensure HTTPS
- Writes X-Content-Type-Options to mitigate sniffing attacks
- Writes Cache Control headers that protect authenticated resources
- Writes X-Frame-Options to mitigate Clickjacking
- Integrates with HttpServletRequest ‘s authentication methods
- Publishes authentication success and failure events
It can be helpful to understand how Spring Boot is coordinating with Spring Security to achieve this. Taking a look at Boot’s security auto configuration, it does the following (simplified for illustration):
@EnableWebSecurity (1) @Configuration public class DefaultSecurityConfig (2) String generatedPassword = // . ; return new InMemoryUserDetailsManager(User.withUsername("user") .password(generatedPassword).roles("ROLE_USER").build()); > @Bean @ConditionalOnMissingBean(AuthenticationEventPublisher.class) DefaultAuthenticationEventPublisher defaultAuthenticationEventPublisher(ApplicationEventPublisher delegate) (3) return new DefaultAuthenticationEventPublisher(delegate); > >- Adds the @EnableWebSecurity annotation. (Among other things, this publishes Spring Security’s default Filter chain as a @Bean )
- Publishes a UserDetailsService @Bean with a username of user and a randomly generated password that is logged to the console
- Publishes an AuthenticationEventPublisher @Bean for publishing authentication events
| Spring Boot adds any Filter published as a @Bean to the application’s filter chain. This means that using @EnableWebSecurity in conjunction with Spring Boot automatically registers Spring Security’s filter chain for every request. |
Security Use Cases
There are a number of places that you may want to go from here. To figure out what’s next for you and your application, consider these common use cases that Spring Security is built to address:
- I am building a REST API, and I need to authenticate a JWT or other bearer token
- I am building a Web Application, API Gateway, or BFF and
In case none of those match what you are looking for, consider thinking about your application in the following order:
- Protocol: First, consider the protocol your application will use to communicate. For servlet-based applications, Spring Security supports HTTP as well as Websockets.
- Authentication: Next, consider how users will authenticate and if that authentication will be stateful or stateless
- Authorization: Then, consider how you will determine what a user is authorized to do
- Defense: Finally, integrate with Spring Security’s default protections and consider which additional protections you need
Apache®, Apache Tomcat®, Apache Kafka®, Apache Cassandra™, and Apache Geode™ are trademarks or registered trademarks of the Apache Software Foundation in the United States and/or other countries. Java™, Java™ SE, Java™ EE, and OpenJDK™ are trademarks of Oracle and/or its affiliates. Kubernetes® is a registered trademark of the Linux Foundation in the United States and other countries. Linux® is the registered trademark of Linus Torvalds in the United States and other countries. Windows® and Microsoft® Azure are registered trademarks of Microsoft Corporation. “AWS” and “Amazon Web Services” are trademarks or registered trademarks of Amazon.com Inc. or its affiliates. All other trademarks and copyrights are property of their respective owners and are only mentioned for informative purposes. Other names may be trademarks of their respective owners.
Реализация JWT в Spring Boot

Теперь, когда мы знаем что такое JWT токен и как он устроен, пришло время использовать наши теоретические знания на практике.
Одно из преимуществ аутентификации с использованием JWT – это возможность выделить выдачу токенов и работу с данными пользователей в отдельное приложение, переложив механизм валидации токенов на клиентские приложения. Этот механизм отлично подходит микросервисной архитектуре.
Сначала сделаем приложение, которое будет совмещать в себе бизнес-логику и выдачу токенов. А чуть позже мы сделаем два приложения: одно будет отвечать за выдачу токенов, а другое содержать бизнес логику. Сервис с бизнес логикой не сможет выдавать токены, но сможет их валидировать. Таких приложений может быть много.
Давайте рассмотрим механизм аутентификации по шагам. Обычно в обучающих статьях опускают наличие refresh токена. Однако, refresh токен является важной частью в аутентификации с помощью JWT, поэтому мы рассмотрим и его. Вот как будет выглядеть механизм аутентификации:
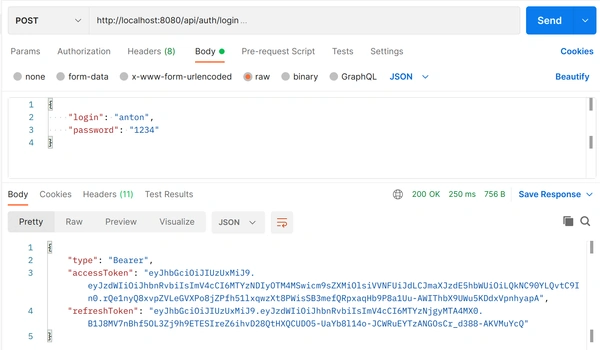
- Клиент API, чаще всего это фронт, присылает нам объект с логином и паролем.
- Если пароль подходит, то мы генерируем access и refresh токены и отправляем их в ответ.
- Клиент API использует access токен для взаимодействия с остальным нашим эндпойнтами нашего API.
- Через пять минут, когда access токен протухает, фронт отправляет refresh токен и получает новый access токен. И так по кругу, пока не протухнет refresh токен.
- Refresh токен выдается на 30 дней. Примерно на 25-29 день клиент API отправляет валидный refresh токен вместе с валидным access токеном и взамен получает новую пару токенов.
В этой статье будет чистый REST-сервис без фронтенда. Подразумевается, что front написан отдельно.
Используемые версии
Java: 17
SpringBoot: 2.7.0
jsonwebtoken: 0.11.5
jaxb-api: 2.3.1
История изменений
21.06.2022: Актуализировал версию спрингбута и перевел проект на 17 Java. Удалил все устаревшие классы и методы, заменив их на аналогичные современные варианты. Детализировал некоторые моменты в статье.
Создание сервера аутентификации
Если вы хотите повторять все действия из статьи, чтобы лучше понять что происходит. То для вас я собрал начальную конфигурацию приложения на сайте start.spring.io, вам остается только скачать ее, распаковать, и открыть с помощью IDEA.
После этого в pom.xml добавим зависимости. Они понадобятся нам для генерации JWT токенов.
После этого берем access токен и вcтавляем его на вкладке Authorization, выбрав тип «Bearer token».
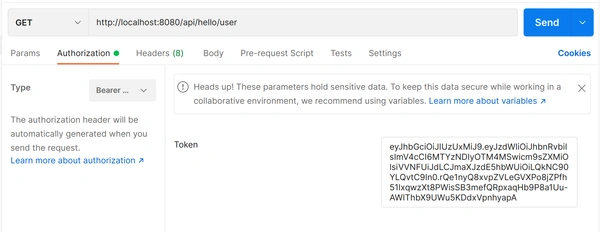
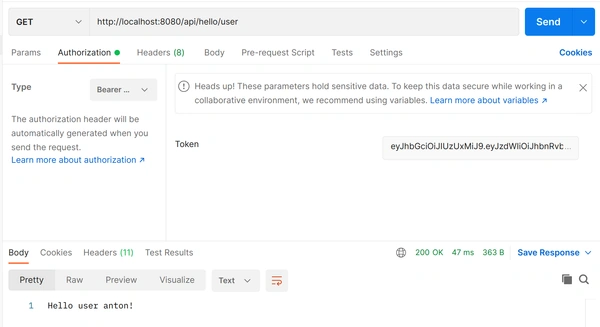
Далее выполняем запрос и получаем заветный результат.
Также попробуем получить сообщение предназначенное только для админов.
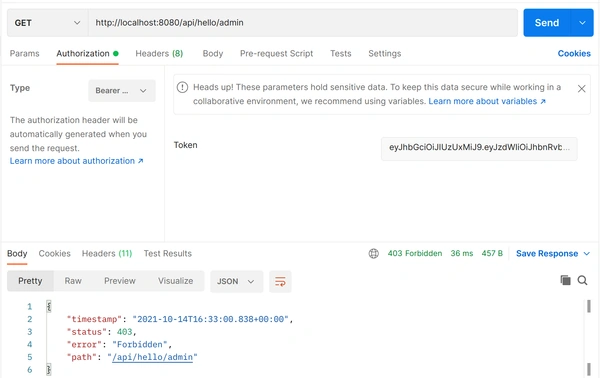
Видим 403 ошибку доступа, все работает. Если подождать 5 минут, то и по эндпойнту /api/hello/user увидим ту же ошибку, так как access токен протух.
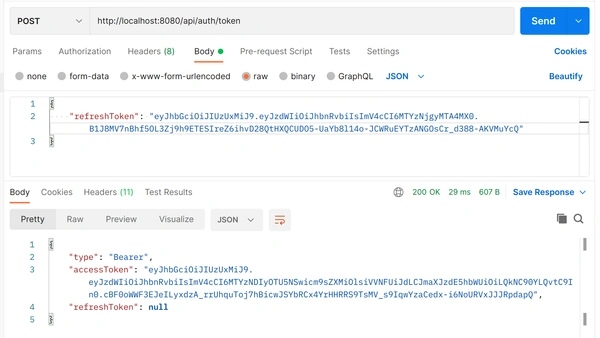
Чтобы получить новый access токен отправляем запрос на /api/auth/token . В теле запроса указываем наш refresh токен.
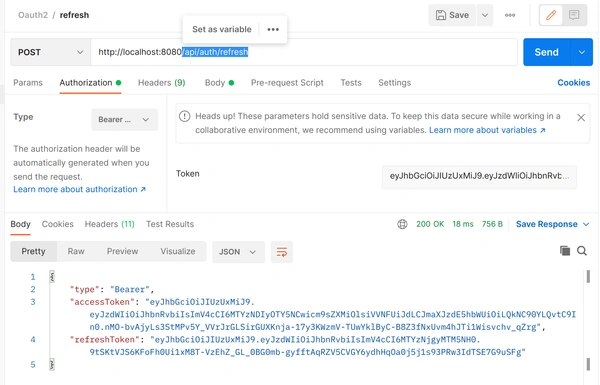
Все работает. А теперь взамен текущего refresh токена получим новые access и refresh токены. Для этого вызовем /api/auth/refresh и передадим наш текущий refresh токен в теле запроса. Также не стоит забывать, что это защищенный метод, поэтому во вкладке Authorization вставляем наш access токен.
Отлично, мы получили новую пару токенов. А что если попробовать снова вызвать этот же запрос?
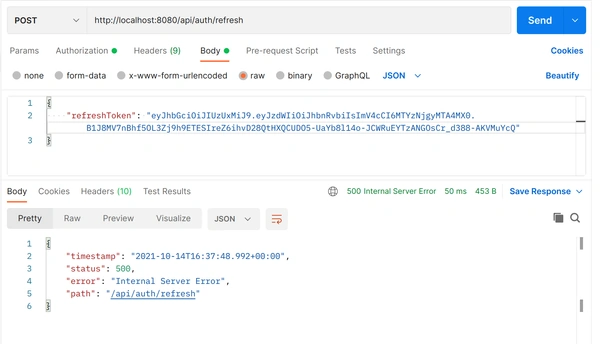
Мы получим ошибку, так как этого токена больше нет в сохраненных.
На этом основная часть закончена. Мы реализовали JWT аутентификацию. Теперь вы запросто реализуете приложение клиент, если это необходимо. Нужно только оставить функционал проверки токенов и аутентификации, и убрать функционал по выдаче новых токенов. Для удобства я сделал одно небольшое приложение клиент для демонстрации.
Склонируйте его себе и запустите. Токены выдает наш сервер аутентификации, а приложение клиент может их использовать для доступа к своему API.
Резюмирую
В этой статье мы реализовали аутентифицкаицю в SpringBoot сервисе с использованием JWT.
Теперь вы знаете, что можно выдавать токены в одном сервисе, а в других сервисах их валидировать, тем самым уменьшая запросы к сервису аутентификации. Такой подход можно использовать в микросервисной архитектуре.