- Html css and jquery coding
- HTML Code
- Starter Template
- Paste the below code in your tag
- Output Till Now
- CSS Code
- Output Till Now
- JavaScript Code
- jQuery HTML / CSS Methods
- Minimal To-Do List App using HTML CSS & jQuery
- Video Tutorial of Minimal To-Do List App
- Minimal To-Do List App [Source Codes]
- Create a Product Page with Interactive Colors in HTML, CSS3 & jQuery
- HTML
- Beats EP
- CSS
- JS
- Download Website Product Page
- Raul Dronca
Html css and jquery coding
Welcome to Coding Torque, fellow coders! Are you looking to add some flair to your website design? In this tutorial, we will be creating an Animated Product Card using HTML, CSS, and JavaScript (with a little help from JQuery). Not only will this project enhance your front-end development skills, but it will also give your website a professional and visually appealing touch. So, let’s get started and bring your product cards to life!
Before we start, here are some JavaScript Games you might like to create:
I would recommend you don’t just copy and paste the code, just look at the code and type by understanding it.
HTML Code
Starter Template
Paste the below code in your tag
 ADDIDAS GAZE ZX
Lorem ipsum dolor sit lorenm i amet, consectetur adipisicing elit. Eum, ea, ducimus!
Colour:$09.00 Nine dollar only
Output Till Now

CSS Code
Create a file style.css and paste the code below.
@import url(«https://fonts.googleapis.com/css2?family=Poppins:wght@400;500;600&display=swap»); * < margin: 0; padding: 0; box-sizing: border-box; font-family: "Poppins", sans-serif; >body < height: 100vh; display: flex; align-items: center; justify-content: center; background-image: linear-gradient(135deg, #43cbff 10%, #9708cc 100%); >.product-card < position: relative; max-width: 355px; width: 100%; border-radius: 25px; padding: 20px 30px 30px 30px; background: #fff; box-shadow: 0 5px 10px rgba(0, 0, 0, 0.2); z-index: 3; overflow: hidden; >.product-card .logo-cart < display: flex; align-items: center; justify-content: space-between; >.product-card .logo-cart img < height: 60px; width: 60px; object-fit: cover; >.product-card .logo-cart i < font-size: 27px; color: #707070; cursor: pointer; transition: color 0.3s ease; >.product-card .logo-cart i:hover < color: #333; >.product-card .main-images < position: relative; height: 210px; >.product-card .main-images img < position: absolute; height: 300px; width: 300px; object-fit: cover; transform: rotate(18deg); left: 12px; top: -40px; z-index: -1; opacity: 0; transition: opacity 0.5s ease; >.product-card .main-images img.active < opacity: 1; >.product-card .shoe-details .shoe_name < font-size: 24px; font-weight: 500; color: #161616; >.product-card .shoe-details p < font-size: 12px; font-weight: 400; color: #333; text-align: justify; >.product-card .shoe-details .stars i < margin: 0 -1px; color: #333; >.product-card .color-price .color-option < display: flex; align-items: center; >.color-price < display: flex; justify-content: space-between; align-items: center; margin-top: 10px; >.color-price .color-option .color < font-size: 18px; font-weight: 500; color: #333; margin-right: 8px; >.color-option .circles < display: flex; >.color-option .circles .circle < height: 18px; width: 18px; background: #0071c7; border-radius: 50%; margin: 0 4px; cursor: pointer; transition: all 0.4s ease; >.color-option .circles .circle.blue.active < box-shadow: 0 0 0 2px #fff, 0 0 0 4px #0071c7; >.color-option .circles .circle.pink < background: #fa1795; >.color-option .circles .circle.pink.active < box-shadow: 0 0 0 2px #fff, 0 0 0 4px #fa1795; >.color-option .circles .circle.yellow < background: #f5da00; >.color-option .circles .circle.yellow.active < box-shadow: 0 0 0 2px #fff, 0 0 0 4px #f5da00; >.color-price .price < display: flex; flex-direction: column; justify-content: center; align-items: center; >.color-price .price .price_num < font-size: 25px; font-weight: 600; color: #707070; >.color-price .price .price_letter < font-size: 10px; font-weight: 600; margin-top: -4px; color: #707070; >.product-card .button < position: relative; height: 50px; width: 100%; border-radius: 25px; margin-top: 30px; overflow: hidden; >.product-card .button .button-layer < position: absolute; height: 100%; width: 300%; left: -100%; background-image: linear-gradient(135deg, #9708cc, #43cbff, #9708cc, #43cbff); transition: all 0.4s ease; border-radius: 25px; >.product-card .button:hover .button-layer < left: 0; >.product-card .button button
Output Till Now

JavaScript Code
let circle = document.querySelector(".color-option"); circle.addEventListener("click", (e) => < let target = e.target; if (target.classList.contains("circle")) < circle.querySelector(".active").classList.remove("active"); target.classList.add("active"); document.querySelector(".main-images .active").classList.remove("active"); document.querySelector(`.main-images .$`).classList.add("active"); > >); jQuery HTML / CSS Methods
The following table lists all the methods used to manipulate the HTML and CSS.
The methods below work for both HTML and XML documents. Exception: the html() method.
| Method | Description |
|---|---|
| addClass() | Adds one or more class names to selected elements |
| after() | Inserts content after selected elements |
| append() | Inserts content at the end of selected elements |
| appendTo() | Inserts HTML elements at the end of selected elements |
| attr() | Sets or returns attributes/values of selected elements |
| before() | Inserts content before selected elements |
| clone() | Makes a copy of selected elements |
| css() | Sets or returns one or more style properties for selected elements |
| detach() | Removes selected elements (keeps data and events) |
| empty() | Removes all child nodes and content from selected elements |
| hasClass() | Checks if any of the selected elements have a specified class name |
| height() | Sets or returns the height of selected elements |
| html() | Sets or returns the content of selected elements |
| innerHeight() | Returns the height of an element (includes padding, but not border) |
| innerWidth() | Returns the width of an element (includes padding, but not border) |
| insertAfter() | Inserts HTML elements after selected elements |
| insertBefore() | Inserts HTML elements before selected elements |
| offset() | Sets or returns the offset coordinates for selected elements (relative to the document) |
| offsetParent() | Returns the first positioned parent element |
| outerHeight() | Returns the height of an element (includes padding and border) |
| outerWidth() | Returns the width of an element (includes padding and border) |
| position() | Returns the position (relative to the parent element) of an element |
| prepend() | Inserts content at the beginning of selected elements |
| prependTo() | Inserts HTML elements at the beginning of selected elements |
| prop() | Sets or returns properties/values of selected elements |
| remove() | Removes the selected elements (including data and events) |
| removeAttr() | Removes one or more attributes from selected elements |
| removeClass() | Removes one or more classes from selected elements |
| removeProp() | Removes a property set by the prop() method |
| replaceAll() | Replaces selected elements with new HTML elements |
| replaceWith() | Replaces selected elements with new content |
| scrollLeft() | Sets or returns the horizontal scrollbar position of selected elements |
| scrollTop() | Sets or returns the vertical scrollbar position of selected elements |
| text() | Sets or returns the text content of selected elements |
| toggleClass() | Toggles between adding/removing one or more classes from selected elements |
| unwrap() | Removes the parent element of the selected elements |
| val() | Sets or returns the value attribute of the selected elements (for form elements) |
| width() | Sets or returns the width of selected elements |
| wrap() | Wraps HTML element(s) around each selected element |
| wrapAll() | Wraps HTML element(s) around all selected elements |
| wrapInner() | Wraps HTML element(s) around the content of each selected element |
Minimal To-Do List App using HTML CSS & jQuery

Hello readers, Today in this blog you’ll learn how to create a Minimal To-Do List using HTML CSS, and Javascript. Previously I have shared a Custom Modal Box using HTML CSS & Javascript, now it’s time to create a To-Do List HTML CSS & jQuery.
Todo is a task management app or program to help you to stay organized and managed your day-to-day. You can add things that you have to do in the whole day, after completing those works you can simply remove that item from the list.
As you can see in the image, this one is a minimal To-Do List Design and it is based on jQuery. There are 3 fields in the program. One field for show list, one is input for insert items, and a plus button to add. When you will type some things and press the add button, then the item will add to the list and visible.
And removing any items from the list, you have to hover on that item and there will a trash icon reveal you have to click that to remove. The whole layout has a minimal design. If you’re feeling difficulty understanding what I am saying. You can watch a full video tutorial on this program (Minimal To-Do List).
Video Tutorial of Minimal To-Do List App
If you are a beginner, you can easily use this To-Do List in your project after changes some codes. If you have basic knowledge of HTML CSS & jQuery you can easily do that.
If you like this program (Minimal ToDo List) and want to get source codes. You can easily get the source codes of this program. To get the source codes you just need to scroll down. And, I believe this To-Do list program helps you a lot.
Minimal To-Do List App [Source Codes]
To create this program (Minimal To-Do List). First, you need to create two Files one HTML File and another one is CSS File. After creating these files just paste the following codes in your file. First, create an HTML file with the name of index.html and paste the given codes in your HTML file. Remember, you’ve to create a file with .html extension.
Second, create a CSS file with the name of style.css and paste the given codes in your CSS file. Remember, you’ve to create a file with .css extension.
@import url(‘https://fonts.googleapis.com/css?family=Montserrat:600|Noto+Sans|Open+Sans:400,700&display=swap’); * < margin: 0; padding: 0; color: #f2f2f2; box-sizing: border-box; >.center < position: absolute; top: 45%; left: 50%; transform: translate(-50%, -50%); background: #1b1b1b; border-radius: 5px; >.center .button < width: 350px; background: #1b1b1b; height: 50px; padding: 0 20px; border-radius: 5px 5px 0 0; >.button .text < font-size: 25px; font-weight: 600; line-height: 50px; letter-spacing: 1px; font-family: 'Open Sans',sans-serif; >.button .icon < font-size: 30px; float: right; line-height: 40px; cursor: pointer; >.center .field < height: 45px; width: 350px; background: #f2f2f2; position: relative; display: block; >.field.hide < display: none; >.field input < height: 100%; width: 100%; padding-left: 15px; font-size: 18px; outline: none; background: none; color: #202020; border: 2px solid #1b1b1b; >.field .add-btn < position: absolute; top: 50%; right: 10px; transform: translateY(-50%); background: #1b1b1b; font-size: 17px; padding: 4px 8px; border-radius: 3px; cursor: pointer; font-family: 'Montserrat',sans-serif; display: none; >input:valid ~ .add-btn < display: block; >.center ul < list-style: none; overflow: hidden; >ul li < height: 45px; width: 100%; line-height: 45px; background: #262626; font-family: 'Noto Sans',sans-serif; >ul li:nth-child(2n) < background: #1b1b1b; >ul li:last-child < border-radius: 0 0 5px 5px; >ul li:last-child span < border-radius: 0 5px 5px 5px; >ul li span < margin-right: 20px; height: 45px; width: 45px; margin-left: -45px; background: #e74c3c; display: inline-block; line-height: 45px; text-align: center; cursor: pointer; border-radius: 0 5px 5px 0; transition: 0.3s ease; >ul li:hover span
That’s all, now you’ve successfully created a Minimal To-Do List using HTML CSS & jQuery. If your code does not work or you’ve faced any error/problem then please comment down or contact us from the contact page.
Create a Product Page with Interactive Colors in HTML, CSS3 & jQuery
In this tutorial, we are going to create a website product page using HTML, CSS3 and jQuery. You can use it for product presentations on your shop website.
This page can be utilized to present your products on the website for your online business, making it simpler for customers to understand what you have to offer. The webpage’s structure can be created with HTML, and it can be styled and made visually appealing with CSS3. With the help of the JavaScript library jQuery, you can make your website more interactive and animated for your visitors and provide them a more satisfying experience overall. You can make a product page that looks professional and will make your company stand out by following the instructions in this guide.
In this tutorial, we’ll use Google Fonts, specifically Roboto. Make sure to include the typeface before you start.
HTML
The first step is to create an HTML structure. Here’s what we need:
With Postcards you can create and edit email templates online without any coding skills! Includes more than 100 components to help you create custom emails templates faster than ever before.
Two columns
- Headphones images (**on the left**)
- Headphones description and customization (**on the right**)
- In this section, we’ll have more elements (**buttons, radios, links**)
Ok, let’s wrap everything in a `.container` class.
 Headphones
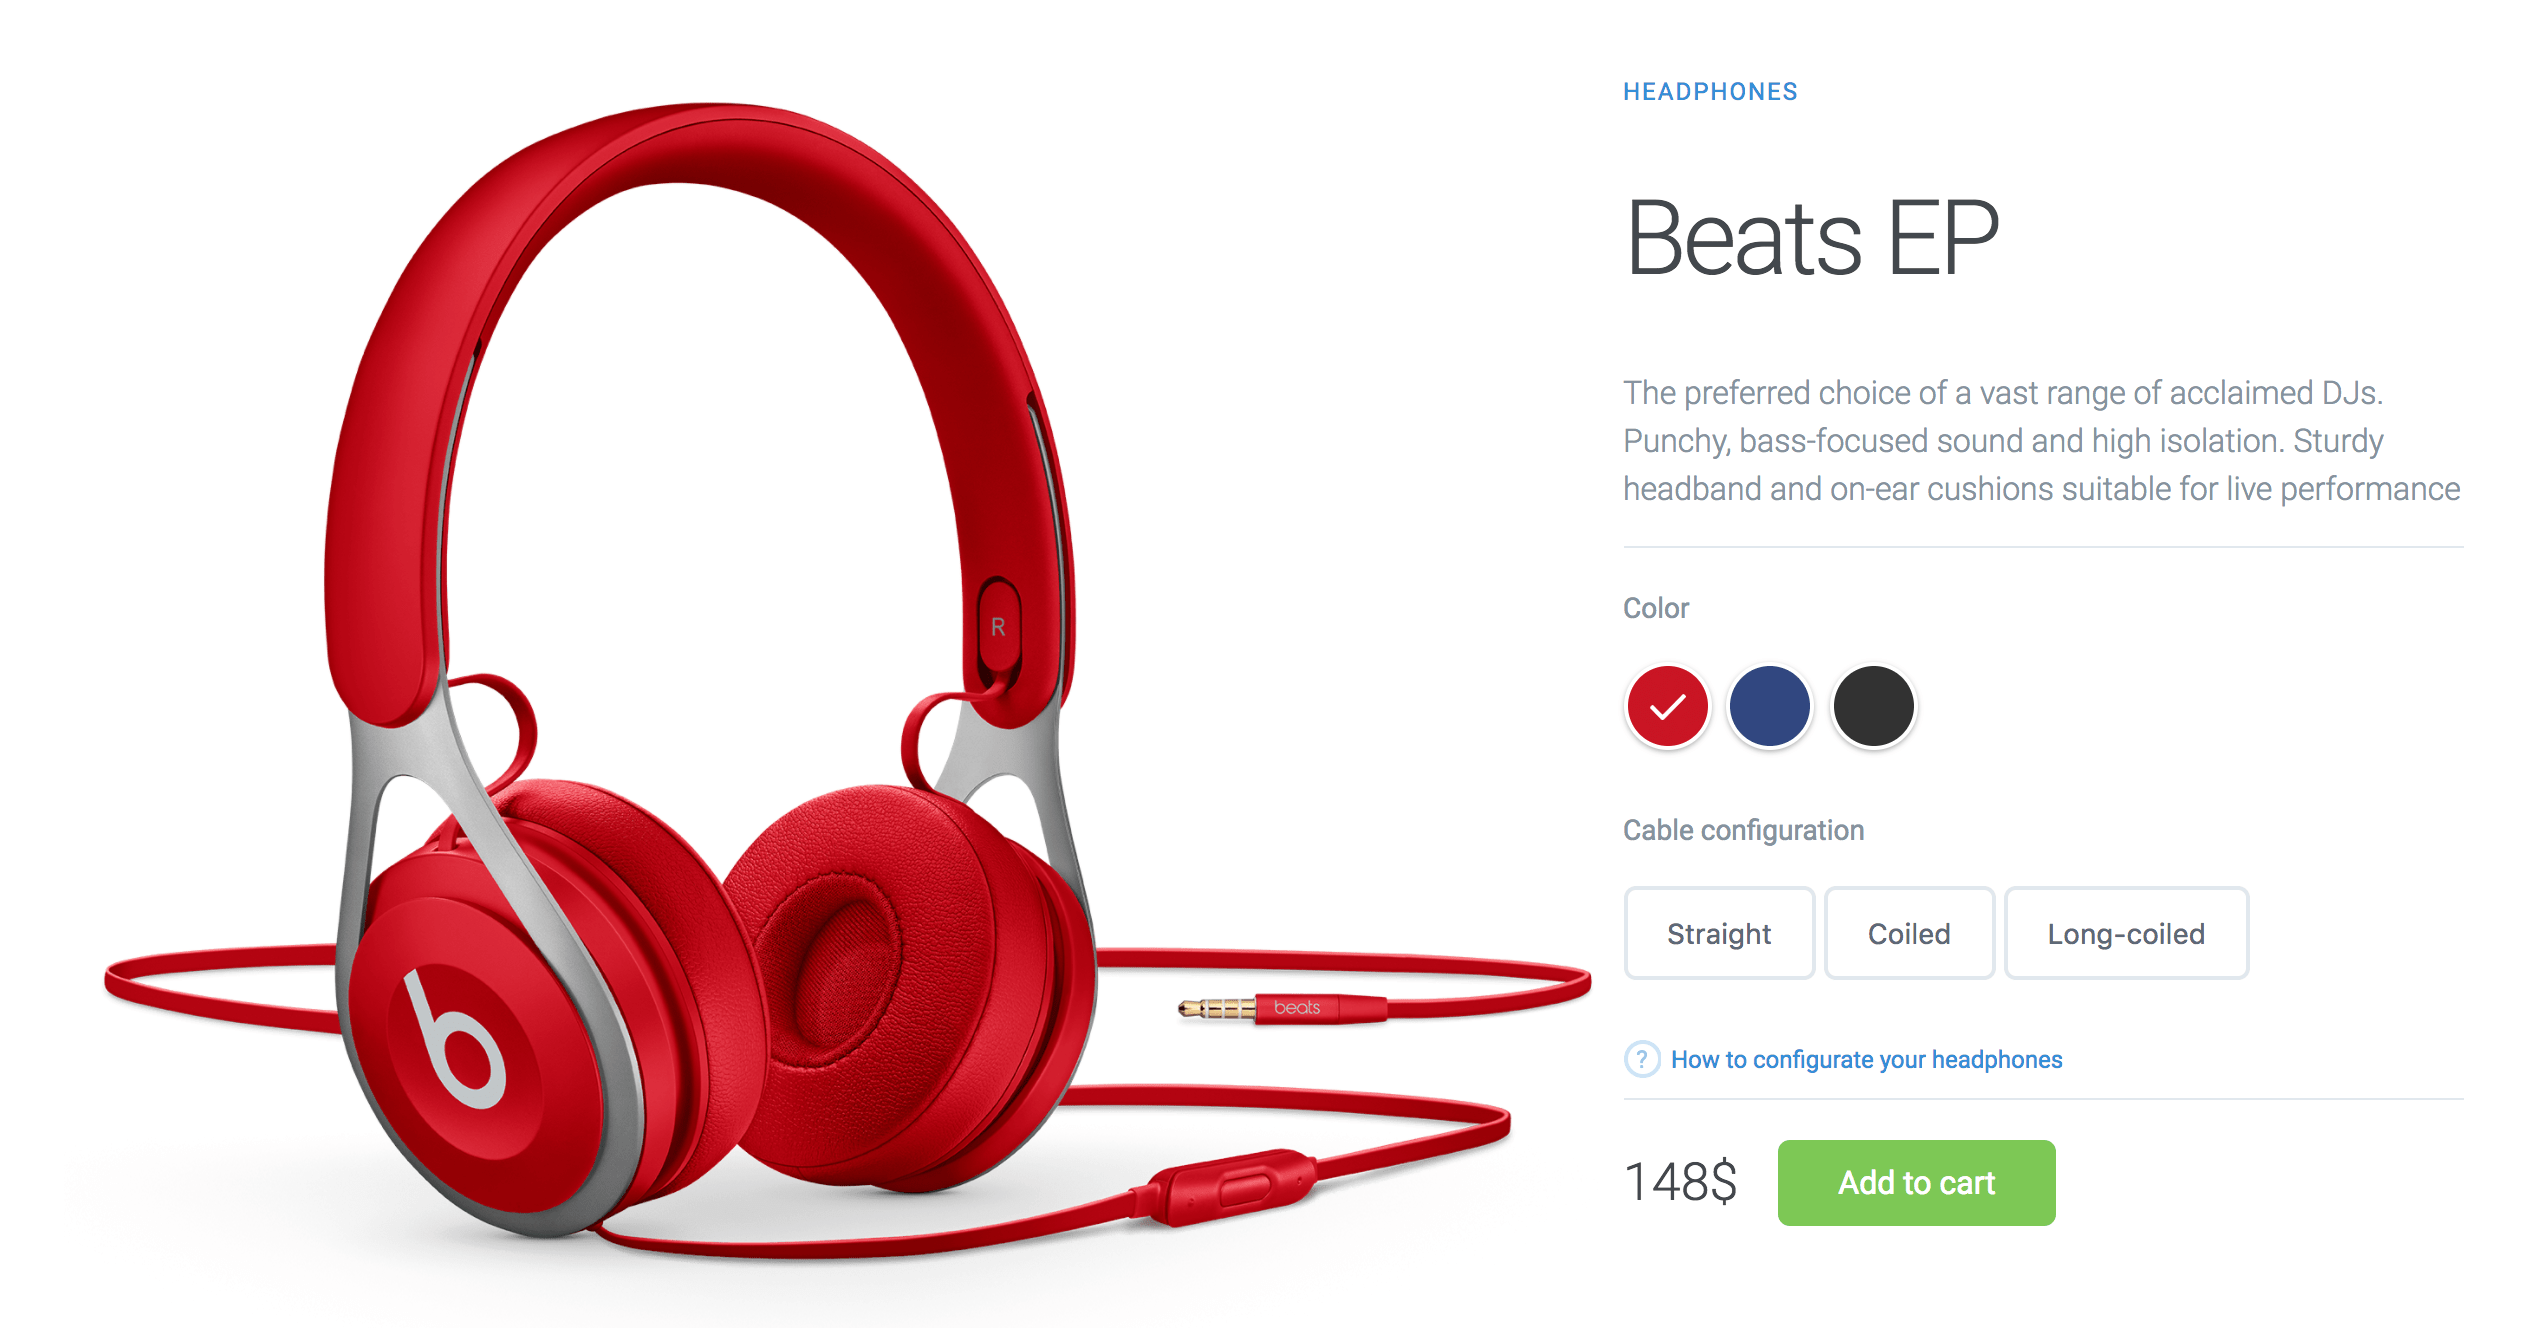
Beats EP
The preferred choice of a vast range of acclaimed DJs. Punchy, bass-focused sound and high isolation. Sturdy headband and on-ear cushions suitable for live performance
ColorCable configurationStraightHow to configurate your headphones148$Now let’s go to the next step where we’ll make it look awesome.
CSS
Add basic styling to the body.
/* Basic Styling */ html, body < height: 100%; width: 100%; margin: 0; font-family: 'Roboto', sans-serif; >.container
Notice that `.container` has been set to `display: flex` which will align the columns.
Now let’s add some width to columns and `position: relative` the `.left-column`, because we will `position: absolute` the images.
/* Columns */ .left-column < width: 65%; position: relative; >.right-column
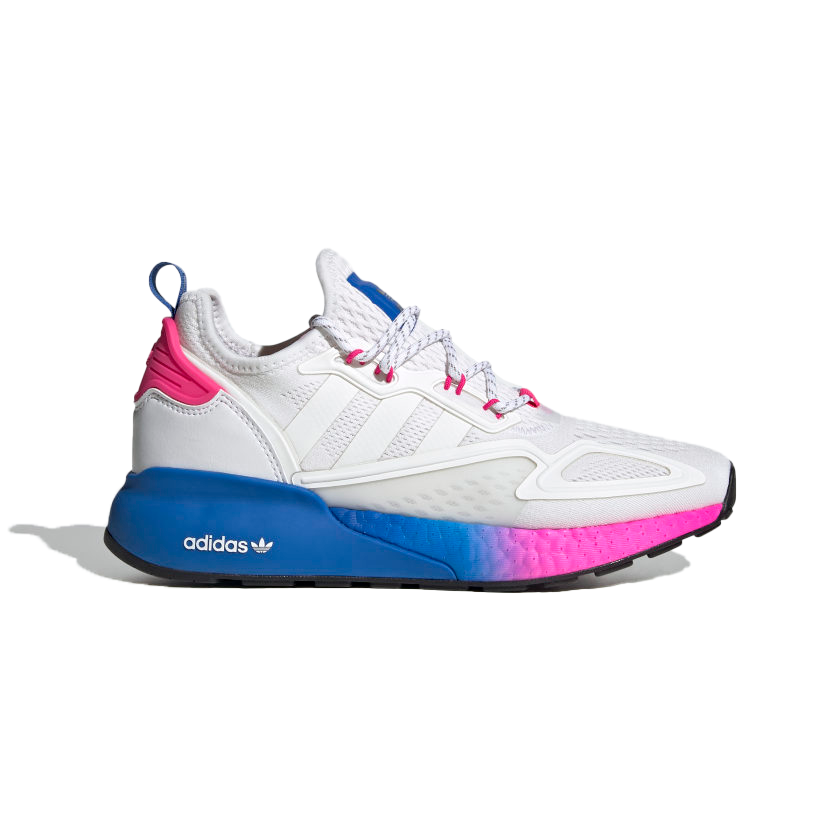
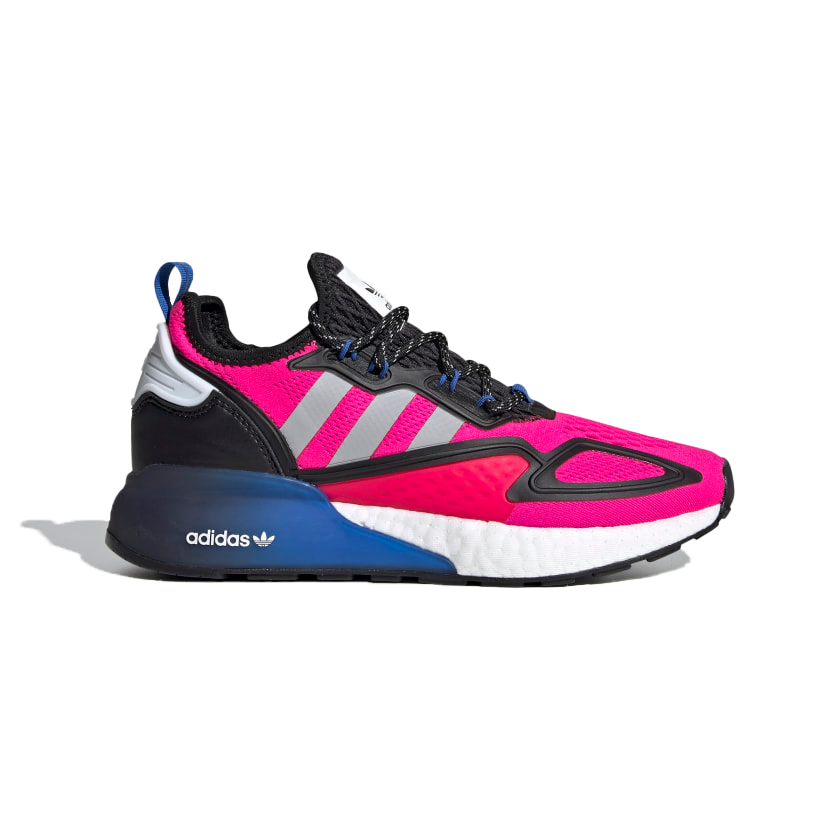
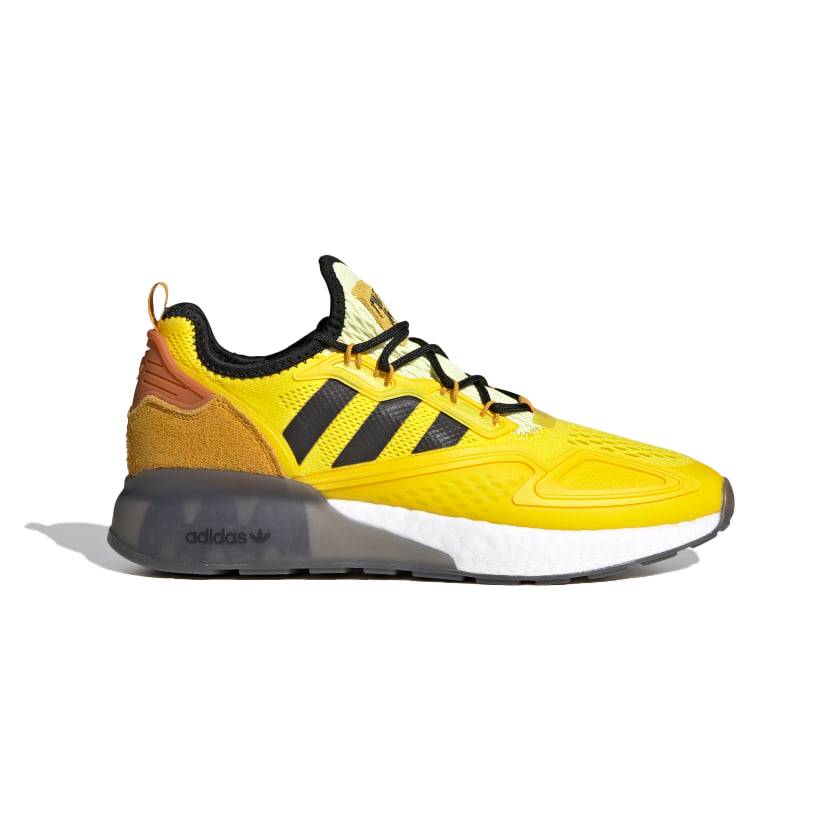
Great! Let’s style the first column, which is `.left-column`. This column has three images, three headphones in different colors. We’ll give them `opacity: 0` and also add a class `.active` on them with `opacity: 1`, which we’ll need it later in this tutorial.
With Startup App and Slides App you can build unlimited websites using the online website editor which includes ready-made designed and coded elements, templates and themes.
/* Left Column */ .left-column img < width: 100%; position: absolute; left: 0; top: 0; opacity: 0; transition: all 0.3s ease; >.left-column img.active
Style the `.right-colum` now. Begin with `.product-description` where we describe the product.
/* Product Description */ .product-description < border-bottom: 1px solid #E1E8EE; margin-bottom: 20px; >.product-description span < font-size: 12px; color: #358ED7; letter-spacing: 1px; text-transform: uppercase; text-decoration: none; >.product-description h1 < font-weight: 300; font-size: 52px; color: #43484D; letter-spacing: -2px; >.product-description p
Now, we need to style the product color configuration.
Here, we have three radio inputs, we’ll style them to look nice. Each input will have a color that pairs with the headphones color. We’re going to use `:checked` to add a checked icon on the checked radio input, `:checked` is an awesome feature which CSS provides.
/* Product Color */ .product-color < margin-bottom: 30px; >.color-choose div < display: inline-block; >.color-choose input[type="radio"] < display: none; >.color-choose input[type="radio"] + label span < display: inline-block; width: 40px; height: 40px; margin: -1px 4px 0 0; vertical-align: middle; cursor: pointer; border-radius: 50%; >.color-choose input[type="radio"] + label span < border: 2px solid #FFFFFF; box-shadow: 0 1px 3px 0 rgba(0,0,0,0.33); >.color-choose input[type="radio"]#red + label span < background-color: #C91524; >.color-choose input[type="radio"]#blue + label span < background-color: #314780; >.color-choose input[type="radio"]#black + label span < background-color: #323232; >.color-choose input[type="radio"]:checked + label span < background-image: url(images/check-icn.svg); background-repeat: no-repeat; background-position: center; >Good! Now let’s style the `.cable-configuration` section. We have three buttons and a link. Let’s style their states and make them look nice.
/* Cable Configuration */ .cable-choose < margin-bottom: 20px; >.cable-choose button < border: 2px solid #E1E8EE; border-radius: 6px; padding: 13px 20px; font-size: 14px; color: #5E6977; background-color: #fff; cursor: pointer; transition: all .5s; >.cable-choose button:hover, .cable-choose button:active, .cable-choose button:focus < border: 2px solid #86939E; outline: none; >.cable-config < border-bottom: 1px solid #E1E8EE; margin-bottom: 20px; >.cable-config a < color: #358ED7; text-decoration: none; font-size: 12px; position: relative; margin: 10px 0; display: inline-block; >.cable-config a:before
One last thing to do is to style the last section of this column, which is `.product-price`.
/* Product Price */ .product-price < display: flex; align-items: center; >.product-price span < font-size: 26px; font-weight: 300; color: #43474D; margin-right: 20px; >.cart-btn < display: inline-block; background-color: #7DC855; border-radius: 6px; font-size: 16px; color: #FFFFFF; text-decoration: none; padding: 12px 30px; transition: all .5s; >.cart-btn:hover
Awesome! Here’s what we’ve accomplished so far:
Let’s add responsiveness, too.
/* Responsive */ @media (max-width: 940px) < .container < flex-direction: column; margin-top: 60px; >.left-column, .right-column < width: 100%; >.left-column img < width: 300px; right: 0; top: -65px; left: initial; >> @media (max-width: 535px) < .left-column img < width: 220px; top: -85px; >>JS
The last thing we need to do is to make the images change when we click on a color, so that the checked radio input color matches with headphones color. This uses jQuery, so make sure to include it in your project. We’ll use data attributes to work with.
Notice that we add the class `.active`. I mentioned earlier everytime we click on the matched color.
Download Website Product Page
Awesome! We’re done here! Feel free to use this in your projects. Take a look at the demo and let me know what you think in the comments.
Like what you’re reading? Subscribe to our top stories.
Raul Dronca
I’m a Front-End Developer from Arad, Romania. I am passionate about everything related to Web Development. Huge coffee lover.