- Step-by-step Guides to add Android App Icon
- 1. Delete all existing icon assets in Android Studio
- 2. Copy your new icon asset into the drawable folder
- 3. Generate launcher icon from image asset
- Done!
- Step-by-Step Guide to Create or Change Android App Icon using Android Studio
- Create App Icon using a Custom Image
- step 1 : Open your android app project using android studio
- step 2 : In the Project window , Navigate to android => src => main => res folder
- step 3 : Right click res folder => Select New > Image Asset
- step 4 : In Icon Type field ,Select Launcher icons (Adaptive and Legacy)
- step 5 : In Foreground Layer tab, select Asset type as Image and browse your png or jpg image file and specify the path to your image file
- step 6 : In Background layer tab — keep default settings
- step 7 : In Legacy tab — keep default settings , change only if you require some different icon shapes
- step 8 : Resize your design using resize slider so that contents of logo are inside the safe zone border
- step 9 : Click Next , Hit Finish
- Create App Icon using Text strings
- step 1 : In Foreground Layer tab , select Asset type as Text
- step 2 : In Background layer tab — select Asset type as color and select a color which improves the text readability
- step 3 : In Legacy tab — keep default settings , change only if you require some different icon shapes
- step 4 : Resize your design using resize slider so that contents of logo are inside the safe zone border
- step 5 : Click Next , Hit Finish
- Create App Icon using Clip Art
- step 1 : In Foreground Layer tab , select Asset type as Clip Art
- step 2 : In Background layer tab — select Asset type as color and select a color which makes the icon stand out.
- step 3 : In Legacy tab — keep default settings
- step 4 : Resize your design using resize slider so that contents of logo are inside the safe zone border
- step 5 : Click Next , Hit Finish
- Join our newsletter!
Step-by-step Guides to add Android App Icon
How to add new icon asset to your Android App using Asset Studio in Android Studio? This assumes you already have the icon asset and would like to import that you into your app using Android Studio. The following example is based on the new project template from Android Studio.
1. Delete all existing icon assets in Android Studio
- Delete ic_launcher.background.xml and ic_launcher_foreground.xml in drawable folder. This is just an example, you could be any icon asset file format.
- Delete all mipmap folders which consist of all the icon assets
Tip: This step seems necessary. If I don’t clean them up first, Android Studio doesn’t seem to generate and overwrites the icon assets correctly. It is less messy in my opinion. You don’t have mixed new and old icon assets.
2. Copy your new icon asset into the drawable folder
Tip: This step is optional since the actual icon assets are generated later. However, I prefer to copy the icon asset file into the drawable folder so that we can keep a copy of it.
3. Generate launcher icon from image asset
- Make sure the Icon Type is Launcher Icons (Adaptive and Legacy), which is the default)
- In Foreground Layer, Source Asset, select Image Asset Type. Browse to the icon asset in the drawable the folder just now.
- In Scaling, Resize the icon accordingly to fit in your app.
- Go to Background Layer, change the Source Asset Type Color to white color (i.e. FFFFFF)
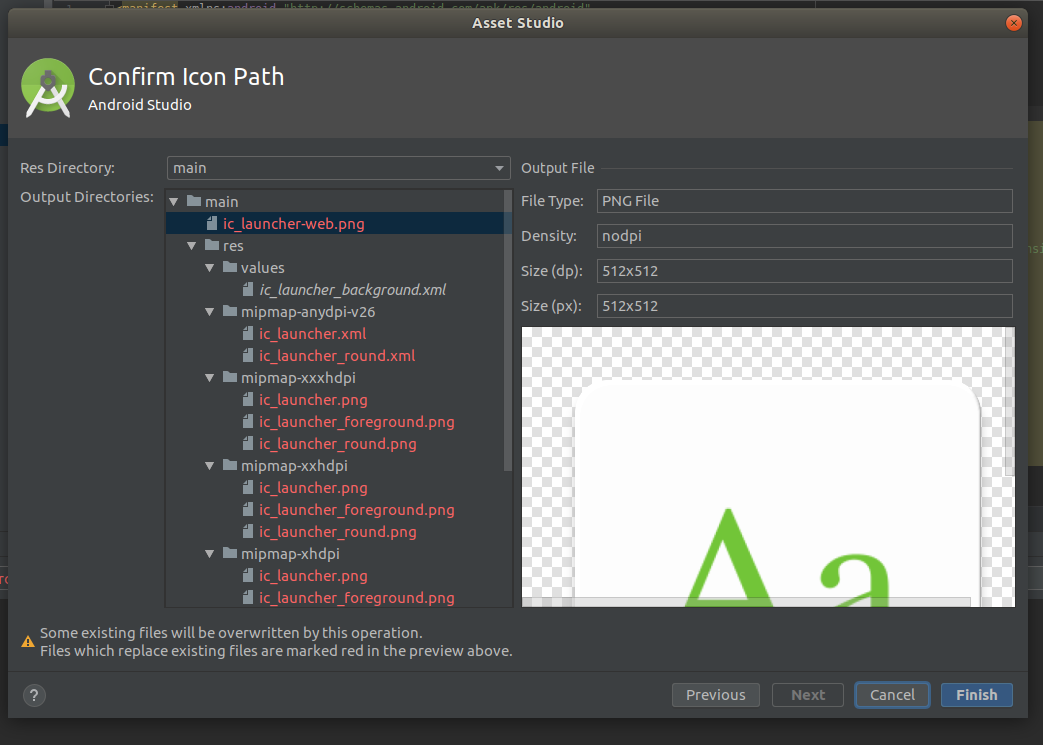
- Click Next->Finish. Different screen resolution icon assets are now generated in the mipmap folders
The default Res Directly is debug folder. Make sure you select the main folder, so you app with both debug and release variants.
Done!
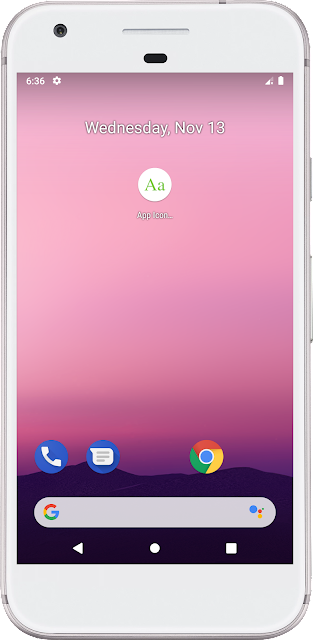
Run the app, and you should see your new icon!
Step-by-Step Guide to Create or Change Android App Icon using Android Studio
YES, using this guide you can also change flutter app launcher icon.
Create App Icon using a Custom Image
Using this guide you can create android app icon from images designed by you.
Note : Supported image format for creating app icon for android app —
Recommended image specification — 512 x 512 pixel png image
step 1 : Open your android app project using android studio
step 2 : In the Project window , Navigate to android => src => main => res folder
step 3 : Right click res folder => Select New > Image Asset
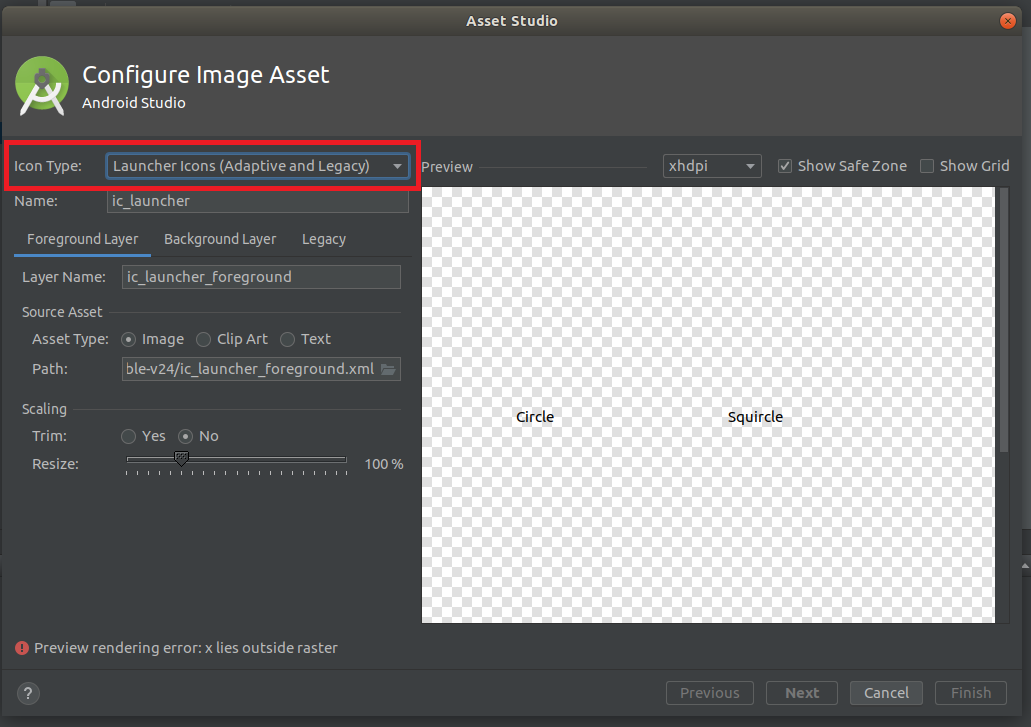
step 4 : In Icon Type field ,Select Launcher icons (Adaptive and Legacy)
Note : If your app supports Android 8.0 or higher create adaptive and legacy icons.
If your app supports version no higher than Android 7.1 , create a legacy launcher icon only.
 |
|---|
| Android Studio — Icon Type |
step 5 : In Foreground Layer tab, select Asset type as Image and browse your png or jpg image file and specify the path to your image file
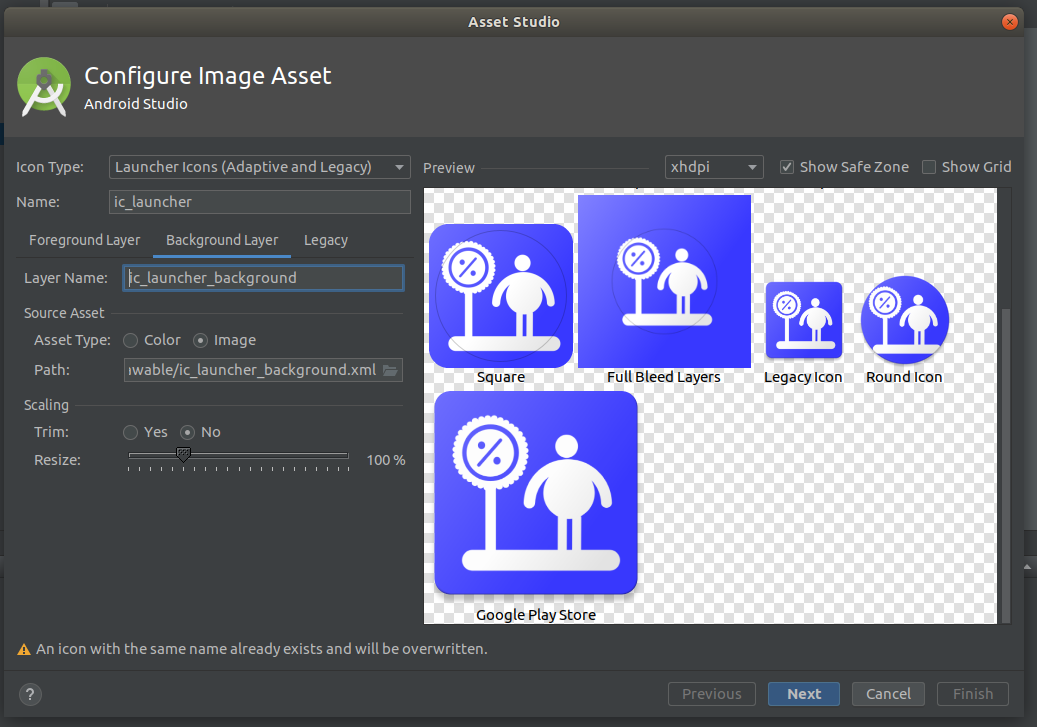
step 6 : In Background layer tab — keep default settings
 |
|---|
| Android Studio — Background Layer Tab |
step 7 : In Legacy tab — keep default settings , change only if you require some different icon shapes
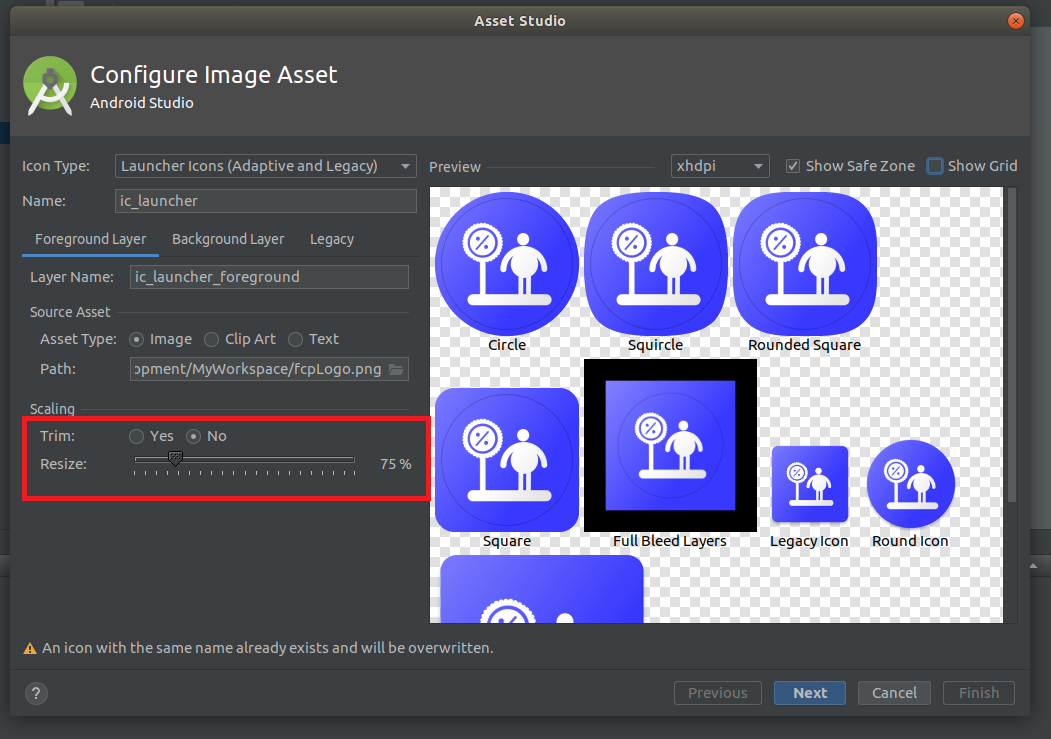
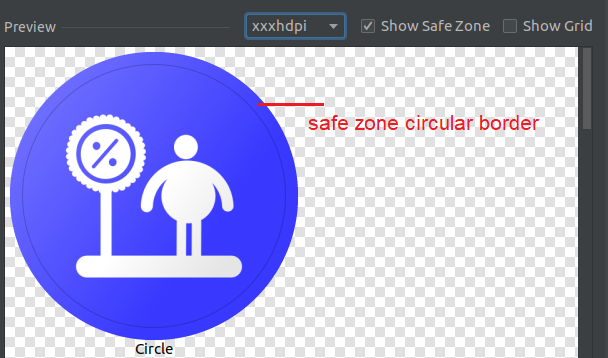
step 8 : Resize your design using resize slider so that contents of logo are inside the safe zone border
 |
|---|
| Android Studio — Resize Slider |
 |
|---|
| Android Studio — Safe Zone |
step 9 : Click Next , Hit Finish
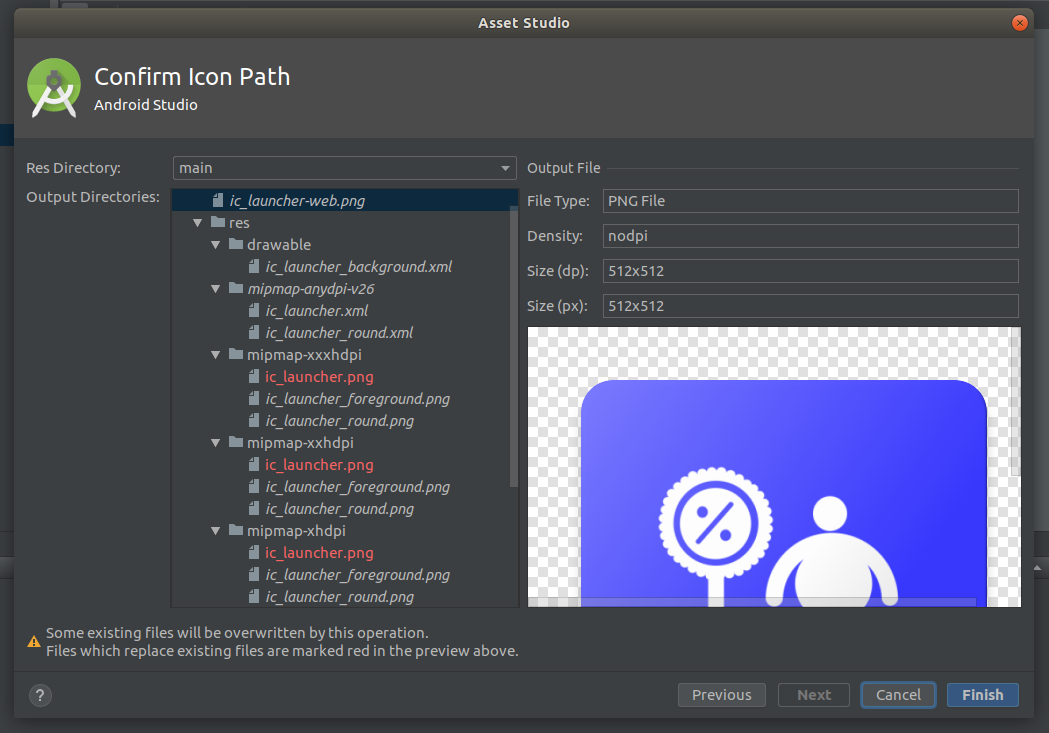 |
|---|
| Confirm Icon Path |
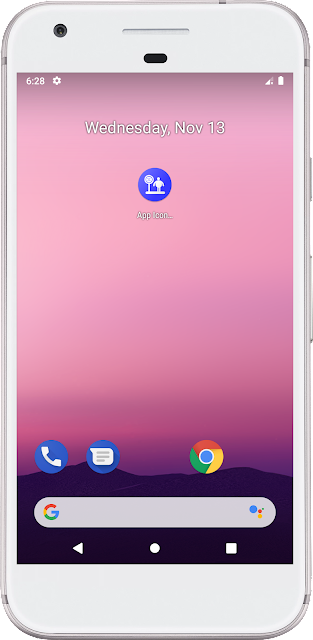 |
|---|
| Android App Icon — Image |
Create App Icon using Text strings
Open Image Asset Studio (same as above step 1, 2, 3 and 4).
We can type text string in different fonts and use the text string as icon.
Image Asset Studio converts text based icon into png files for different densities
step 1 : In Foreground Layer tab , select Asset type as Text
- enter the text you want to display
- select the font from drop-down menu
- select the color of the font
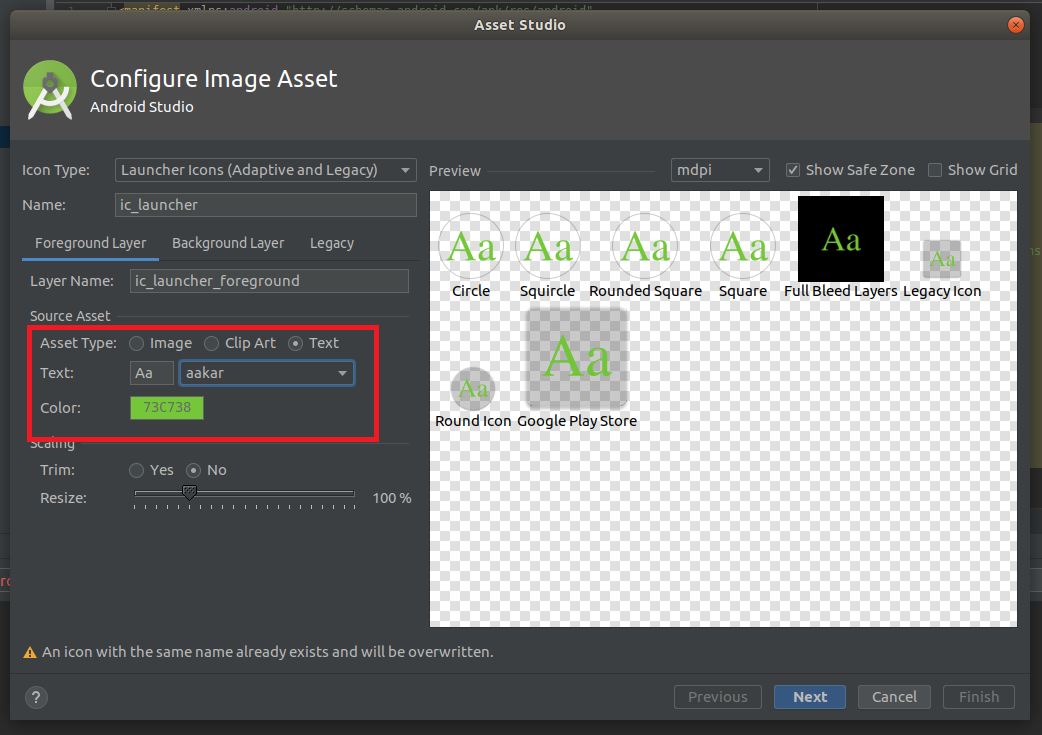 |
|---|
| Android Studio — Text Asset |
step 2 : In Background layer tab — select Asset type as color and select a color which improves the text readability
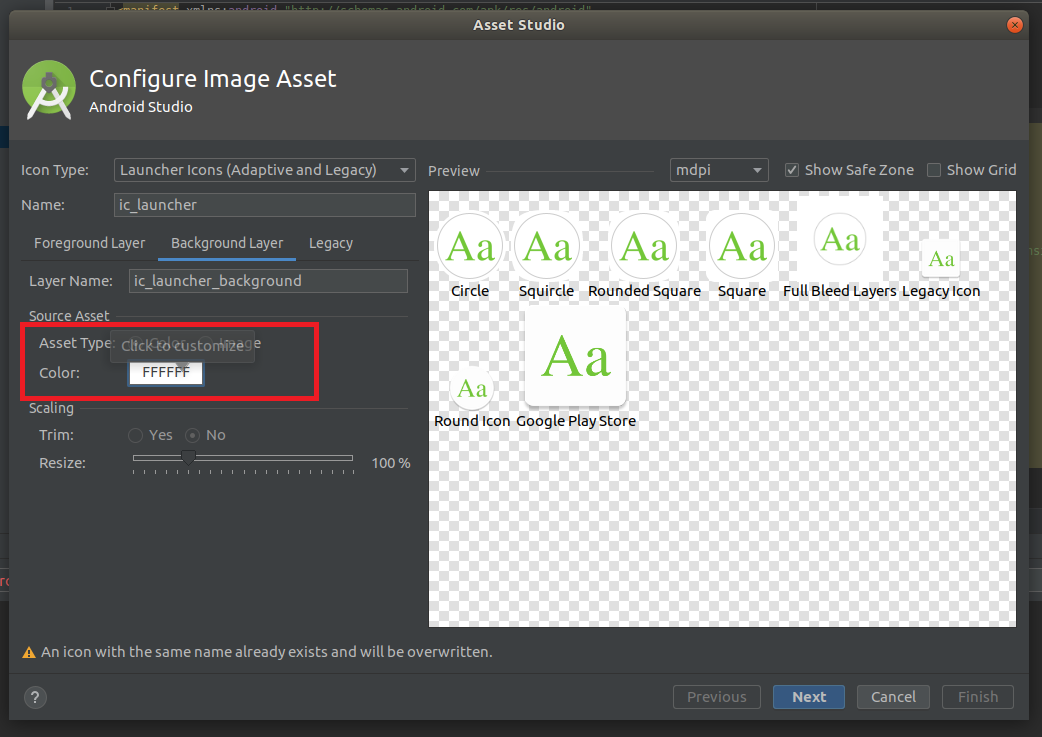 |
|---|
| Android Studio — Text Background Layer |
step 3 : In Legacy tab — keep default settings , change only if you require some different icon shapes
step 4 : Resize your design using resize slider so that contents of logo are inside the safe zone border
step 5 : Click Next , Hit Finish
 |
|---|
| Confirm Text Icon Path |
 |
|---|
| Android App Icon — Text |
Create App Icon using Clip Art
step 1 : In Foreground Layer tab , select Asset type as Clip Art
- select the clip art icon
- select the color of the icon
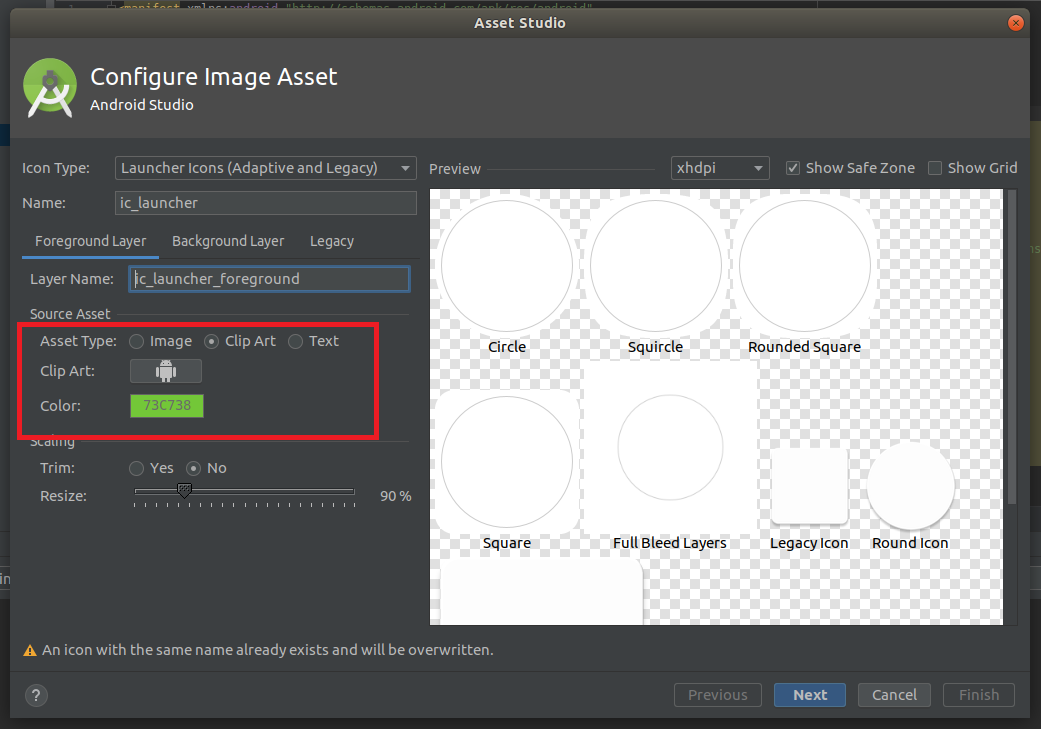 |
|---|
| Asset Type — Clip Art |
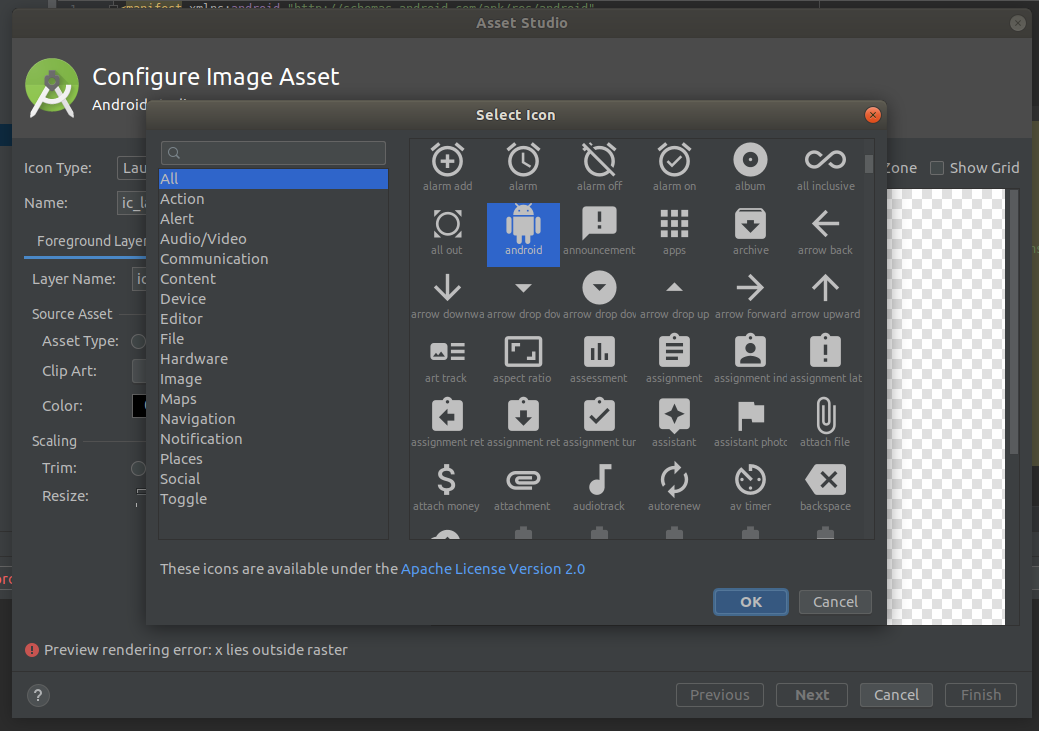 |
|---|
| Select Icon |
step 2 : In Background layer tab — select Asset type as color and select a color which makes the icon stand out.
step 3 : In Legacy tab — keep default settings
step 4 : Resize your design using resize slider so that contents of logo are inside the safe zone border
step 5 : Click Next , Hit Finish
Clip Art — Image Assets studio allows us to import Google material icons in Vector Draw-able and png format
Useful Resources — Android Developer Docs
This article help android developers to create or change android app icon using Android Studio.
Share This Post
The information contained on this blog is for academic and educational purposes only. Unauthorized use and/or duplication of this material without express and written permission from this site’s author and/or owner is strictly prohibited. The materials (images, logos, content) contained in this web site are protected by applicable copyright and trademark law.
Join our newsletter!
Enter your email to receive our latest newsletter.
Step-by-Step Guide to Create or Change Android App Icon using Android Studio
YES, using this guide you can also change flutter app launcher icon.
Create App Icon using a Custom Image
Using this guide you can create android app icon from images designed by you.
Note : Supported image format for creating app icon for android app —
Recommended image specification — 512 x 512 pixel png image
step 1 : Open your android app project using android studio
step 2 : In the Project window , Navigate to android => src => main => res folder
step 3 : Right click res folder => Select New > Image Asset
step 4 : In Icon Type field ,Select Launcher icons (Adaptive and Legacy)
Note : If your app supports Android 8.0 or higher create adaptive and legacy icons.
If your app supports version no higher than Android 7.1 , create a legacy launcher icon only.
|
|---|
| Android Studio — Icon Type |
step 5 : In Foreground Layer tab, select Asset type as Image and browse your png or jpg image file and specify the path to your image file
step 6 : In Background layer tab — keep default settings
|
|---|
| Android Studio — Background Layer Tab |
step 7 : In Legacy tab — keep default settings , change only if you require some different icon shapes
step 8 : Resize your design using resize slider so that contents of logo are inside the safe zone border
|
|---|
| Android Studio — Resize Slider |
|
|---|
| Android Studio — Safe Zone |
step 9 : Click Next , Hit Finish
|
|---|
| Confirm Icon Path |
|
|---|
| Android App Icon — Image |
Create App Icon using Text strings
Open Image Asset Studio (same as above step 1, 2, 3 and 4).
We can type text string in different fonts and use the text string as icon.
Image Asset Studio converts text based icon into png files for different densities
step 1 : In Foreground Layer tab , select Asset type as Text
- enter the text you want to display
- select the font from drop-down menu
- select the color of the font
|
|---|
| Android Studio — Text Asset |
step 2 : In Background layer tab — select Asset type as color and select a color which improves the text readability
|
|---|
| Android Studio — Text Background Layer |
step 3 : In Legacy tab — keep default settings , change only if you require some different icon shapes
step 4 : Resize your design using resize slider so that contents of logo are inside the safe zone border
step 5 : Click Next , Hit Finish
|
|---|
| Confirm Text Icon Path |
|
|---|
| Android App Icon — Text |
Create App Icon using Clip Art
step 1 : In Foreground Layer tab , select Asset type as Clip Art
- select the clip art icon
- select the color of the icon
|
|---|
| Asset Type — Clip Art |
|
|---|
| Select Icon |
step 2 : In Background layer tab — select Asset type as color and select a color which makes the icon stand out.
step 3 : In Legacy tab — keep default settings
step 4 : Resize your design using resize slider so that contents of logo are inside the safe zone border
step 5 : Click Next , Hit Finish
Clip Art — Image Assets studio allows us to import Google material icons in Vector Draw-able and png format
Useful Resources — Android Developer Docs
This article help android developers to create or change android app icon using Android Studio.
Share This Post
The information contained on this blog is for academic and educational purposes only. Unauthorized use and/or duplication of this material without express and written permission from this site’s author and/or owner is strictly prohibited. The materials (images, logos, content) contained in this web site are protected by applicable copyright and trademark law.
Join our newsletter!
Enter your email to receive our latest newsletter.