- Two ways to get and set HTML content with vanilla JavaScript
- Manipulating HTML
- Manipulating just text content
- Browser Compatibility
- 2 Ways To Add HTML Code In Javascript (A Quick Guide)
- TLDR – QUICK SLIDES
- TABLE OF CONTENTS
- WAYS TO ADD HTML CODE
- METHOD 1) DIRECTLY CHANGE HTML CODE
- METHOD 2) CREATE & APPEND HTML ELEMENTS
- MORE HTML SELECTION & INSERTION
- GET HTML ELEMENTS IN JAVASCRIPT
- SET HTML/CSS PROPERTIES
- TAKE EXTRA NOTE OF THE LOADING ORDER!
- DOWNLOAD & NOTES
- SUPPORT
- EXAMPLE CODE DOWNLOAD
- EXTRA BITS & LINKS
- DIRECT HTML MANIPULATION VS CREATING OBJECTS
- RECOMMENDED READS
- TUTORIAL VIDEO
- INFOGRAPHIC CHEAT SHEET
- THE END
- Leave a Comment Cancel Reply
- Search
- Breakthrough Javascript
- Socials
- About Me
- Append HTML Content to the Existing HTML Element Using JavaScript
- Drawback of Using InnerHTML to Add a New HTML Node
- Adding HTML Content Without Replacing the DOM Elements
- Using appendChild() to Append HTML Content in JavaScript
- Note
- Using insertAdjacentHTML() to Add HTML Node
Two ways to get and set HTML content with vanilla JavaScript
Vanilla JavaScript provides two really easy ways to get and set content in the DOM—one to manipulate markup, and the other just for text.
Manipulating HTML
You can use the innerHTML to get and set HTML content in an element.
If you want to add HTML after what’s already in an element instead of replacing it entirely you can use += .
// Add HTML to the end of an element's existing content elem.innerHTML += ' Add this after what is already there.'; And you can add HTML before what’s already in an element by adding + elem.innerHTML to the end.
// Add HTML to the beginning of an element's existing content elem.innerHTML = 'We can add this to the beginning. ' + elem.innerHTML; Manipulating just text content
The innerHTML property works great, but what if you just want to get or set content without the markup?
For that, there’s textContent . It works just like innerHTML , but only gets content, and will ignore HTML tags.
var elem = document.querySelector('#some-elem'); // Get text content var text = elem.textContent; // Set text content elem.textContent = 'We can dynamically change the content.'; // Add text to the end of an element's existing content elem.textContent += ' Add this after what is already there.'; // Add text to the beginning of an element's existing content elem.textContent = 'We can add this to the beginning. ' + elem.textContent; Browser Compatibility
Both innerHTML and textContent work in all modern browsers, and IE9 and up.
Hate the complexity of modern front‑end web development? I send out a short email each weekday on how to build a simpler, more resilient web. Join over 14k others.
Made with ❤️ in Massachusetts. Unless otherwise noted, all code is free to use under the MIT License. I also very irregularly share non-coding thoughts.
2 Ways To Add HTML Code In Javascript (A Quick Guide)
Welcome to a short beginner’s tutorial on how to add HTML code in Javascript. So you have finally gotten to the point of working with both HTML and Javascript, but the challenge is that you now have to add some HTML to an existing page.
Adding HTML code using Javascript is actually a simple “get target container and insert HTML” process:
- By directly changing or appending to the inner HTML.
- var target = document.getElementById(«ID»);
- target.innerHTML + ;
- By creating and inserting a new element.
- var newElement = document.createElement(«p»);
- newElement.innerHTML = «CONTENTS»;
- document.getElementById(«ID»).appendChild(newElement);
Yep. As simple as this select-insert mechanism may seem like, there are actually quite a few ways to select and insert elements. So let us walk through some actual examples in this tutorial – Read on!
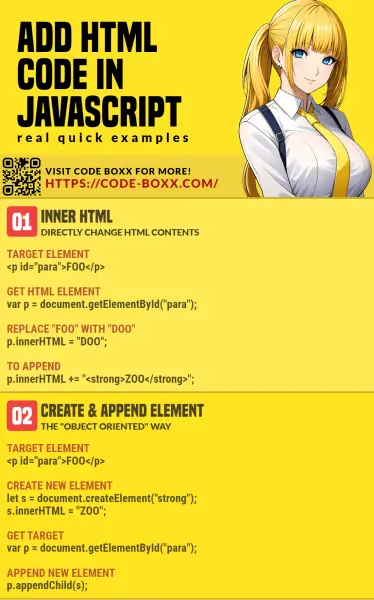
TLDR – QUICK SLIDES

TABLE OF CONTENTS
WAYS TO ADD HTML CODE
All right, let us now move into the actual examples themselves – How we can work with Javascript to add HTML code and elements.
METHOD 1) DIRECTLY CHANGE HTML CODE
- (A) First, we give the HTML element a unique id .
- (B) Then select it with var ELEMENT = document.getElementById(ID) in Javascript.
- (C & D) Finally, take note that innerHTML can be used in two directions.
- var CONTENTS = ELEMENT.innerHTML to get the current contents.
- ELEMENT.innerHTML = «FOO!» to replace the contents.
- ELEMENT.innerHTML += «FOO!» to append to the existing contents.
METHOD 2) CREATE & APPEND HTML ELEMENTS
- (A & B) As usual, give the HTML element an id . Then use var PARENT = document.getElementById(«ID») to get it.
- (C) But instead of directly replacing the innerHTML , we create a new HTML element instead.
- We use var ELEMENT = document.createElement(«TAG») to create a new HTML tag.
- Then change the contents using ELEMENT.innerHTML = «FOO» … Which you already know.
- Finally, append the new element to the parent – PARENT.appendChild(ELEMENT) .
MORE HTML SELECTION & INSERTION
So far so good? Here are a few more examples of the various ways to select and insert HTML elements.
GET HTML ELEMENTS IN JAVASCRIPT
DemoD not John Wick.
// (B) GET BY ID var demoA = document.getElementById("demoA"); console.log(demoA); // ] // (D) GET BY CSS CLASS var demoC = document.getElementsByClassName("demoC"); console.log(demoC); // html collection - [demoD] // (F) GET BY QUERY SELECTOR var demoE = document.querySelector("#demoE strong"); console.log(demoE); // not // (G) GET BY QUERY SELECTOR (MULTIPLE SELECTORS) var demoF = document.querySelectorAll("span.demoC, p#demoE"); console.log(demoF); // node list - [ SET HTML/CSS PROPERTIES
window.addEventListener("load", () => < // (A) GET HTML LIST var ul = document.getElementById("thelist"); // (B) DATA var data = ["Foo", "Bar", "Hello", "World", "John", "Doe"]; // (C) ADD LIST ITEMS for (let idx in data) < let li = document.createElement("li"); li.innerHTML = data[idx]; li.id = "item-" + idx; // set id li.style.color = "red"; // set style li.classList.add("dummy"); // add css class ul.appendChild(li); >>);
TAKE EXTRA NOTE OF THE LOADING ORDER!
Lastly, this is a common pitfall among beginners – Not taking note of the order in which things are being loaded. Notice how demo is NULL in this example? Isn’t already defined!? Nope, Javascript is not broken. What happened is that HTML files load in a top-to-bottom, left-to-right manner.
The is loaded first, and ran before is even rendered – This is how getElementById("demo") ends up as a NULL . To solve this problem, we can use window.addEventListener("load") (as in the previous example) to wait for the window to be fully loaded before proceeding with the scripts.
DOWNLOAD & NOTES
Here is the download link to the example code, so you don’t have to copy-paste everything.
SUPPORT
600+ free tutorials & projects on Code Boxx and still growing. I insist on not turning Code Boxx into a "paid scripts and courses" business, so every little bit of support helps.
EXAMPLE CODE DOWNLOAD
Click here for the source code on GitHub gist, just click on “download zip” or do a git clone. I have released it under the MIT license, so feel free to build on top of it or use it in your own project.
EXTRA BITS & LINKS
That’s all for this guide, and here is a small section on some extras and links that may be useful to you.
DIRECT HTML MANIPULATION VS CREATING OBJECTS
- innerHTML works better when you are dealing with changing the text contents inside a single element.
- createElement() makes more sense when you are dealing with lists and tables.
So yep – It is up to you to decide which is more comfortable.
RECOMMENDED READS
TUTORIAL VIDEO
INFOGRAPHIC CHEAT SHEET

THE END
Thank you for reading, and we have come to the end of this guide. I hope that it has helped you with your project, and if you want to share anything with this guide, please feel free to comment below. Good luck and happy coding!
Leave a Comment Cancel Reply
Search
Breakthrough Javascript
Take pictures with the webcam, voice commands, video calls, GPS, NFC. Yes, all possible with Javascript - Check out Breakthrough Javascript!
Socials
About Me
W.S. Toh is a senior web developer and SEO practitioner with over 20 years of experience. Graduated from the University of London. When not secretly being an evil tech ninja, he enjoys photography and working on DIY projects.
Code Boxx participates in the eBay Partner Network, an affiliate program designed for sites to earn commission fees by linking to ebay.com. We also participate in affiliate programs with Bluehost, ShareASale, Clickbank, and other sites. We are compensated for referring traffic.
Append HTML Content to the Existing HTML Element Using JavaScript
- Drawback of Using InnerHTML to Add a New HTML Node
- Adding HTML Content Without Replacing the DOM Elements
- Using appendChild() to Append HTML Content in JavaScript
- Using insertAdjacentHTML() to Add HTML Node
Adding HTML content to a div or another HTML element with javascript is easy. We can set the HTMLElement.innerHTML property of the element with the new HTML content. But during the process, it will erase off all the dynamic attributes added to it.
Drawback of Using InnerHTML to Add a New HTML Node
- The HTMLElement.innerHTML works by deleting the HTML content inside the element and then adding them back again with the new piece of HTML included in it. In essence, it replaces the HTML content rather than just adding a new one.
- When we add a new HTML element to the DOM with the innerHTML property, it will remove all the descendant nodes too and then replace them with the new nodes built by parsing the new HTML content (the HTML string that is assigned to innerHTML property) and render the entire HTML afresh.
- It is not much known that while using innerHTML in a project which undergoes a cybersecurity review, the code can get rejected. It is advisable not to use innerHTMl directly as it may have a potential security risk (for further details, refer to the MDN link).
Adding HTML Content Without Replacing the DOM Elements
Using appendChild() to Append HTML Content in JavaScript
appendChild() serves the same purpose as that of the innerHTML . We can use both of these methods to add HTML content to a node. The difference between the two approaches is that the appendChild() is a function, whereas innerHTML is a property. appendChild() will add a node to the existing DOM element instead of replacing the content of DOM as done by the innerHTML property.
div> div>User Detailsdiv> div> label>Name:label> input type="text" id="name" placeholder="Name"> div> div id="adress"> label>Address:label> input type="text" id="contact" placeholder="Address"> div> button id="add_address" onclick="addAddressLine()">Add Address Linebutton> div>
var lineCount = 0; addAddressLine = function () var i = document.createElement('input'); i.setAttribute("type", "text"); i.setAttribute("placeholder", "Address Line " + ++lineCount); var addressContainer = document.getElementById("adress"); addressContainer.appendChild(i); >
We have created a form to capture the name and address of the user using the above code. The address usually has more than one line. Hence, we have created a button that adds new input fields when clicked to capture these additional address lines. Following is the process followed for creating a new input field.
- We call the addAddressLine function on the click event of the Add Address Line button.
- In the function, we create HTML input dynamically with the document.createElement('input') function. It returns the created input element which stored in the i variable.
- Next we set the type and placeholder attributes to the created input variable with the setAttribute() method.
- We have the input element ready to be added to the existing div structure. Hence, we query for the address div using the docuemnt.getElementById() which returns the div structure as a whole and then we use the appendChild(i) function of JavaScript.
- The appendChild(i) function adds the dynamically created input element held by the variable i and places it at the end of the address div . We use the lineCount to increment the placeholder value each time we add a new input field.
Note
- We can also use the newer method append() for appending the created element to the DOM. The javascript method append allows us to use DOMString (simple string texts) as an argument and does not return any value. Beware that the Internet Explorer browser does not support the newer append() method.
- All the modern web browsers, including the Internet Explorer, support the older appendChild() function.
Using insertAdjacentHTML() to Add HTML Node
- beforebegin : To insert the HTML node before the start of the element.
- afterbegin : As the name suggests, this option inserts the element just after the opening tag of the selected node and places it before the first child.
- beforeend : This one is similar to the appendChild() . As the name suggests, the beforeend position places the element just after the last child.
- afterend : Refers to the position after the target HTML node tag closes.
At a glance, the representation is as follows.
Let us look at the same example as we discussed for appendChild() with the insertAdjacentHTML() function of JavaScript.
div> div>User Detailsdiv> div> label>Name:label> input type="text" id="name" placeholder="Name"> div> div id="address"> label>Address:label> input type="text" id="contact" placeholder="Address"> div> button id="add_address" onclick="addAddressLine()">Add Address Linebutton> div>
var lineCount = 0; addAddressLine = function () var i = document.createElement('input'); i.setAttribute("type", "text"); i.setAttribute("placeholder", "Address Line " + ++lineCount); var addressContainer = document.getElementById("adress"); addressContainer.insertAdjacentElement("beforeend", i); >
In this code, we have used the beforeend option in the parameter to append the dynamically created input element at the end of the address div. You can try playing around with the other attributes like the afterend , beforebegin , and afterbegin parameters.
Copyright © 2023. All right reserved