- Create «Add To Cart» Button Using HTML , CSS & Javascript
- Step1: Adding Some Basic HTML
- Step2: Adding CSS
- Step3: Adding Javascript Code
- Create an “Add To Cart Button” Using HTML and CSS
- Add To Cart Button Html Code:-
- Add To Cart Button CSS Code:-
- Add to Cart Button Using HTML & JavaScript
- 1. Add to cart button
- 2. Add to cart button with quantity select option
Create «Add To Cart» Button Using HTML , CSS & Javascript
Hello, Coders! This article demonstrates how to use HTML, CSS, and Javascript to construct an Add To Cart Animation. The add-to-cart Button animation helps to improve the aesthetic appeal of our website. For front-end developers, Add to Cart button Animation is a very short and simple project. This project can be useful for building an online store. This «add to cart» Button animation might be used there to encourage visitors to connect with our website and provide favourable reviews. We have used SVG into our project . I know most of you are not aware about what SVG’s are but as i already told that this project is beginner friendly and we will be explaining all concepts step by step so that you may not face any issue after reading this article. What are SVG? Scalable Vector Graphics is the abbreviation for this technology. SVGs are a form of graphic image, to put it simply. These photos can be resized and are pixel-perfect at all sizes. We will employ SVGs to make our website look appealing since if we use photos like jpg or jpeg, eventually their pixels start distorting. I hope you get a glimpse of what we’re working on. To achieve this add to cart Button aniamtion, simple HTML, CSS & Javascript will be used. We will continue to go over our project step by step. Let’s start by giving our project some Structure using HTML. Three files were utilised in this project. To organise our code and make it clear that we used separate files for HTML, CSS, and Javascript when we verify it later, we use three different files.
Step1: Adding Some Basic HTML
HTML stands for HyperText Markup Language. This is a markup language. Its main job is to give our project structure. We will provide our project structure by utilising this markup language. So let’s look at our HTML code. We have used W3C SVG to incorporate them into our product in order to add the structure.
Here, we’ve added structure by using a container div tag, which will house the add-to-cart page’s structure.
Using the tag, we have produced a button inside our container. We have included 4 SVGs inside the button tag, which we will use to add the animation using CSS and JavaScript.
Within our button tag, we inserted two tags to include the name of our button. We have added the basic structure to our Add to Cart page. Let’s take a look at our HTML structure. All that is needed for us to give our webpage some structure we just added through our HTML code. We’re going to style our add-to-cart animation now using CSS. We must link our external stylesheet before we can add any styles. You must include the URL below in your HTML head section in order to do that.
Step2: Adding CSS
.add-to-cart-button < background: #e6a247; border: none; border-radius: 4px; -webkit-box-shadow: 0 3px 13px -2px rgba(0, 0, 0, .15); box-shadow: 0 3px 13px -2px rgba(0, 0, 0, .15); color: #fff; display: flex; font-family: 'Ubuntu', sans-serif; justify-content: space-around; min-width: 195px; overflow: hidden; outline: none; padding: 0.7rem; position: relative; text-transform: uppercase; transition: 0.4s ease; width: auto; >.add-to-cart-button:active < -webkit-box-shadow: 0 0 0 0.2rem rgba(252, 186, 3, .45); box-shadow: 0 0 0 0.2rem rgba(252, 186, 3, .45); -webkit-transform: translateY(4px); transform: translateY(4px); >.add-to-cart-button:hover < cursor: pointer; >.add-to-cart-button:hover, .add-to-cart-button:focus < -webkit-box-shadow: 0 0 0 0.2rem rgba(252, 186, 3, .45); box-shadow: 0 0 0 0.2rem rgba(252, 186, 3, .45); -webkit-transform: translateY(-1px); transform: translateY(-1px); >.add-to-cart-button.added < background: #2fbf30; -webkit-box-shadow: 0 0 0 0.2rem rgba(11, 252, 3, 0.45); box-shadow: 0 0 0 0.2rem rgba(11, 252, 3, 0.45); >.add-to-cart-button.added .add-to-cart < display: none; >.add-to-cart-button.added .added-to-cart < display: block; >.add-to-cart-button.added .cart-icon < animation: drop 0.3s forwards; -webkit-animation: drop 0.3s forwards; animation-delay: 0.18s; >.add-to-cart-button.added .box-1, .add-to-cart-button.added .box-2 < top: 18px; >.add-to-cart-button.added .tick < animation: grow 0.6s forwards; -webkit-animation: grow 0.6s forwards; animation-delay: 0.7s; >.add-to-cart, .added-to-cart < margin-left: 36px; >.added-to-cart < display: none; position: relative; >.add-to-cart-box < height: 5px; position: absolute; top: 0; width: 5px; >.box-1, .box-2 < transition: 0.4s ease; top: -8px; >.box-1 < left: 23px; transform: rotate(45deg); >.box-2 < left: 32px; transform: rotate(63deg); >.cart-icon < left: 15px; position: absolute; top: 8px; >.tick < background: #146230; border-radius: 50%; position: absolute; left: 28px; transform: scale(0); top: 5px; z-index: 2; >@-webkit-keyframes grow < 0% < -webkit-transform: scale(0); >50% < -webkit-transform: scale(1.2); >100% < -webkit-transform: scale(1); >> @keyframes grow < 0% < transform: scale(0); >50% < transform: scale(1.2); >100% < transform: scale(1); >> @-webkit-keyframes drop < 0% < -webkit-transform: translateY(0px); >100% < -webkit-transform: translateY(1px); >> @keyframes drop < 0% < transform: translateY(0px); >100% < transform: translateY(1px); >> /* Page style */ .container
we’ll utilise some simple CSS code to add styling to our webpage. It will be simple for you to understand and attempt to incorporate your own style, which will assist you clarify your concepts. The CSS will be explained step by step. Step1: In order to add styling to our project (.container), we will style our button. To do this, we will use the class selector. We selected «Indian yellow» as the backdrop colour. In order to give our button’s corner some curve, we applied a border radius. It was set to «flex» on the display. Additionally, we added a minimum width of «195px» to our button and, using the text transform property, changed the text’s case to «uppercase.» We also gave our button a «easy» transition.
Step2: For selecting and styling the active link, utilise the active selector. By clicking on a link, it becomes active. We’ll apply the box shadow to our button as soon as the link button activates. Our button will be positioned in accordance with the y-axis using the transform attribute (4px). We additionally gave our button some hovering property as the user hover it the pointer change to cursor.
.add-to-cart-button:active < -webkit-box-shadow: 0 0 0 0.2rem rgba(252, 186, 3, .45); box-shadow: 0 0 0 0.2rem rgba(252, 186, 3, .45); -webkit-transform: translateY(4px); transform: translateY(4px); >.add-to-cart-button:hover < cursor: pointer; >.add-to-cart-button:hover, .add-to-cart-button:focus < -webkit-box-shadow: 0 0 0 0.2rem rgba(252, 186, 3, .45); box-shadow: 0 0 0 0.2rem rgba(252, 186, 3, .45); -webkit-transform: translateY(-1px); transform: translateY(-1px); >.add-to-cart-button.added < background: #2fbf30; -webkit-box-shadow: 0 0 0 0.2rem rgba(11, 252, 3, 0.45); box-shadow: 0 0 0 0.2rem rgba(11, 252, 3, 0.45); >.add-to-cart-button.added .add-to-cart < display: none; >.add-to-cart-button.added .added-to-cart
Step3: Now we will add styling to our SVG icons. First of all, we will style our cart icon. We have added the animation of a drop that then moves forward with a delay of 0.18 seconds. We have added a top space of 18px to our svg box icons. Using the (.tick) class selector, we have added an animation of growing and then added a move forward animation, with a delay of 0.7s between both animations. These animations will work when we add the javascript function and when the user clicks on the button.
.add-to-cart-button.added .cart-icon < animation: drop 0.3s forwards; -webkit-animation: drop 0.3s forwards; animation-delay: 0.18s; >.add-to-cart-button.added .box-1, .add-to-cart-button.added .box-2 < top: 18px; >.add-to-cart-button.added .tick
Step4: Our svg icon will now have width, height, padding, and margin added. The Keyframe rule will be used to specify the animation code. By gradually switching from one set of CSS styles to another, the animation is produced. A variety of CSS styles can be changed throughout the animation. Indicate the percentage change in style, or use the phrases «from» and «to,» which are equivalent to 0% and 100%. 0% indicates the start of the animation and 100% indicates its conclusion.
.add-to-cart-box < height: 5px; position: absolute; top: 0; width: 5px; >.box-1, .box-2 < transition: 0.4s ease; top: -8px; >.box-1 < left: 23px; transform: rotate(45deg); >.box-2 < left: 32px; transform: rotate(63deg); >.cart-icon < left: 15px; position: absolute; top: 8px; >.tick < background: #146230; border-radius: 50%; position: absolute; left: 28px; transform: scale(0); top: 5px; z-index: 2; >@-webkit-keyframes grow < 0% < -webkit-transform: scale(0); >50% < -webkit-transform: scale(1.2); >100% < -webkit-transform: scale(1); >> @keyframes grow < 0% < transform: scale(0); >50% < transform: scale(1.2); >100% < transform: scale(1); >> @-webkit-keyframes drop < 0% < -webkit-transform: translateY(0px); >100% < -webkit-transform: translateY(1px); >> @keyframes drop < 0% < transform: translateY(0px); >100% < transform: translateY(1px); >> Although the layout for our add-to-cart button has now been implemented, the animation won’t begin until we add some javascript functionality.
Step3: Adding Javascript Code
addToCartButton = document.querySelectorAll(".add-to-cart-button"); document.querySelectorAll('.add-to-cart-button').forEach(function(addToCartButton) < addToCartButton.addEventListener('click', function() < addToCartButton.classList.add('added'); setTimeout(function()< addToCartButton.classList.remove('added'); >, 2000); >); >); The «add-to-cart-button» class will be selected using document.querySelectorAll, method and an event listener will be added to the button using the function for each element. When users click the button, the «added» class, which is defined in our CSS, will be added to the button. We will deactivate our class after 2000 miliseconds by using the SetTimeout() method. The project is now finished, we have completed Add To Cart Button Animation using HMTL ,CSS and Javascript. Now look at the live preview. Now We have Successfully created our Add To Cart Button Animation using HTML , CSS & Javascript. You can use this project directly by copying into your IDE. WE hope you understood the project , If you any doubt feel free to comment!! We have built an e-commerce website so you can use your technical know-how to add this add-to-cart animation to your e-commerce website if you want to. Visit our e-commerce site, which was developed with the help of HTML, CSS, and JavaScript. If you find out this Blog helpful, then make sure to search code with random on google for Front End Projects with Source codes and make sure to Follow the Code with Random Instagram page. follow : codewithrandom Written By : arun Code by : Arun
Create an “Add To Cart Button” Using HTML and CSS
Welcome to Code With Random blog. In this blog, we will explore how to create an Add to Cart Button Using HTML, CSS and JavaScript Code. This is a very common component of every e-commerce website.
To start this project, you only need a basic understanding of HTML, CSS, and Javascript.
Do you want to learn HTML to JavaScript? 🔥
If yes, then here is our Master Frontend: Zero to Hero eBook! 📚 In this eBook, you’ll learn complete HTML, CSS, Bootstrap, and JavaScript from beginner to advance level. 💪 It includes 450 Projects with source code.
I hope you enjoy our blog so let’s start with a basic HTML structure for a create Add to cart button.
Add To Cart Button Html Code:-
There is all the HTML code for the Add to cart. To create the required figures we are using HTML tag. To know more about SVG (Scalable Vector Graphics) read our blog for an easy introduction.
Below is the output for our HTML file without styling it with CSS.
Html Code Output:-
Add To Cart Button CSS Code:-
To style our project we are using CSS and you can copy and paste this css Code in style.css or in html code if you want.
.add-to-cart-button < background: #e6a247; border: none; border-radius: 4px; -webkit-box-shadow: 0 3px 13px -2px rgba(0, 0, 0, 0.15); box-shadow: 0 3px 13px -2px rgba(0, 0, 0, 0.15); color: #ffffff; display: flex; font-family: "Ubuntu", sans-serif; justify-content: space-around; min-width: 195px; overflow: hidden; outline: none; padding: 0.7rem; position: relative; text-transform: uppercase; transition: 0.4s ease; width: auto; >.add-to-cart-button:active < -webkit-box-shadow: 0 0 0 0.2rem rgba(252, 186, 3, 0.45); box-shadow: 0 0 0 0.2rem rgba(252, 186, 3, 0.45); -webkit-transform: translateY(4px); transform: translateY(4px); >.add-to-cart-button:hover < cursor: pointer; >.add-to-cart-button:hover, .add-to-cart-button:focus < -webkit-box-shadow: 0 0 0 0.2rem rgba(252, 186, 3, 0.45); box-shadow: 0 0 0 0.2rem rgba(252, 186, 3, 0.45); -webkit-transform: translateY(-1px); transform: translateY(-1px); >.add-to-cart-button.added < background: #2fbf30; -webkit-box-shadow: 0 0 0 0.2rem rgba(11, 252, 3, 0.45); box-shadow: 0 0 0 0.2rem rgba(11, 252, 3, 0.45); >.add-to-cart-button.added .add-to-cart < display: none; >.add-to-cart-button.added .added-to-cart < display: block; >.add-to-cart-button.added .cart-icon < animation: drop 0.3s forwards; -webkit-animation: drop 0.3s forwards; animation-delay: 0.18s; >.add-to-cart-button.added .box-1, .add-to-cart-button.added .box-2 < top: 18px; >.add-to-cart-button.added .tick < animation: grow 0.6s forwards; -webkit-animation: grow 0.6s forwards; animation-delay: 0.7s; >.add-to-cart, .added-to-cart < margin-left: 36px; >.added-to-cart < display: none; position: relative; >.add-to-cart-box < height: 5px; position: absolute; top: 0; width: 5px; >.box-1, .box-2 < transition: 0.4s ease; top: -8px; >.box-1 < left: 23px; transform: rotate(45deg); >.box-2 < left: 32px; transform: rotate(63deg); >.cart-icon < left: 15px; position: absolute; top: 8px; >.tick < background: #146230; border-radius: 50%; position: absolute; left: 28px; transform: scale(0); top: 5px; z-index: 2; >@-webkit-keyframes grow < 0% < -webkit-transform: scale(0); >50% < -webkit-transform: scale(1.2); >100% < -webkit-transform: scale(1); >> @keyframes grow < 0% < transform: scale(0); >50% < transform: scale(1.2); >100% < transform: scale(1); >> @-webkit-keyframes drop < 0% < -webkit-transform: translateY(0px); >100% < -webkit-transform: translateY(1px); >> @keyframes drop < 0% < transform: translateY(0px); >100% < transform: translateY(1px); >> /* Page style */ .container
Now we have completed our CSS section, Here is our updated output CSS.
Add to Cart Button Using HTML & JavaScript
Hello there! In this article, you will find 17+ Add To Cart Button Using HTML And JavaScript with complete source code.
Amazon, Flipkart, and many more e-commerce websites have one distinct feature in common which is the add-to-cart button option which enables the shoppers to shortlist items of their choice to proceed to pay and own. This button acts like the shopping cart we use in daily life at the grocery store but here we will try creating a virtual add-to-cart animation using simple codes in HTML, CSS, and JavaScript. In this blog, we have brought to you a wide range of.
Do you want to learn HTML to JavaScript? 🔥
If yes, then here is our Master Frontend: Zero to Hero eBook! 📚 In this eBook, you’ll learn complete HTML, CSS, Bootstrap, and JavaScript from beginner to advance level. 💪 It includes 450 Projects with source code.
Here is a 15+ Add To Cart Button Using HTML, CSS, and JavaScript with code examples from codepen. Happy exploring and learning !!
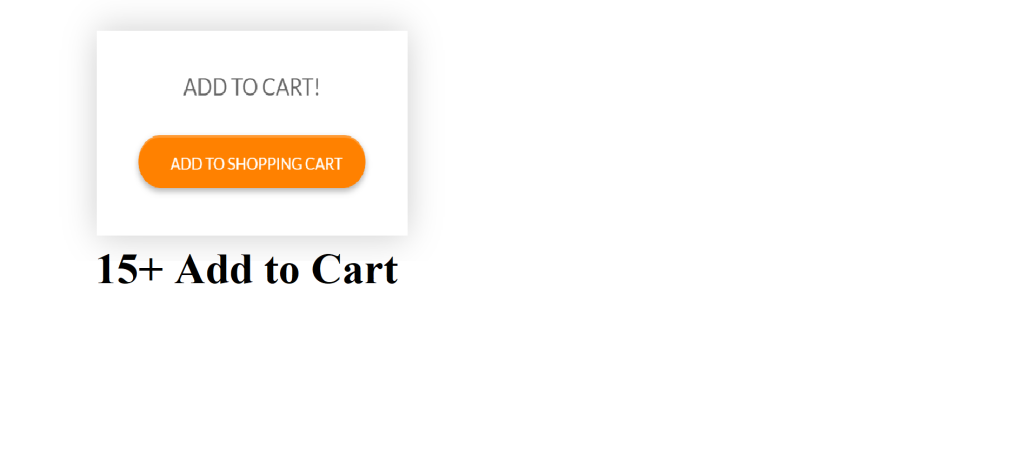
1. Add to cart button
| Code by – | Ankush Chatterjee |
| Demo & Download | Click here For Code |
| Language Used – | HTML, CSS, JS(Babel) |
| External link / Dependencies | No |
| Responsive | Yes |
Project 1 Table
In the given project you can see the Add to cart button using HTML, JS(Babel), and CSS.
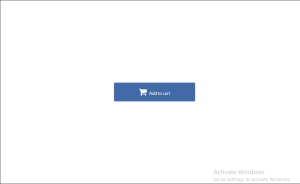
2. Add to cart button with quantity select option
| Code by – | idevelopwebsite |
| Demo & Download | Click here For Code |
| Language Used – | HTML, CSS, JS |
| External link / Dependencies | Yes |
| Responsive | Yes |
Project 2 Table
Here you can see how the above project depicts the Add to cart button with the quantity select option implemented using HTML, CSS, and JavaScript.