- JQuery плагин для перевода страниц с помощью html5 data-* атрибутов
- Translate HTML code: How to translate HTML into different languages with examples
- Get a free trial of Lokalise
- Sample HTML Page to Translate
- Hi, my name is John Doe!
- Using Lokalise to Translate HTML
- Getting Set Up
- Uploading an HTML File to Translate
- Adding Languages for Translation
- Performing HTML Translations
- Placeholders
- Downloading Translated HTML Files
- Missing Translations
- Browser extensions to preview HTML documents
- Conclusion
- Further reading
JQuery плагин для перевода страниц с помощью html5 data-* атрибутов
Хочу поделиться своей наработкой для перевода страниц сайта с помощью простейшего jQuery плагина и такой приятной новой плюшки html5, как data-* атрибуты.
Итак, цель: возможность легко и быстро обеспечить поддержку нескольких языков для разрабатываемого веб приложения.
Теперь немного кода. Предположим у нас имеется вот такая вот нехитрая html разметка:
Heading 1
Some text in tag P
another text
Как видно в листинге приведенном выше у нас есть несколько html элементов имеющих объявленный с помощью атрибута data-translate-key ключ для перевода, по которому мы будем получать сам текст из словаря. Также внутри тегов указан текст «по умолчанию».
Организация словаря у нас будет реализована средствами стандартных объектов JavaScript:
Как видно в данном примере мы имеем два словаря. Для русского и английского языков.
Теперь самое главное. Собственно сам плагин. Он имеет всего несколько строк кода:
$.html5Translate = function(dict, lang)< $('[data-translate-key]').each(function()< $(this).html( dict[ lang ][ $(this).data('translateKey') ] ); >); >; Здесь, как видно из приведенного листинга, мы получаем все элементы html страницы, имеющие атрибут data-translation-key и прокручиваем весь массив этих элементов с помощью колбэка each. Далее в каждой итерации, мы задаем текст для каждого элемента, в соответствии с тем, какой словарь выбран, а так же в соответствии со значением атрибута data-translation-key, для каждого конкретного элемента. Функция принимает в качестве аргументов всего две переменных: dict — содержит объект словаря и lang — содержит названия языка, который сейчас следует использовать.
Что бы применить плагин достаточно сделать следующее:
1. Подключить библиотеку jQuery.
2. Подключить сам плагин.
3. Разметить html документ, расставив для нужных элементов атрибуты data-translation-key.
4. Создать словарь (рекомендуется так же подключить его отдельным js файлом).
5. Вызвать функцию перевода, когда DOM документа будет готов и указать функции необходимые параметры:
Тут, как видно, мы вызываем функцию перевода, указав ей что нужно использовать объект словаря dict и перевести текст все элементов на английский язык.
Translate HTML code: How to translate HTML into different languages with examples
In the previous articles we have seen how to internationalize pure JavaScript, Angular, and Vue applications. However, one might still ask: “How can I translate HTML?”, “Is there an HTML translator application?” and the answer is yes!
So, in this article, I will explain how to get started on translating HTML code into different languages using Lokalise: a simple yet very powerful service. You will learn how to get started with Lokalise, how to create a new project, upload your HTML files, perform translations, and download translated HTML files. By the end of this tutorial you will be able to translate HTML like a pro!
Get a free trial of Lokalise
Sample HTML Page to Translate
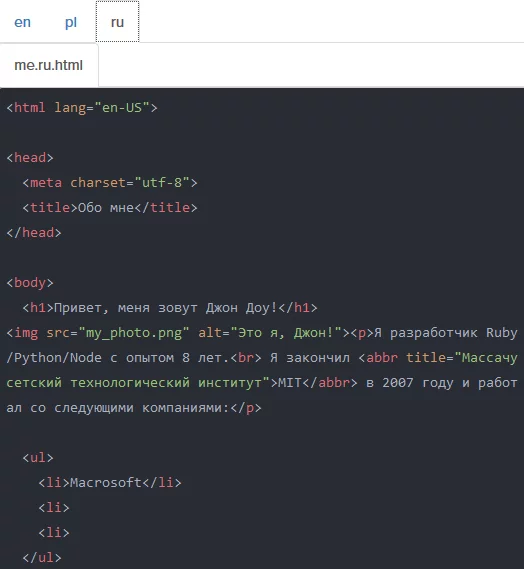
So, suppose we have the following HTML page me.en.html with English content:
Hi, my name is John Doe!
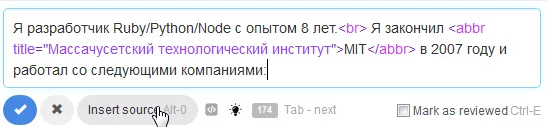
I am a Ruby/Python/Node developer with 8 years' experience.
I've graduated MIT in 2007 and since that have worked with the following companies:

- Macrosoft
- Pineapple
- Facelook
This is a simple markup for a typical “About Me” page found on many personal sites. We need to translate the following:
- title of the page.
- Header, paragraph, and all list items.
- alt attribute for the img tag.
- title attribute for the abbr tag.
However, while this does not seem like a complex task, consider the following:
- First, it is important to make sure all tags and their attributes have translations. The longer your HTML document is, the harder it becomes to check all the nodes.
- Also, you’ll probably have multiple HTML pages and every document requires internationalization.
- Finally, you might not be familiar with all the languages into which the document has to be translated. This means you’ll likely need help from a professional translator and it’s unlikely that s/he will be an HTML expert.
Therefore, using the right translation management system is your best bet. Meet Lokalise: a very popular and the most advanced TMS and localization software out there, with the below core features:
- Ability to translate various types of content with a powerful graphical editor.
- Simple file and translation project management.
- Collaborative translation.
- Quality assurance.
- Localization process automation.
“But it’s too expensive for me!” you might think. Actually, it’s not: pricing starts from $90 per month for small teams. However, as a matter of fact, there is also a free plan which will come in handy for customers who need to translate content for their personal sites and applications. No hidden commissions, no shady schemes. Finally, open source projects can also request free access, while non-profit organizations are eligible for special discounts. Sounds good, right?
Using Lokalise to Translate HTML
Getting Set Up
So, first things first: we need to set up our HTML translator application. If you don’t have a Lokalise account yet, get your free 14 day trial here. Once the trial ends, you will be switched to a free plan automatically. Of course, it is possible to upgrade your subscription any time.
After signing up, you will see your projects dashboard. Simply speaking, a project is a collection of translations or files to be translated (related to a single app or service), contributors who have access to these translations, and some other settings and features (like integrations with third-party services).
- Create a new project by clicking the corresponding button in the top menu.
- Give your project a name, for example “Personal Site”.
- Optionally, provide a project description.
- Choose a base language — that’s the original language of your content.
- Make sure to choose Documents as the Project type — this will allow us to translate HTML files.
Next, you will be redirected to the project page.
Uploading an HTML File to Translate
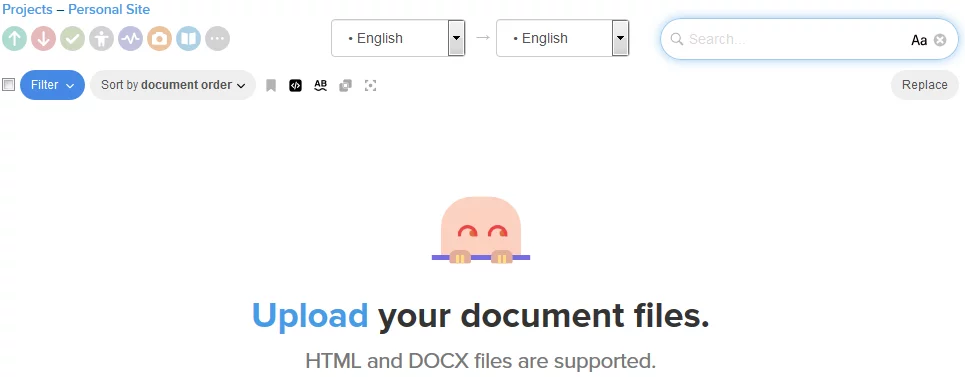
As the next step, we need to upload (import) our HTML file. Click on the Upload link shown in the screenshot above. You will see the uploading interface as follows:
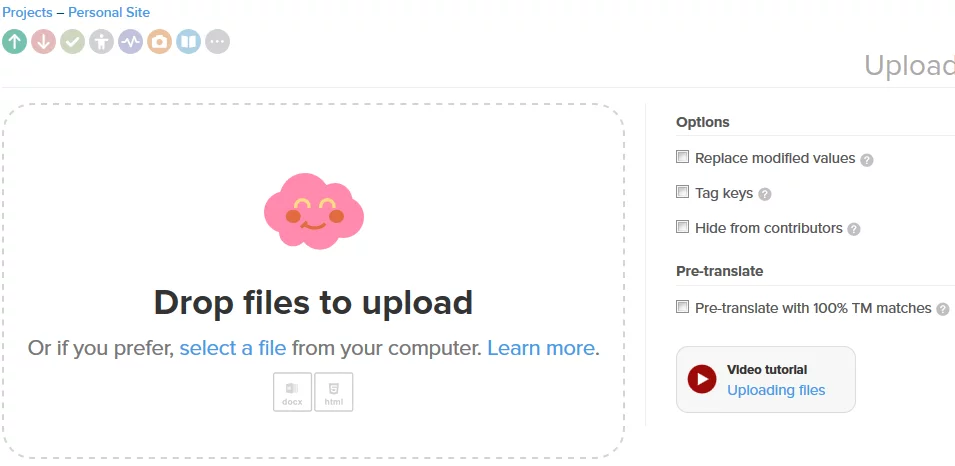
First, click the Select a file link and choose the HTML document from your PC. You don’t need to tweak any uploading options to get started with HTML translation. However, if you are interested in learning about the purpose of the uploading options, refer to our “Uploading files” documentation. Also make sure the language was detected properly as shown here:
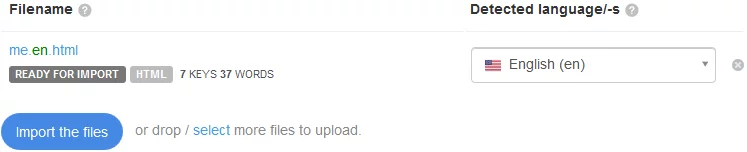
If the language is incorrect, use the dropdown and choose a different option. Also, you may rename the file by clicking on its name:
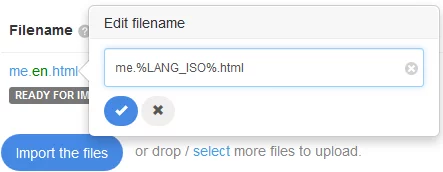
Also you will notice that the %LANG_ISO% part is added automatically. Basically, it says that the locale code will be placed in this position. When downloading translation files for different languages, the %LANG_ISO will be replaced with the proper language code, for example: me.ru.html or me.fr.html . Having a language code in the file name is beneficial because you can easily understand what language version the document contains.
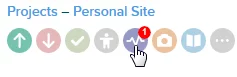
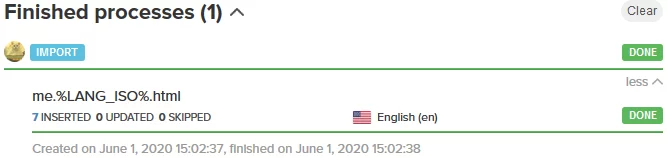
When you are ready, click the Import the files button. The uploading process will happen in the background. Use the Activity page to see the progress of the job:
The upload will be completed within a few moments:
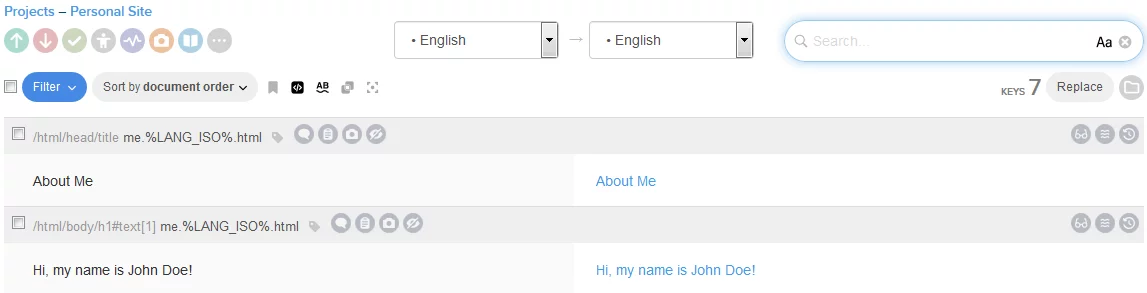
Now, click on the Personal Site link in the top menu. You should see the contents of your HTML document separated by tags:
Adding Languages for Translation
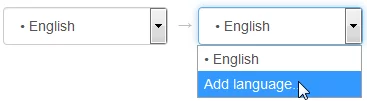
So, we have loaded the HTML file and can proceed to the actual translation. However, what languages do we want to translate? To choose a language, click on the English dropdown to the right, and click Add language…
Next, choose one or more languages from the dropdown. I’ll pick Russian and Polish for the below:
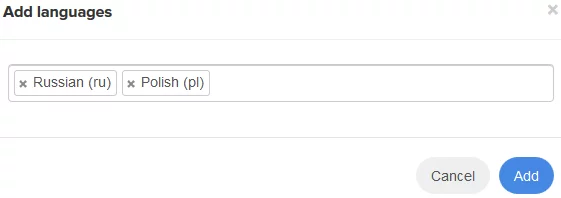
Click Add once you are ready.
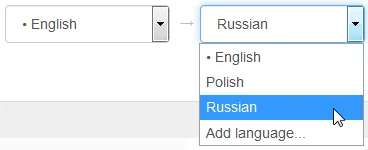
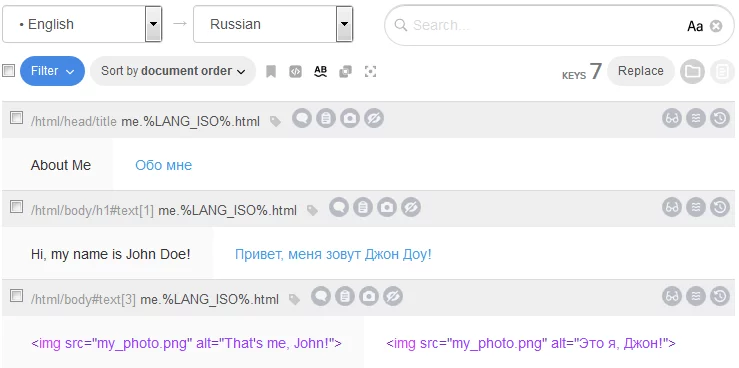
Now simply choose one of the languages from the dropdown to the right. This is the language that we will be translating into (target language). The left dropdown shows the language that you are translating from (source language):
Finally, once you’ve chosen a target language, the values to the right will contain Empty values:
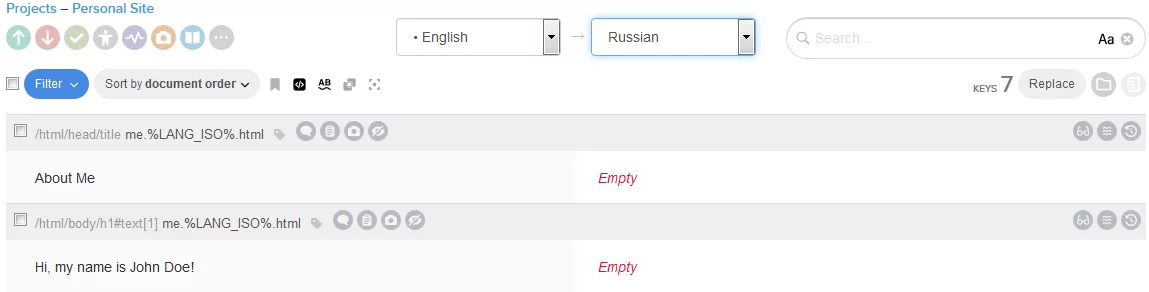
So, these are the values for the target language (set to Russian in the example above). They are empty because we have not yet translated anything. The values to the left belong to the source language (English). Remember that initially the HTML page was in English, so that’s also the base language of our project.
Performing HTML Translations
So, at this point you can go ahead and translate your content. To do that, simply click on one of the Empty values:
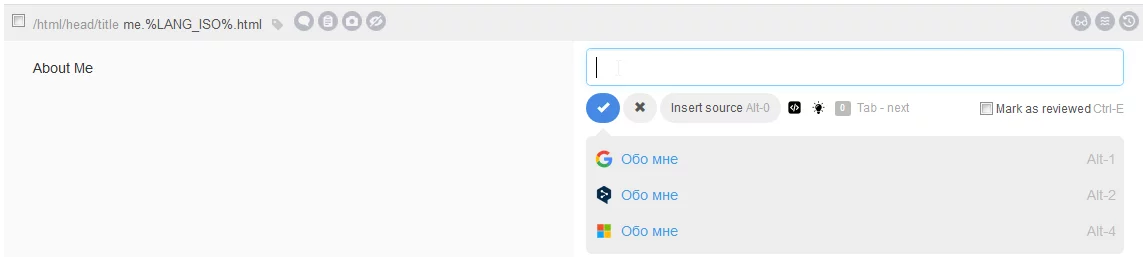
Enter the translation in the text box or choose one of the suggestions below. These suggestions are machine translations from Google, DeepL, and Bing. Once you are ready, click on the OK button with the checkmark icon. Your translation is now saved:

To edit the translation, simply click on its value.
Placeholders
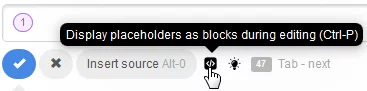
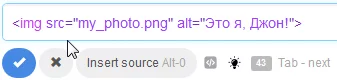
Now, what about the image tag? Currently its value looks like this:

This is a block shown in a user-friendly way. However, if you would rather see the actual markup, disable the Display placeholders as blocks option:

Now let’s provide a translation for the img tag:
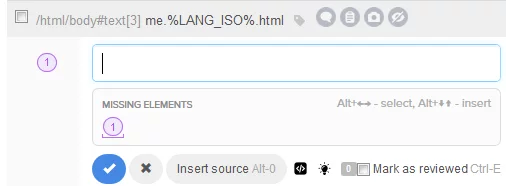
You will notice that the editor reminds you that the current value has a missing element (the img tag). Click on the missing element to add it to the text box. Also, disable displaying placeholders as blocks while editing, for instance:
Next, translate the alt attribute:
After that, proceed to translating the paragraph:

It shows two placeholders:
- First, our br tag, that we should leave intact.
- Second, the abbr tag. We need to translate its title attribute.
So, click the Insert source button and perform the translation in the same way as before:
Next, simply translate all other elements:
Downloading Translated HTML Files
So, once you’ve translated your HTML files, it’s high time you downloaded them! Start by clicking Download, as shown here:

Next, choose HTML from the Format dropdown, and select the languages that you would like to download:
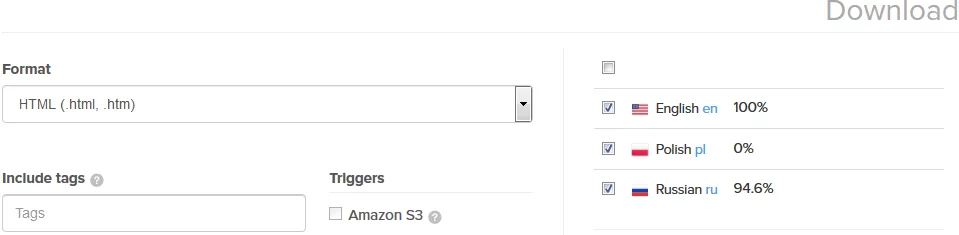
Also, you will be able to see the translation progress for each language. It is possible to tweak the language codes by clicking on them:
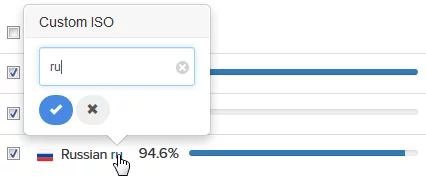
Remember that these language codes will form part of the filename (if the name has the %LANG_ISO% part). So, for the Russian language you would see me.ru.html .
After that, click the Preview button to see how your translation files will look:

For each language, you will see the filenames and the translated content.
Now return to the Download page and click Build and download. You will get an archive named after your project. The archive will contain translation files for each chosen language, which are separated into folders:


As a result, you have just translated your HTML page. Congratulations!
Missing Translations
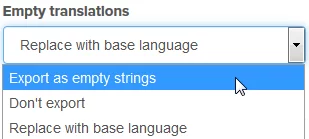
Now, what if you have not yet translated some of the values? During the download, it is possible to choose what to do a with such values:
- Export as empty strings — tags that have no translations will be empty.
- Don’t export — the corresponding translations won’t be exported. For HTML documents it works in a slightly different way: if the language has no translations at all, it won’t be exported. If the language has a handful of untranslated values, they will be replaced with the original text (which is English in our case).
- Replace with base language — replaces all untranslated strings with the values from the base language.
You can control this on the Download page using the Empty translations dropdown, like so:
Now, what if you would like to find all the values missing translations and deal with them? To achieve this, use the Filter dropdown on the project page and choose Untranslated:
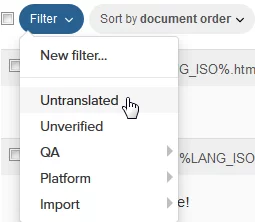
This way you will see only the untranslated values for the chosen language!
Browser extensions to preview HTML documents
You can also use these unofficial extensions for Firefox and Chrome to preview HTML documents in Lokalise before exporting them. To use the extension:

- Install it in your browser
- Proceed to Lokalise
- Open the Download page
- Adjust options as needed
- Click Preview
- Scroll to the bottom of the page and preview the document!
Conclusion
So, in this tutorial we have seen how to translate HTML using the Lokalise graphical user interface. Remember that you are able to upload multiple translation files into a single project and can add as many languages as needed. While we have covered quite a lot of material, Lokalise provides many other features. Here are a few suggestions that may interest you:
Feel free to contact us if you have any further questions or if you would like to learn more about the platform. Thank you for stopping by today, and until next time!